StraightSmile Solutions®
What Wires Should I Use When Expanding an RPE Simultaneously with Braces
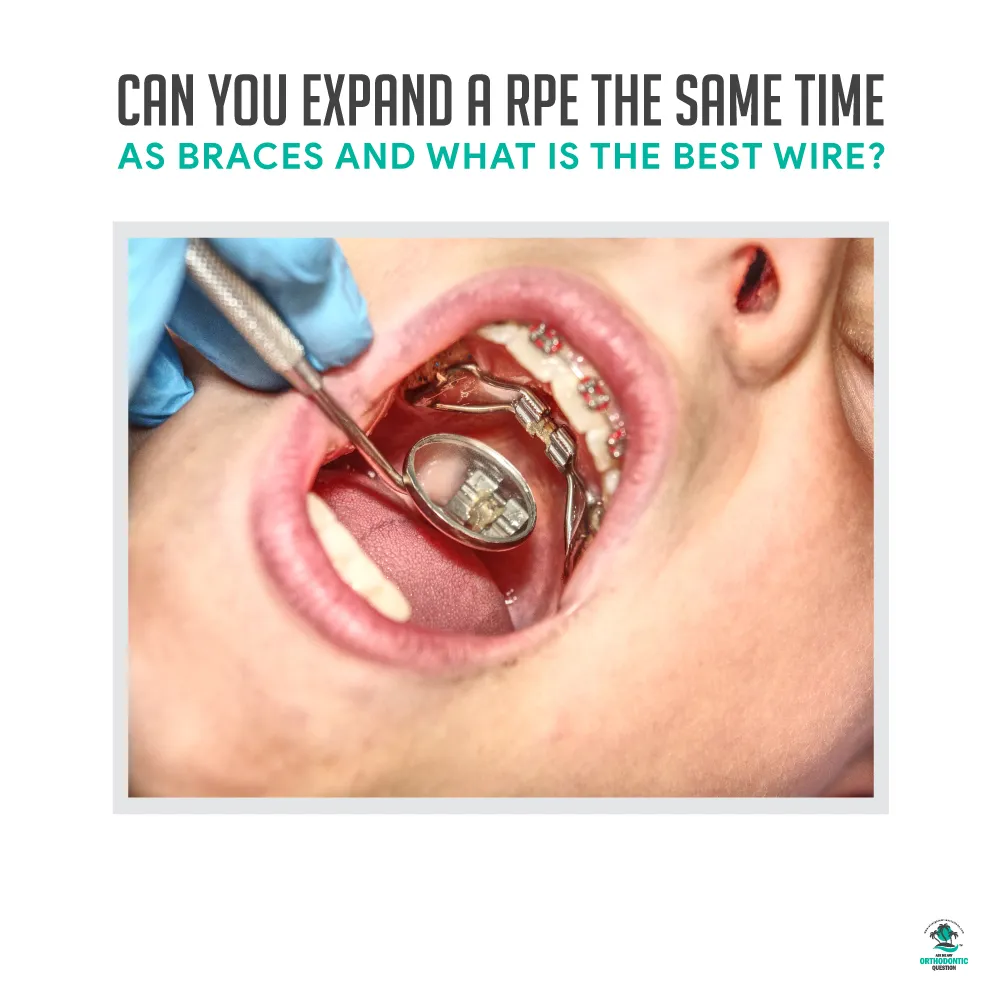 If you have been looking at finishing cases more quickly, considering fast braces techniques could be valuable – and simultaneously using an expander with braces can help speed up the process. However, if this is something you’ve been considering, it’s important to choose the right wires to ensure this fast braces approach won’t affect the expansion and make finishing cases harder.
What Wires Should I Use When Expanding an RPE Simultaneously with Braces
When choosing the right type of wire, you need to keep several factors in mind. Generally speaking, up to 18 ni-ti wires will be suitable for use simultaneously with expanders, as these are relatively flexible wires and don’t provide a counter force against the expander. However, try to avoid any wires heavier than an 18 ni-ti, as these may be more likely to exert a counter-force.
In addition, you could consider using sectional wires in the front when tackling fast expansion and braces cases simultaneously. However, this may somewhat depend on where you are looking to expand; for example, are you looking at the molar, premolar, or anterior areas predominantly? Indeed, this can influence the results and may cause the patient’s final arch form to look more like a triangle.
Overall, expanding an RPE and using fast braces simultaneously is possible, but you will need to use light wires (i.e., no heavy wires or Power Chain), which helps ensure that space isn’t closed and there are no significant counter forces. However, there is the risk they might pop some spaces; this can be resolved when finishing cases during the retention phase after the expansion is complete.
Fixing Generalized Mild Phase 1 Anterior Crossbites with OCS
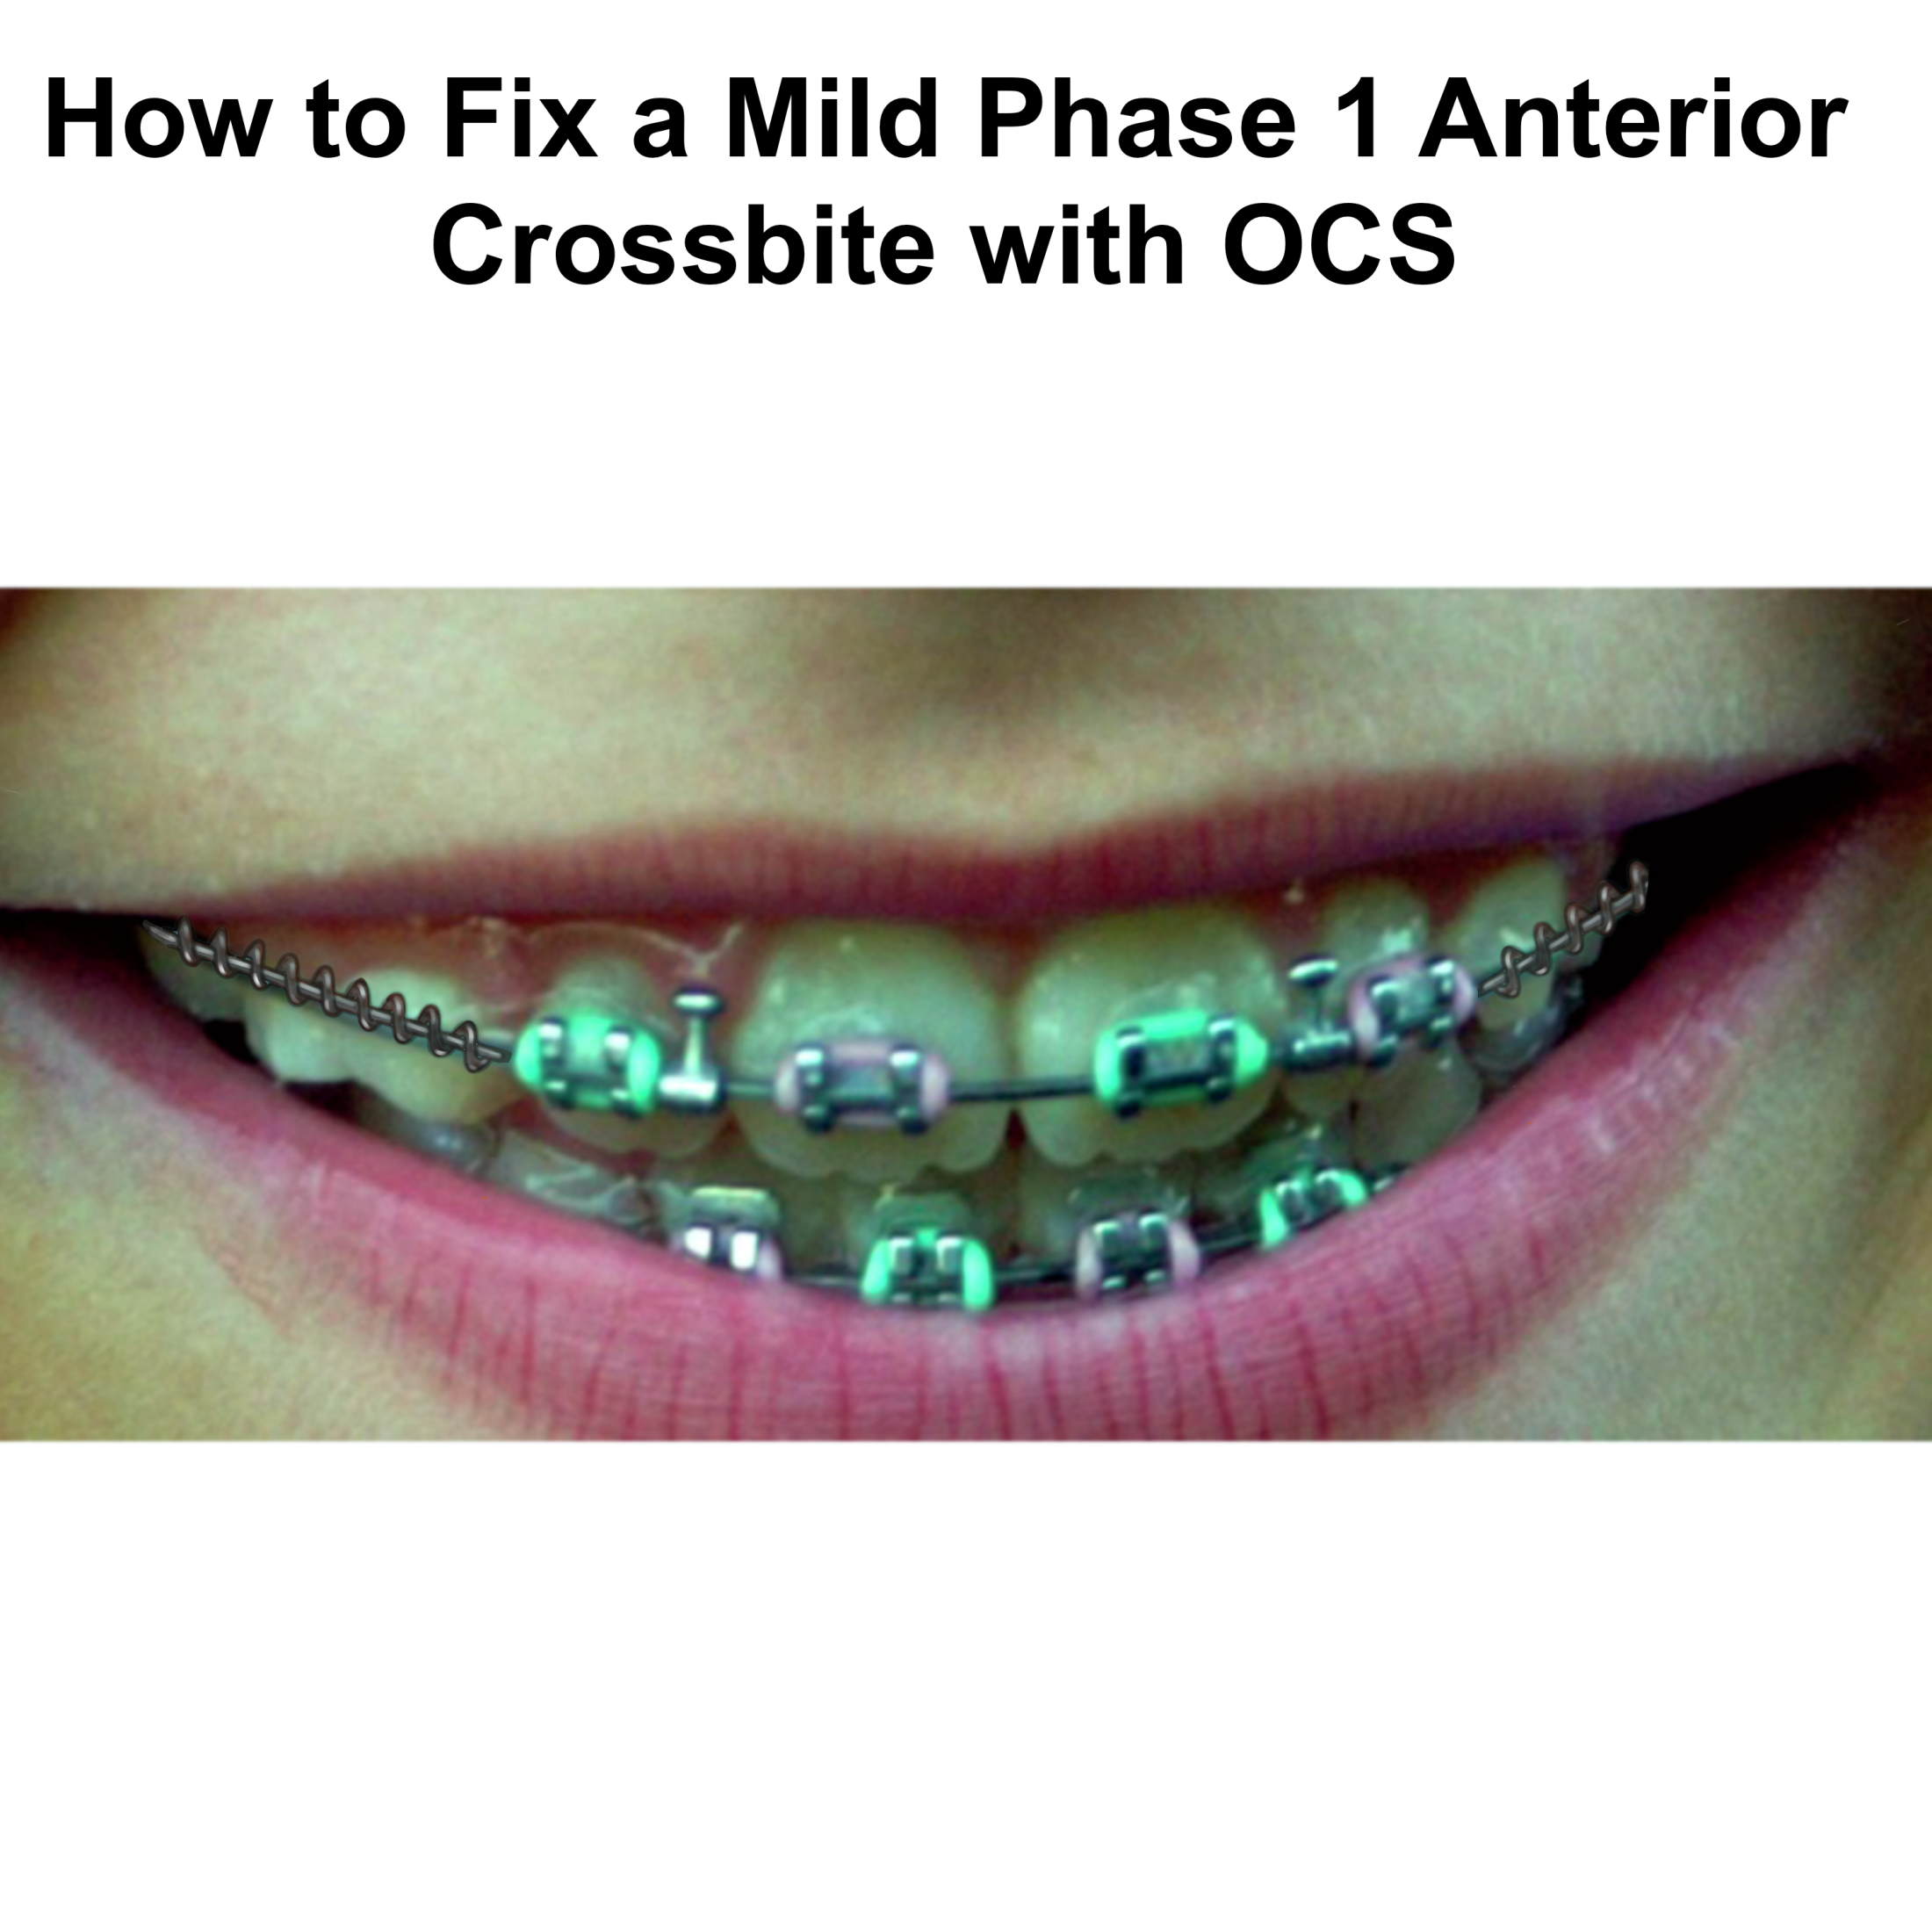
Fixing Generalized Mild Phase 1 Anterior Crossbites with OCS
When treating generalized mild Phase 1 anterior crossbites, there are many different options you could potentially consider – and choosing the right treatment plan can have a significant influence on the success of your orthodontics cases. As such, we’re outlined some of the key things you should know about using OCS to fix generalized mild Phase 1 anterior crossbites as follows to help.
OCS Should Only be Used in Young Patients
If you’re looking to use an OCS treatment plan, this should only be used for young Phase 1 patients. Indeed, for older patients, OCS may not be a suitable approach to treating a generalized anterior crossbite; however, just because a patient is young does not necessarily mean OCS will work for their case.
Always Diagnose the Cause Before Using OCS
OCS can be an incredibly valuable tool provided the cause of the negative overjet or anterior collisions. If the cause is due to an inclination of the incisors, and there is no skeletal malformation (e.g., the SNA, SNB, and ANB are normal), then OCS can potentially be used, provided you have contacts that can be used. It’s also possible to use OCS if the upper incisors are upright; however, if they are flared, you should not use OCS.
If you do use OCS, seeing the patient regularly is absolutely critical; otherwise, it is possible to push the teeth through the bone, which can naturally cause severe complications. Indeed, OCS is a very active mechanic and can do damage if not monitored closely.
Fixing an anterior crossbite in Phase 1 patients always depends on the diagnosis. If you’re not sure about the most appropriate treatment plan for your case, be sure to reach out to a professional orthodontist, such as our team here at Straight Smile Solutions, to help.
What do Black and Blue Dots Mean in Invisalign?
Understanding Black and Blue Dots in Invisalign Cases
In many cases, Invisalign’s system can offer a range of incredibly valuable tools, and understanding how to make the most of these is very important. In line with this thought, today, we’re looking at some of the key things you should know about the black and blue dot system with Invisalign to help you make the most of this tool.
What do Black and Blue Dots Mean in Invisalign?
When ordering aligners through Invisalign, you can turn on the TMA system to utilize the black and blue dot guides. These dots refer to the complexity of the case and how many aligners you might need, making it very useful information to consider when selecting cases.
What Do Black and Blue Dots Mean?
Blue dots indicate a moderate case that will likely need between 40 and 60 aligners to complete. Meanwhile, black dots may need anywhere up to 99 aligners or a hybrid aligner and braces approach to complete (or you could potentially consider a functional appliance in growing patients).
If you hover over the black or blue dot, you’ll be able to view information about the tooth, such as how much extrusion there might be or the angle of tipping. This will help you decide whether you’ll need a large attachment on these teeth; if the dots refer to intrusion, this may be less necessary, but extrusion or tipping cases will often benefit from having a very large attachment instead.
Be Careful with Black Dot Cases
If you see a black dot on any of your patients, you may need to consider carefully whether you should be taking on the case with Invisalign as a general dentist. In young, growing patients, black dots may not be such a major concern; however, in adults (or patients who are past the point of skeletal maturity), black dot cases may be much more concerning, which is important to keep in mind before starting an Invisalign treatment plan.
If you’re not sure, reach out to a professional orthodontist to see whether an Invisalign treatment plan will be suitable for black dot cases. You might find that some black dot cases would benefit from a braces or hybrid treatment plan, instead.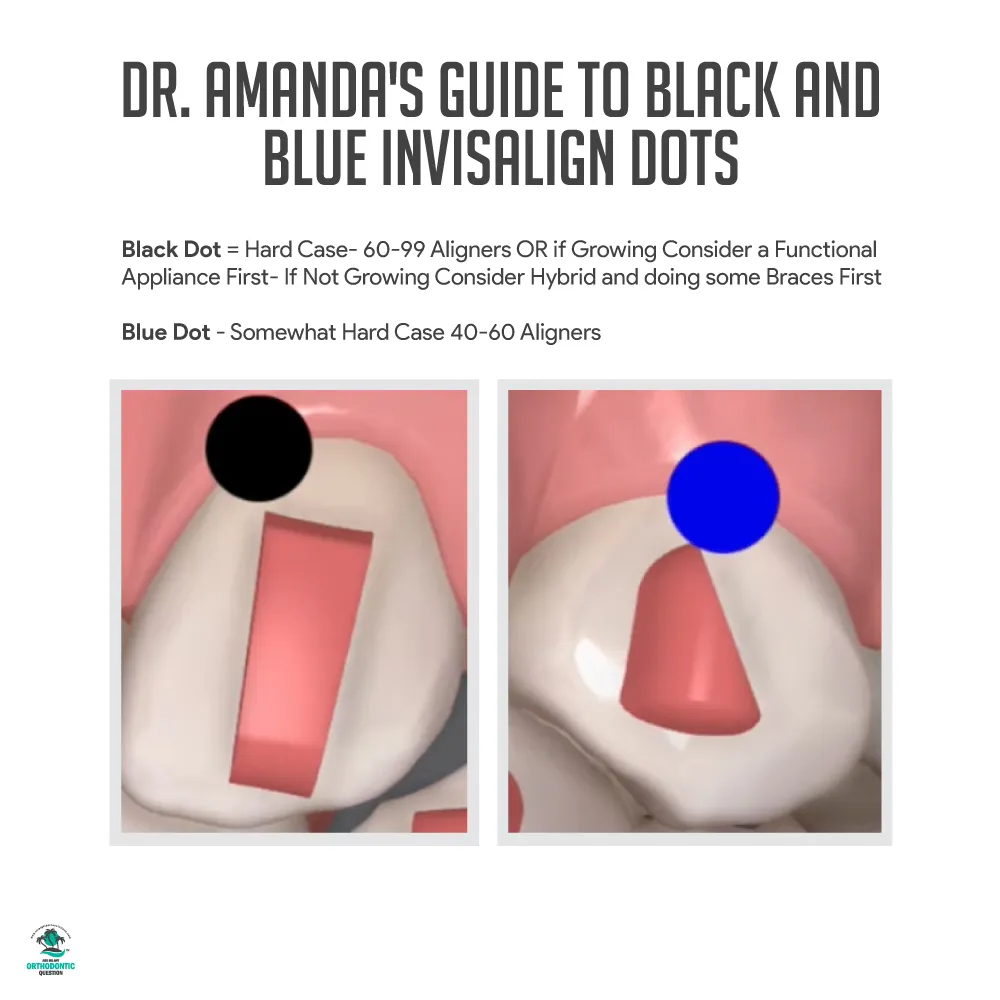
Fixed vs. Removable Expanders: ( RPE vs. Schwartz )
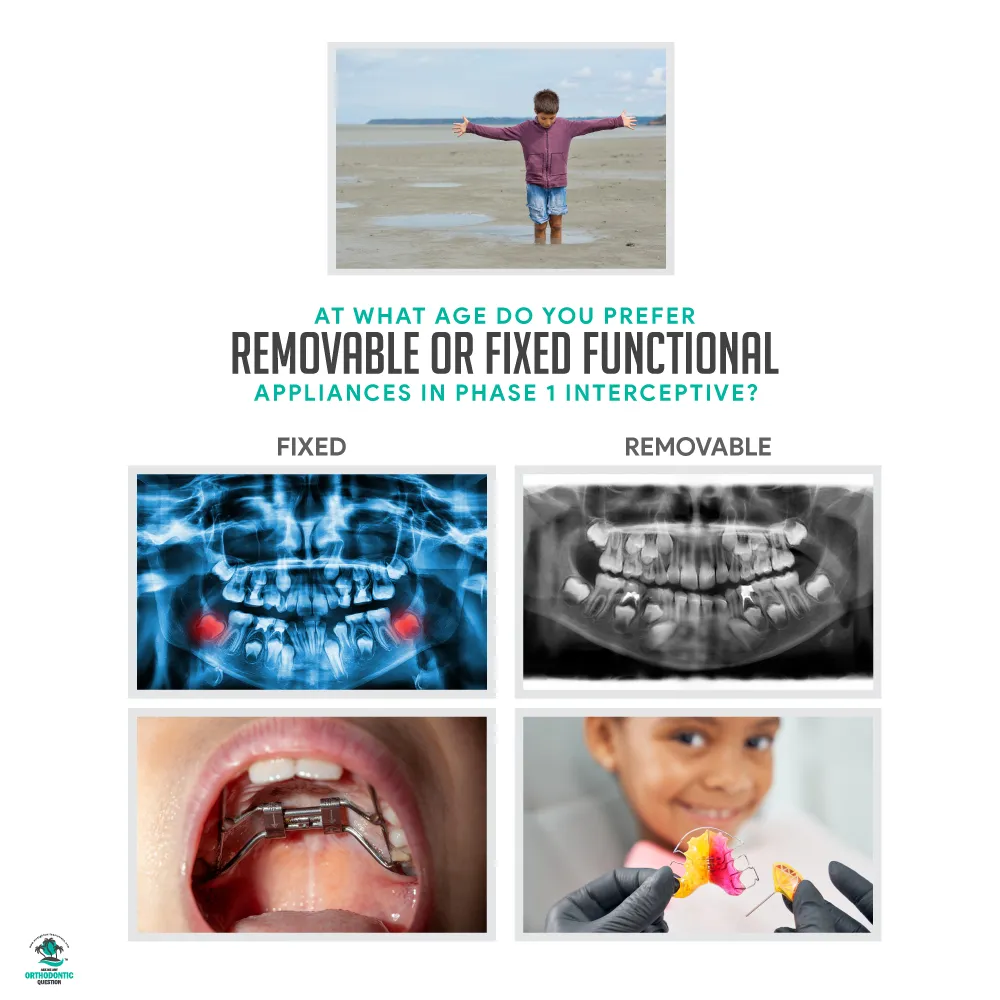 Fixed vs. Removable Expanders: ( RPE vs. Schwartz )
I. Introduction
Dr. Amanda discusses considerations for when to use removable versus fixed functional appliances for phase one orthodontic treatment in growing patients. She references insights from a course by Dr. Simon Wong. She shares his analogy of not doing treatment “in the quicksand” – during periods of rapid tooth loss and eruption where retainers may need frequent adjustments. Dr Amanda explains her criteria for appliance timing based on the eruption of key permanent teeth. She then compares the pros and cons of removable versus fixed expanders, highlighting that fixed appliances have better compliance and retention, but removable ones have lower upfront lab fees. Factors like patient age, compliance, and treatment timeline play into appliance selection.
II. Timing and Foundation
A. Analogy of being in quicksand – the importance of laying a foundation before using appliances
B. Emphasis on waiting until the first molars are erupted before starting appliances
C. Psychosocial considerations and maturity level for timing decisions
III. Dr. Wong’s Approach
A. Dr. Wong’s preference for delaying expansion or sagittal appliances
B. Caution against starting appliances too early due to potential complications
C. Mention of Dr. Wong’s live program in New York and speaker’s potential involvement
IV. Fixed Functional Appliances
A. Differentiation between removable and fixed appliances
B. Speaker’s preference for waiting until at least six anterior teeth are present for fixed appliances
C. Discussion on psychosocial considerations and timing for boys vs. girls
V. Quicksand Analogy
A. Further exploration of the quicksand analogy in relation to removable appliances
B. Speaker’s perspective on using fixed appliances to avoid complications during tooth eruption
C. Mention of potential fit issues and retainer-related challenges with removable appliances
VI. 3D Printed Metal Expanders
A. Introduction to 3D printing technology for orthodontic appliances
B. Advantages of 3D printed metal expanders, including custom fit and reduced fit issues
C. Mention of increased cost compared to traditional methods but with potential time and comfort savings
VII. Patient Management
A. Considerations for patient compliance with removable appliances
B. Importance of clear communication about treatment timelines and potential complications
C. Addressing additional fees if patients deviate from the recommended treatment plan
VIII. Conclusion
This article focuses on deciding when to use removable versus fixed functional appliances for growth modification in mixed dentition. The key factors are the patient’s maturity level, cooperation, and stage of tooth eruption. Removable appliances allow flexibility but require diligent wear time and may need frequent adjustments during periods of rapid tooth eruption. Fixed appliances guarantee full-time wear but limit removal options. Custom 3D-printed fixed expanders are more comfortable and durable, though costlier. Ultimately, the choice depends on the individual patient’s needs and likelihood of cooperation. Clear communication regarding appliance requirements, limitations, and any potential added fees is essential to set appropriate expectations.
When Should Ankylosed Baby Teeth Be Extracted?
Extracting Ankylosed Teeth in Mixed Dentition Cases
Mixed dentition cases can pose a range of unique challenges, and keeping this in mind can help you make sure that you’re following the right treatment plan for your patient’s needs. One such example of a potentially tricky case is ankylosed baby teeth – but when should you extract these for mixed dentition patients?
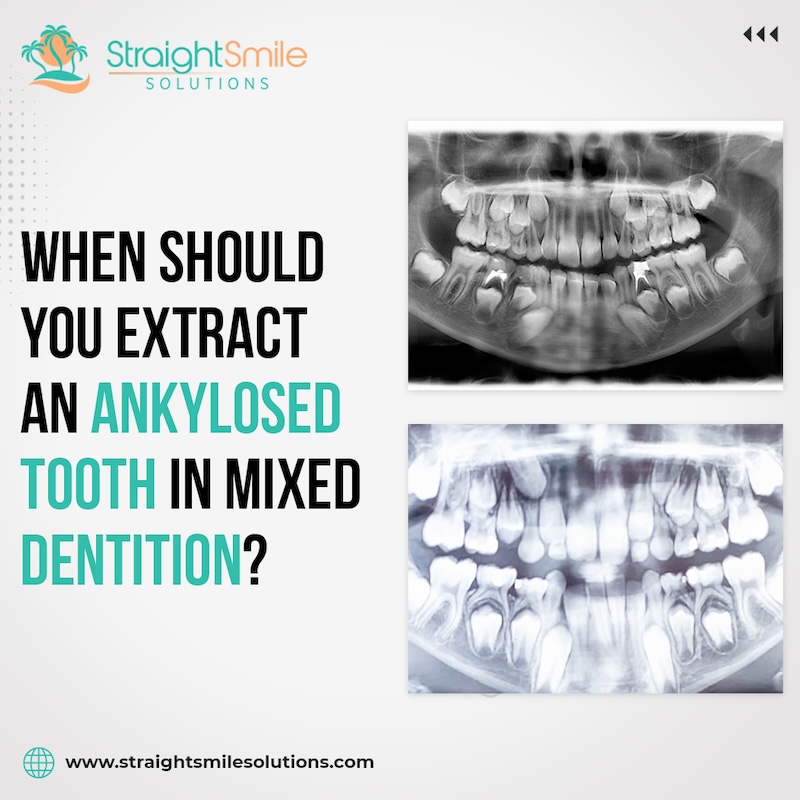
Before you make any decisions on a mixed dentition patient’s treatment plan, always confirm that the tooth is genuinely ankylosed. To do this, you’ll usually want to take a CBCT and get this read by a radiologist, OMFS, or an online tool. You should also always check whether there is a succedaneous tooth present; if there is, you’ll likely want to put the patient on a Watch treatment plan and take regular panoramic X-rays every three or four months.
If the ankylosed tooth does not also have a succedaneous tooth below, you may want to consider whether you could get away with simply leaving the tooth in for as long as possible. However, if you leave it in, you may notice a Bolton discrepancy over time, which may require you to remove part of the sides of the tooth.
Don’t forget: if you’re not yet in orthodontics and you remove an ankylosed tooth, your patient may experience supereruption in the primary or permanent upper teeth if there is a step. As such, if you do decide to extract an ankylosed tooth, you may want to add an appliance or retainer to prevent supereruption.
Overall, each mixed dentition orthodontics case must be addressed on an individual basis. If you’re not sure whether or not to extract the ankylosed tooth, don’t hesitate to contact a professional local orthodontist, or contact our Straight Smile Solutions experts for your own consultation on each case’s treatment plan.
When Should You Take Out Baby Canine Teeth for Orthodontic Cases?
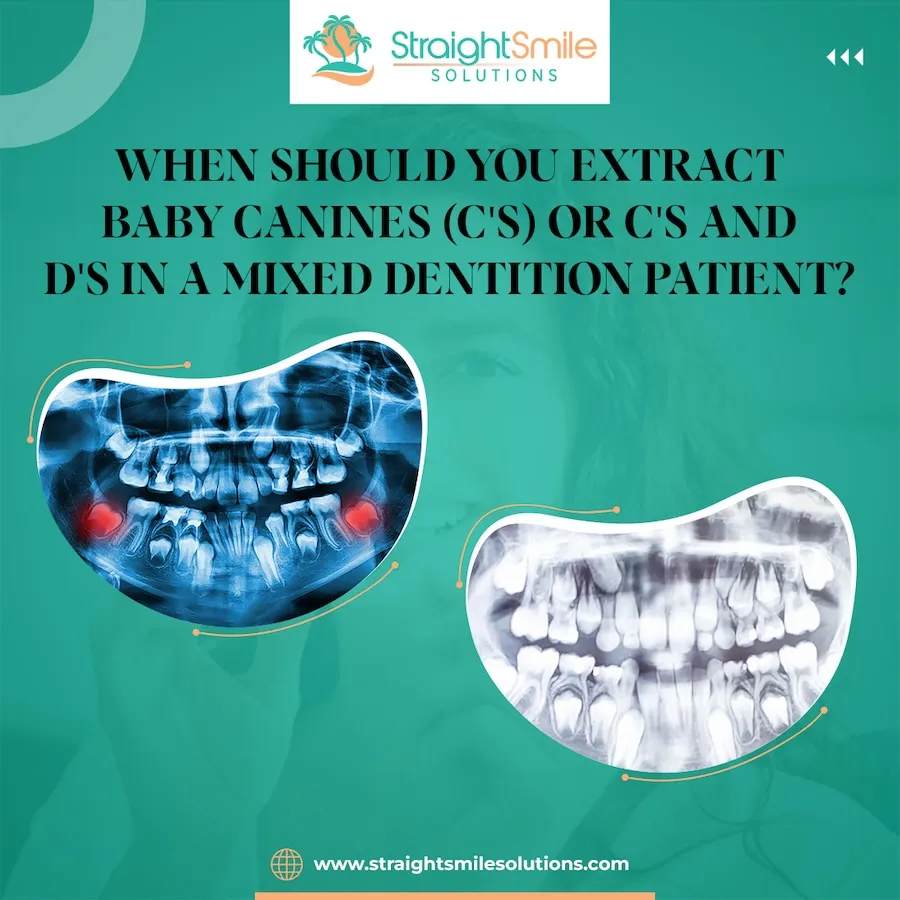
Extracting Baby Canines: When to Do It
Extractions are sometimes necessary when it comes to orthodontic cases, and understanding when you might need to extract baby canines is hugely important. Indeed, extracting baby canine teeth is potentially an exception to typical baby tooth extraction rules, and provided that you take both out simultaneously, the midlines shouldn’t shift in your patients.
When Should You Take Out Baby Canine Teeth for Orthodontic Cases?
Whether you will need to remove baby canine teeth will often depend on the angle of the canines. If there is a slight tilt, you may need to do expansion first prior to extracting the baby Cs; however, if there is a significant tilt, you may need to approach these orthodontic cases differently and remove the canines first.
In high risk applications, studies have shown that creating space and removing the baby canines can help with reducing the likelihood of impactions occurring.
Taking Out Baby Teeth Can Cause Complications
While baby teeth are usually risky to remove, baby canines may be a safer extraction option when removed in tandem – however, removing baby canines when it is not needed could cause more impactions, and it’s crucial to make the space first (usually through expansion).
If you’re not sure about impactions in a patient, be sure to visit our document store at Straight Smile Solutions to download a copy of our My Phase 1 Smile file, which provides a whole section on evaluating impactions for canines based on overlap and angulation. Alternatively, for our members, feel free to reach out to us if you have any questions about one of your orthodontic cases to see whether extracting baby canines might help.
Long Comprehensive vs. Phase 1 Treatment
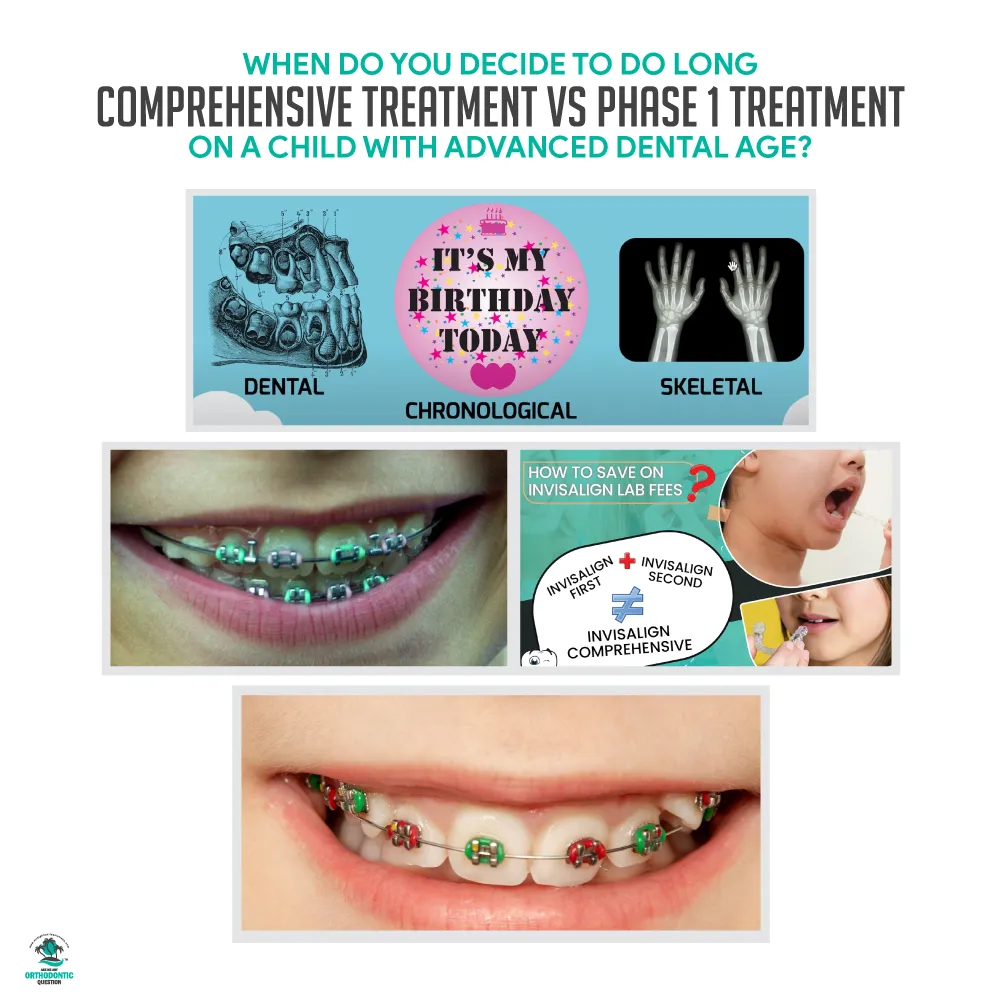
Long Comprehensive vs. Phase 1 Treatment
I. Introduction
Dr. Amanda provides an informative overview of “long comprehensive” orthodontic treatment. She explains that long comprehensive treatment involves starting comprehensive treatment when a patient is in late mixed dentition, often spanning 2.5-3 years with breaks. Dr. Amanda outlines critical considerations when evaluating if long comprehensive treatment is appropriate for a patient, including compliance, dental age, ability to finish the case properly, and risks of surprises. She notes the pros and cons of this marathon treatment versus the shorter phase one treatment. Dr. Amanda provides orthodontists and dentists critical guidance on managing expectations and decisions around extended comprehensive orthodontic treatment.
II. Factors to Consider
A. Cost considerations
1. Two-phase vs. long comprehensive treatment cost implications.
2. Front-loading costs with initial records, treatment, and retainers.
3. Potential cost differences for providers in different networks.
B. Duration of Treatment
1. Two and a half to three-year commitment.
2. Evaluation periods and breaks during treatment.
3. Monthly or periodic visits and potential scheduling conflicts.
C. Patient Commitment
1. Importance of patient and parent commitment.
2. Risks of moving during treatment.
3. Non-refundable nature of long comprehensive treatment.
D. Compliance Issues
1. Importance of patient compliance.
2. Challenges of dealing with non-compliant patients over an extended period.
3. Considerations for both patient and parent compliance.
III. Case Selection
A. Existing Relationship with General or Pediatric Dentist
1. Advantages of having a pre-existing relationship with the family.
2. Increased comfort level for orthodontists in taking on long comprehensive cases.
B. Hygiene Considerations
1. The necessity of impeccable hygiene for a three-year commitment.
2. Avoiding long comprehensive treatment for patients with hygiene issues.
C. Dental Age vs. Chronological Age
1. Understanding that dental age and chronological age may not align.
2. Considering eruption patterns and development in treatment planning.
IV. Treatment Planning
A. Finish Considerations
1. Ensuring comfort with the anticipated finish of the case.
2. Addressing potential challenges with unerupted or impacted teeth.
3. Communicating the potential need for impaction surgery and additional fees.
B. Unknowns and Surprises
1. Acknowledging the possibility of unexpected challenges.
2. The importance of transparency in treatment planning.
3. Managing parental expectations regarding potential surprises.
C. Finishing with Braces or Invisalign
1. Considering the implications of finishing with braces.
2. Challenges with offering phase two treatment after phase one.
3. Communicating effectively with parents about treatment choices.
V. Conclusion
Ultimately, the decision to pursue long comprehensive orthodontic treatment is complex, involving considerations of cost, compliance, unknown factors, and long-term commitment. While it can provide continuity of care in one treatment plan, risks include patients moving or losing motivation. Thorough informed consent regarding potential complications and fees is essential. Assess dental age, eruption status, hygiene compliance, and family plans first. Weigh the pros and cons of phased treatment as well. With careful case selection and setting appropriate patient expectations, long comprehensive treatment can benefit certain patients when factors align favorably. Still, unpredictability remains, demanding flexibility from doctors and patients alike.
Is the Invisalign CBCT AI Feature Accurate on Kids and Teens

I. Introduction
Dr. Amanda from StraightSmile Solutions provides valuable insights into using Invisalign’s CBCT feature for orthodontic treatment planning. She explains how this technology has been a “game changer” for adult cases, giving great accuracy and confidence to fix more complex issues. However, Dr. Amanda cautions against over-reliance on CBCT for teenage and child patients. Through her 20 years of clinical expertise, she has found regular aligners and braces can safely achieve expansion in growing patients without risk of harm. She advises using judgment based on skeletal maturity rather than just applying CBCT routinely. Dr. Amanda offers constructive feedback to Invisalign on improving their AI to account for growth potential. Overall, her goal is to educate doctors on the appropriate and safe use of advanced tools like CBCT for orthodontic treatment.
II. Positive Experience with CBCT in Adults
A. Dr. Amanda’s clinical opinion
B. Confidence in treating cases over 30
C. Addressing conservative approaches
D. Increased confidence with posterior crossbites
III. Accuracy and Reliability of CBCT Feature in Adults
A. Dr. Amanda’s claim of accuracy
B. Pushing the treatment envelope
C. Dependence on AI and CBCT feature
D. Enhanced ability to tackle challenging cases
IV. Concerns Regarding CBCT in Kids and Teens
A. Lack of confidence in AI for younger patients
B. Dr. Amanda’s extensive experience with children and teens
C. Skepticism about the need for CBCT in younger cases
D. Preference for more traditional expansion methods
V. Skepticism about Safety and Necessity in Kids and Teens
A. Dr. Amanda’s concern about overusing CBCT
B. Lack of differentiation for growing kids
C. Fear of unnecessary treatment restrictions
D. Emphasizing the need for caution in utilizing CBCT in younger cases
VI. Addressing Usage Patterns
A. Observation of widespread use in every case
B. Dr. Amanda’s disagreement with the necessity
C. Caution against defaulting to CBCT for kids and teens
D. Preference for selective and justified application
VII. Call for Improvement in AI for Kids and Teens
A. Dr. Amanda’s suggestion for AI enhancement
B. Incorporating skeletal maturity in AI
C. Acknowledging the need for educating dentists
D. Highlighting the challenges in programming skeletal age
VIII. Advice for Orthodontic Professionals
A. Caution in using CBCT for growing patients
B. Stressing the importance of orthodontic expertise
C. Encouraging continual education on skeletal maturity
D. Dr. Amanda’s recommendation to learn more from free resources on the StraightSmile Solutions YouTube channel
IX. Conclusion
Dr. Amanda of Straight Smile Solutions passionately emphasizes the transformative impact of Invisalign’s CBCT feature, particularly for adult cases, especially those aged 30 and over. With confidence born from successful cases, she lauds the CBCT’s accuracy in addressing challenges like posterior crossbites and complex scenarios that previously seemed risky. However, she urges caution with its application in kids and teens, citing a perceived over-reliance on CBCT for every case and highlighting the need for further AI development to incorporate skeletal maturity. Dr. Amanda concludes with a reminder of the ongoing education resources available for dental professionals seeking to enhance their orthodontic expertise.
Top 10 Tips to Avoid Braces in Kids age 0-10
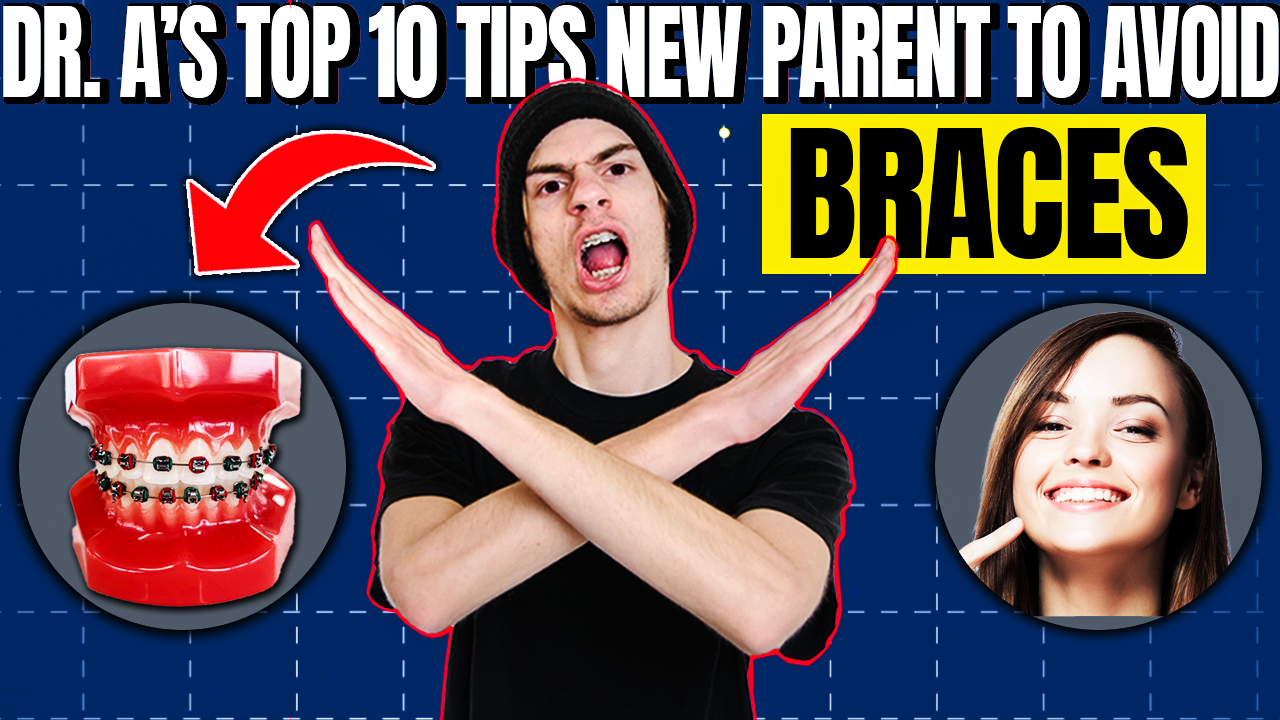
Top 10 Tips to Avoid Braces in Kids age 0-10
I. Introduction
Dr. Amanda from StraightSmile Solutions. Today, she shares her top 10 tips for new parents or those expecting, focusing on guiding them to make informed decisions and potentially reducing the need for orthodontic treatment. Dr. Amanda emphasizes that while it might not be feasible to implement all 10 tips, having them in mind can positively impact dental health. Her channel, tailored for dentists, serves as an educational resource supported by research and personal experience. Viewers can explore a more extensive Phase One course on straightsmilesolutions.com for in-depth knowledge. Dr. Amanda’s clinical opinions are backed by research and complemented by recommendations for further reading and viewing. Without further ado, she delves into her top 10 tips, acknowledging that some might stir controversy but stressing their potential benefits.
II. Disclaimer
A. Acknowledgment of feasibility challenges
B. Emphasis on having tips ready for patients
C. Clarification: Tips may not eliminate the need for orthodontic treatment
III. Educational Resources
A. Mention of Dr. Amanda’s channel for dentist education
B. Reference to the phase one course at StraightSmile Solutions
C. Recommendation of two books and a movie for additional information
IV. Top 10 Tips
A. Exclusive breastfeeding for one year
1. Emphasis on pediatrician advice
2. Strict avoidance of bottles
B. No pacifiers past three, four, or five months
1. Discouragement of extended pacifier use
2. Advocacy for healthy alternatives
C. No baby food
1. Historical perspective on baby food
2. Advocacy for breastfeeding and whole foods
D. Avoiding thumbs, fingers, or foreign objects in the mouth
1. Strict prohibition of non-food items
2. Emphasis on oral hygiene
E. Lips closed when eating
1. Historical context and personal experience
2. Importance for jaw and muscle development
F. Lips closed when sleeping
1. Recommendation to check on children
2. Indication of potential nasal obstruction or allergies
G. Evaluation for arch expansion around age 6-7
1. Importance of early intervention
2. Emphasis on orthodontic assessment
H. Sugar-free gum with Xylitol
1. Approval of gum for muscle development
2. Benefits of oral hygiene
I. Chewing sugar-free gum with braces
1. Personal experience and recommendation
2. Caution against hard gum
J. Avoid pulling out baby teeth
1. General recommendation against extraction
2. Exceptions for damage, infection, or cavities
V. Conclusion
Dr. Amanda from StraightSmile Solutions has shared valuable insights and tips for parents, particularly those with newborns or pregnant patients. Though her top 10 tips may be challenging to implement entirely, they provide a comprehensive guide to support proper jaw development and oral health in children. While these tips are based on Amanda’s clinical opinion and experience, she emphasizes the importance of individual circumstances and encourages parents to be mindful of their choices. Incorporating research-backed information and references to additional resources such as books and a movie enhances the credibility of her recommendations. Dr. Amanda’s dedication to dental education shines through, emphasizing the significance of early interventions for long-term oral health benefits.
Invisalign vs. Alternative Aligners vs. White Label Aligners
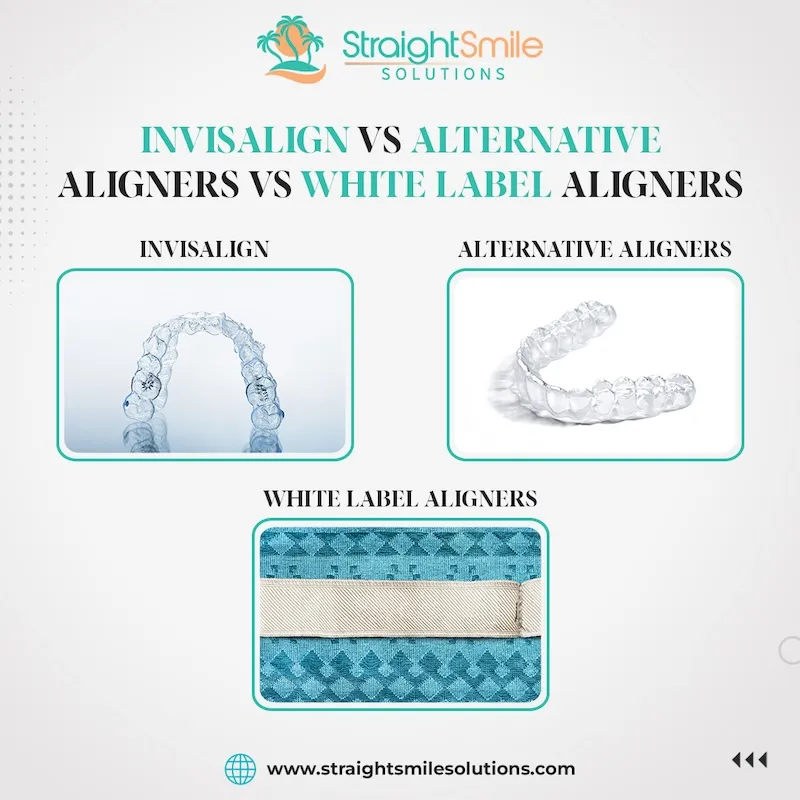
Invisalign vs. Alternative Aligners vs. White Label Aligners
I. Introduction
Dr. Amanda from StraightSmile Solutions. Today, we delve into the fascinating world of orthodontic aligners, breaking down three key terminologies that might be familiar to some but are crucial for everyone involved. At the forefront is the OG of aligner systems – Invisalign, a pioneer since 1998. We explore alternative aligner systems, a diverse landscape with countless brands emerging post-Invisalign patents. Learn the importance of case selection, predictability, and accountability loops for successful outcomes. Lastly, discover the cost-effective realm of white label aligners, offering flexibility and cash flow advantages. Join us on this journey as we unravel the intricacies of modern orthodontics.
II. Invisalign – The OG Aligner System
A. Originated in 1998
B. First exposure in 1998 at UCSF
C. Leading aligner system with advanced features
D. Higher lab fee due to R&D, marketing, and brand awareness
E. Capabilities: Lower jaw growth, expander attachment
F. Continuous innovation but expensive and requires an upfront payment
III. Alternative Aligners
A. Hundreds of brands globally
B. Proliferation post-expiration of Invisalign patents
C. Caution: Quality varies, some good, some not
D. Case selection crucial for success
E. Recommendation: Watch case selection videos for guidance
F. Predictability depends on a reliable ClinCheck and accountability loop
G. Accountability Loop: Virtual or in-person check-ins for each aligner
H. Low revision and refinement rates achievable with proper planning
IV. White Label Aligners
A. Term: Unbranded aligners from the manufacturing system
B. Cost: Setup price ranges from $90 to $200
C. Process: Third-party setup, local lab manufacturing
D. Appearance: Generic, unbranded aligners
E. Branding legality: Check FDA approvals for custom branding
F. Cost-effectiveness: Lower lab fees, around $18-$25 per aligner
G. Batch printing option for cost control
H. Accountability Loop crucial for success
V. Choosing Between Options
A. Invisalign
1. Benefits: Advanced features, continuous innovation
2. Drawbacks: Expensive, upfront payment, higher lab fees
B. Alternative Aligners
1. Benefits: Variety, case-specific suitability
2. Drawbacks: Quality varies, and thorough case selection is crucial
C. White Label Aligners
1. Benefits: Cost-effective, batch printing option
2. Drawbacks: Generic appearance, accountability, Loop essential
VI. Conclusion
Navigating the world of aligner systems requires a thoughtful consideration of various options. Invisalign is the pioneer, boasting advanced features at a higher cost. Alternative aligners, numerous in variety, offer viable choices if the right case is selected and a predictable setup is ensured. White label aligners provide a cost-effective alternative, allowing flexibility in batch printing and minimizing upfront expenses. However, success hinges on maintaining an accountability loop, whether virtual or in-person. Choosing the most suitable system depends on individual preferences, desired outcomes, and financial considerations. With the right knowledge and strategic approach, practitioners can effectively incorporate aligner systems into their orthodontic practice.