StraightSmile Solutions®
Avoiding Overcorrection with Deprogramming Aligners
Avoiding Overcorrection with Deprogramming Aligners
Have you completed the deprogramming section of your Invisalign case, only to find yourself wondering: what next? Well, once you’ve achieved good contacts on the back teeth, knowing how to progress is important, and luckily, we’ve outlined some key points in today’s guide to help.
Things to Consider
There are a few things to consider when looking at how to avoid overcorrection with deprogramming aligners. These include how quickly you can get the patient into the clinic and whether you have an itero scanner on site. Ideally, you’ll want to get the patient into the clinic within two weeks to begin finishing the case and fitting the final refinement aligners .
Once Solid Contacts Are Achieved
Once all of a patient’s permanent teeth have solid contacts following the Invisalign MA deprogramming section, you can let the patient know that they only need to wear the trays at night. By limiting the time that the patient wears their aligner trays, rather than having them on 24/7, this helps avoid overcorrection.
Naturally, the more your patient wears the aligners, the more their teeth will extrude. However, if the patient doesn’t wear them at all, the front teeth may still shift, which can impact the final results. Thus, finding a balance by limiting the time that the tray is used can provide a good balance between fixing the bite and overcorrection, allowing for more successful finishing with the final refinement aligners.
What If I Can’t Get the Patient In Quickly?
If you can’t get the patient into the clinic quickly, or if you can’t get the finishing refinement delivered quickly, you may need to get a set of Essex retainers made up. These allow you to avoid overcorrection, thus ensuring that the final refinement trays fit the patient comfortably.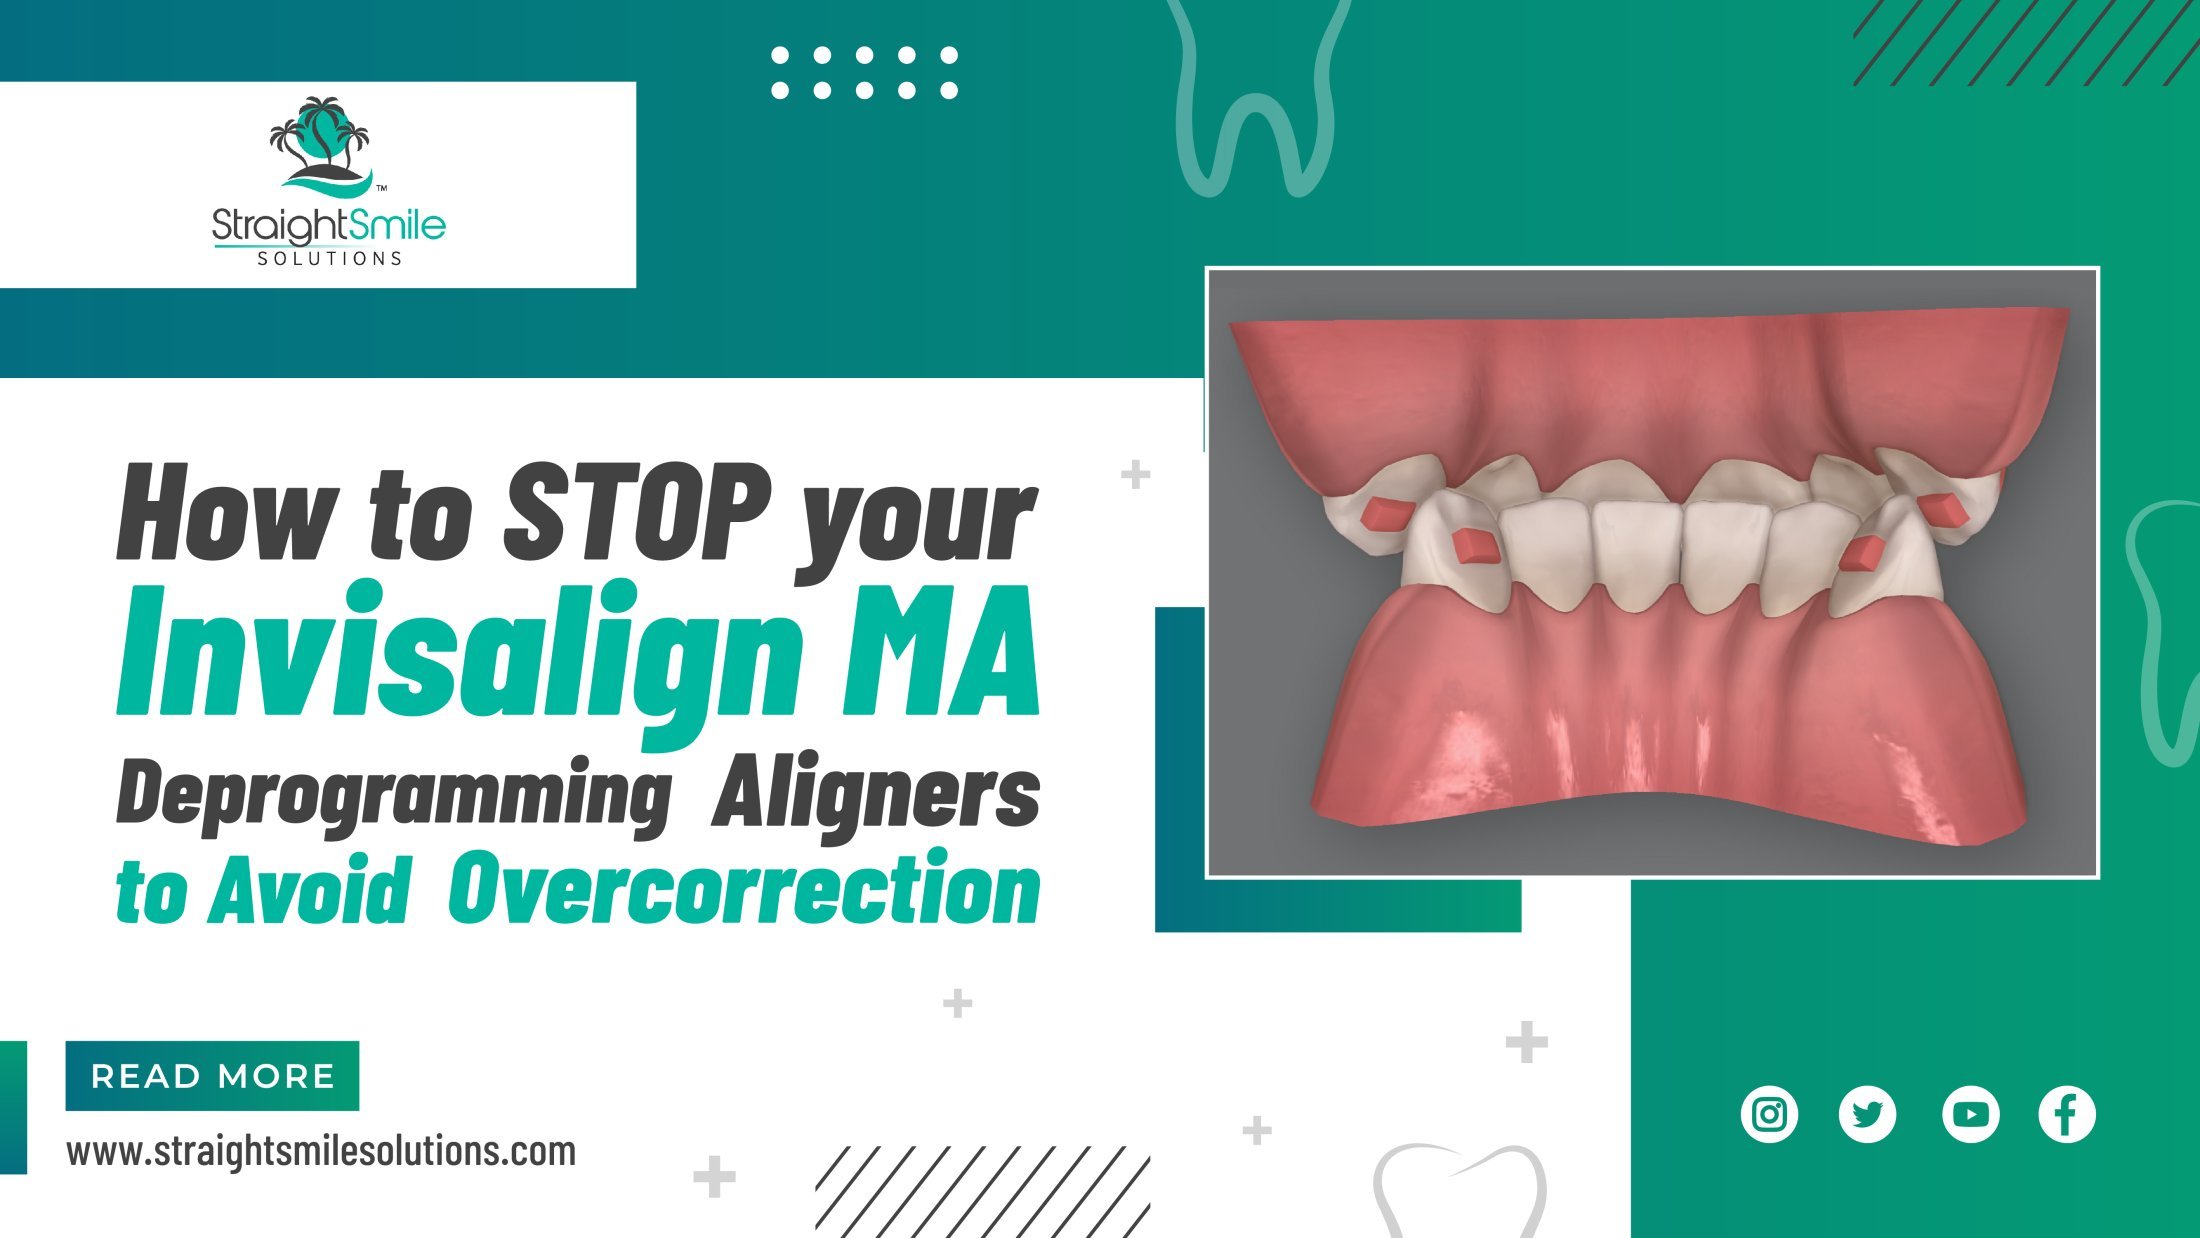
Why You Should Get An OMT’s Support Before Taking Lateral Openbite Due to Lateral Tongue Thrust Patients
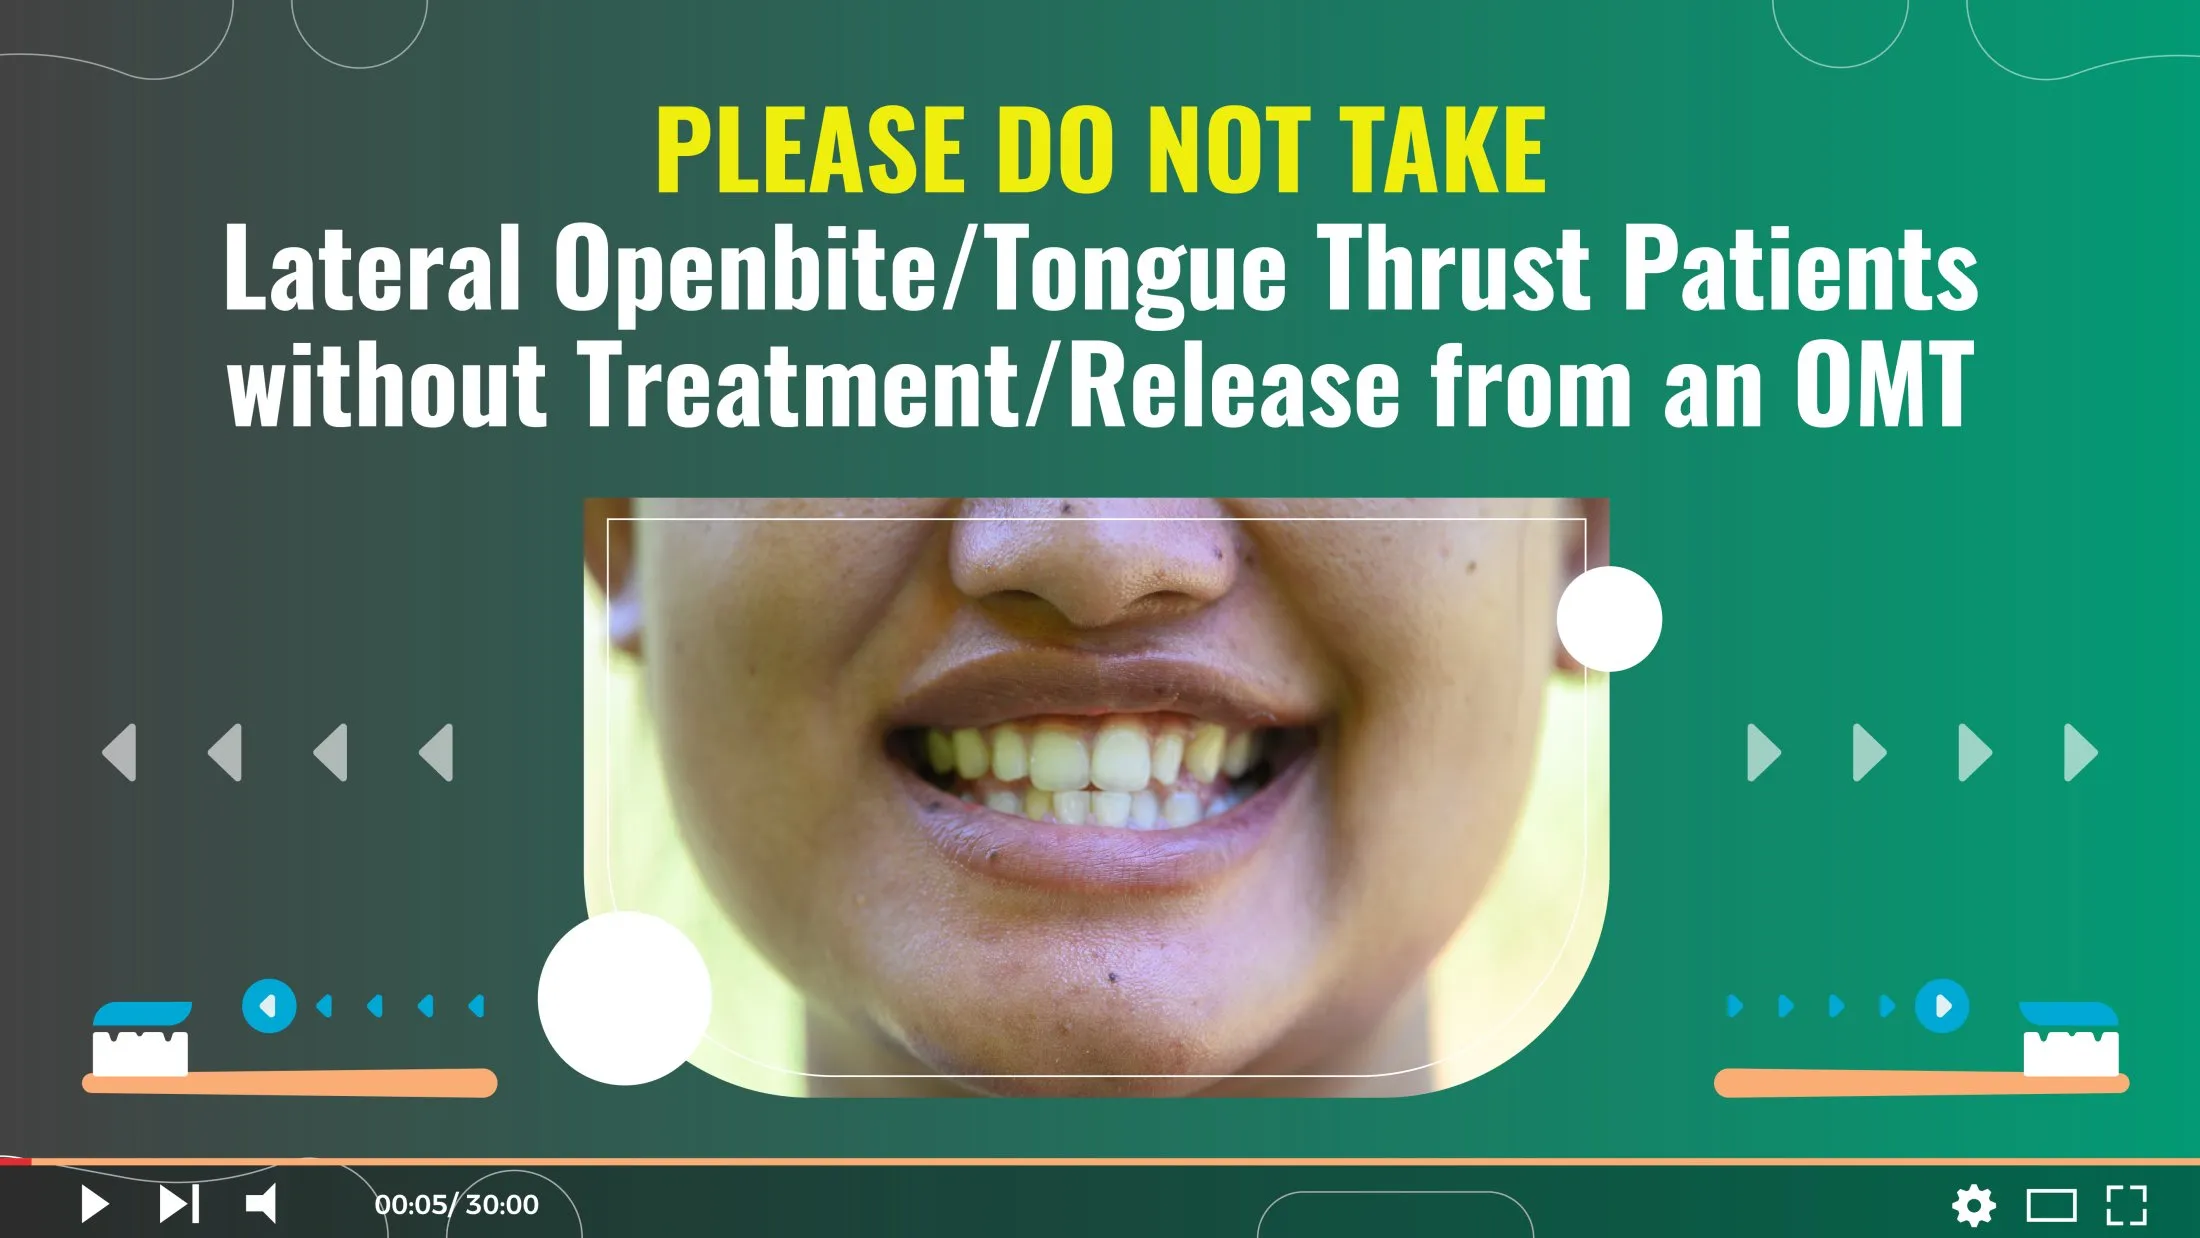
Why You Should Get An OMT’s Support Before Taking Lateral Openbite Due to Lateral Tongue Thrust Patients
As a general dentist, getting into the world of orthodontics can offer a wealth of opportunities. However, orthodontics for general dentists isn’t always straightforward, and being aware of tricky cases – and when you should get support from a professional orthodontist or OMT – is vital. This is the case with lateral openbite patients due to lateral tongue thrust, and we’ve outlined why in today’s guide.
Why You Should Not Take Patients with a Lateral Openbite Due to Lateral Tongue Thrust
If you come across a patient with a lateral openbite due to lateral tongue thrust, we strongly recommend that you avoid taking these cases on. Indeed, these cases should instead be referred immediately to an OMT, as these cases will often be incredibly difficult to finish – and, even if they do work initially, retainment is usually very poor.
Many patients will be reluctant to go to an OMT, naturally, since this can be incredibly expensive. Often, it’s not just the cost of an OMT consultation either; there are often additional costs for the patient to pay, such as surgeries, tongue releases, cervical chiropractic care, and the like.
The Risk of Taking On These Cases Before Getting an OMT’s Support
The poor success of lateral openbite cases due to lateral tongue thrust can lead to many issues down the line. When the patient notices that their orthodontics treatment plan isn’t working in the long term or is not progressing normally, you’ll likely experience a lot of complaints, and you may even need to refund the treatment plan entirely.
Get the OMT to Sign The Patient Off First
While these cases are tricky, it is potentially possible to treat these patients. However, you should never attempt to do so until an OMT has signed off the patient as having corrected the issues.
Still feeling unsure? Make sure you get professional support from an orthodontics consultancy team – such as us here at Straight Smile Solutions – to help you avoid taking on risky cases.
2023 Invisalign and Clear Aligner Refinement Instructions
2023 Invisalign and Clear Aligner Refinement Instructions
I. Introduction
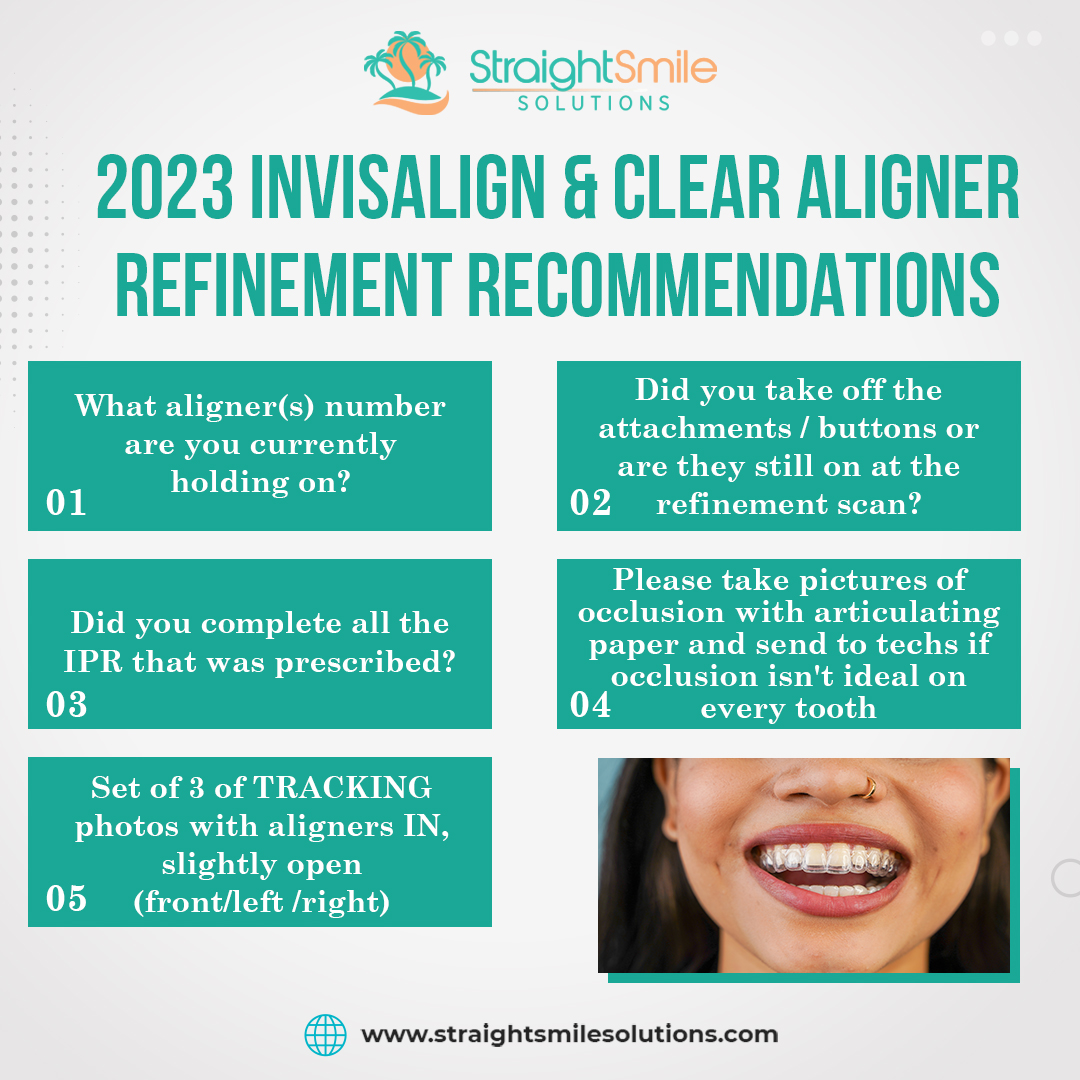
Dr. Amanda from StraightSmile Solutions discusses the five key things needed when submitting an Invisalign or clear aligner refinement case. Emphasizing the importance of knowing the current aligner number, attachment status, previous IPR done, updated photos with bite registration, and tracking photos of the aligners in the patient’s mouth. Having this information ensures a proper refinement ClinCheck for a successful case outcome.
II. 5 Things to Submit for a Refinement
1. What aligner number is the patient currently on?
– You need to know exactly what aligner the patient has been wearing so the new ClinCheck is accurate.
2. Were attachments removed or left on for the refinement scan?
– Decide whether to keep or remove attachments based on how the initial treatment went.
3. Was all the prescribed IPR done on the previous ClinCheck?
– Check records to ensure IPR isn’t repeated on the same sites.
4. Provide a full set of intraoral photos with articulating paper.
– This ensures the bite is accurate in the ClinCheck refinement.
5. Provide tracking photos with aligners in.
– Shows how aligners are fitting and tracking.
III. Best Practices for Better Outcomes
– Use a virtual monitoring system to oversee patient compliance.
– Ensure aligners fit like a glove with no gaps before advancing.
– Have the patient seat aligners fully before starting new tray.
– Follow clear aligner delivery protocol.
IV. Conclusion
To complete clear aligner treatment, whether Invisalign or another system, clinicians must follow proper protocols. For refinements, provide the aligner number, attachment status, IPR done, photos with bite marks, and tracking photos. Ensure proper ClinCheck staging, aligner delivery with seating instructions, and virtual monitoring. When steps are skipped, treatment predictability suffers, leading to suboptimal results, unhappy patients, and unnecessary refinements. Attention to detail and consistency in process is imperative for clear aligner success.
When to Use the CBCT Feature on your Invisalign Clincheck
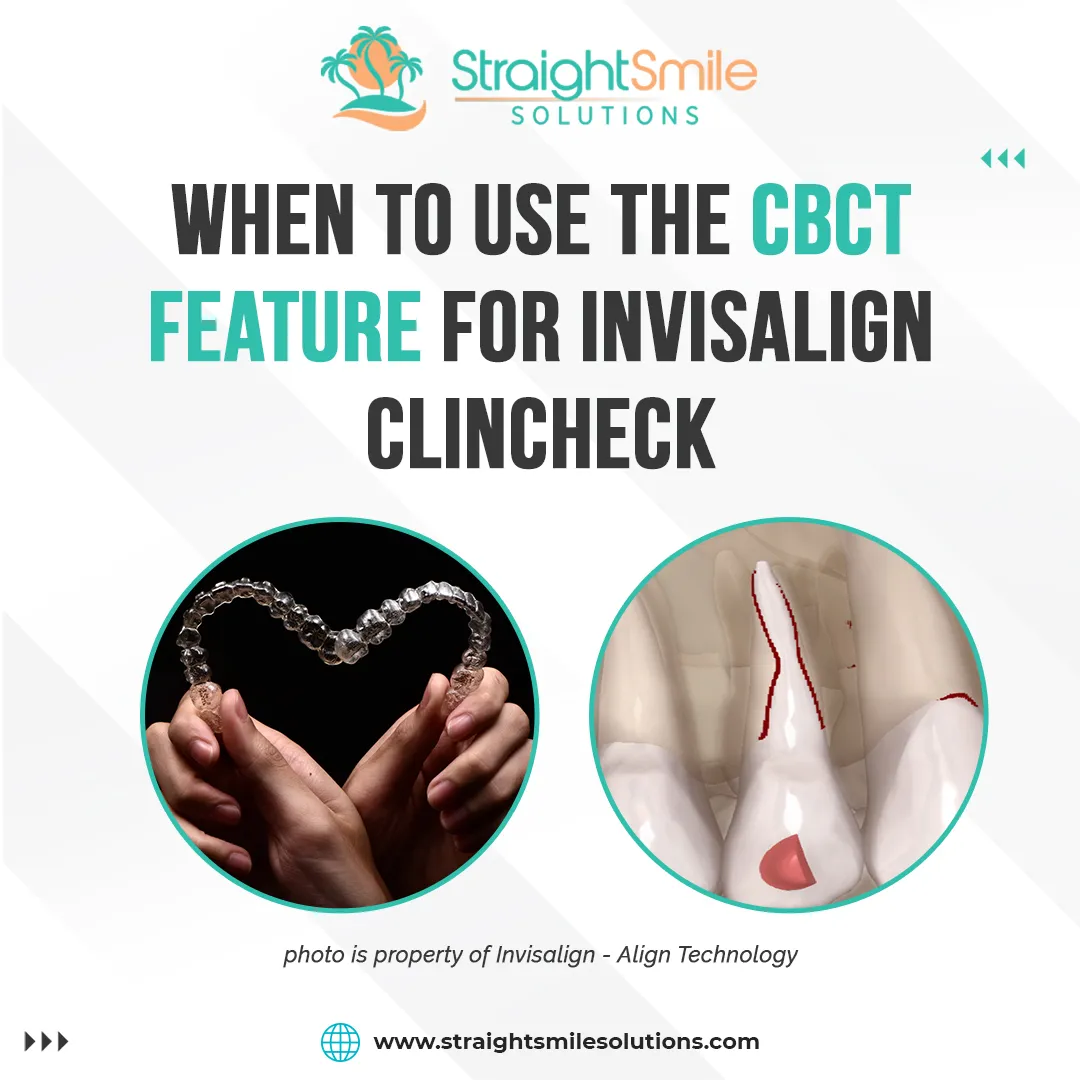
I. Introduction
The CBCT feature on Invisalign ClinCheck allows you to overlay the patient’s teeth from their CBCT scan onto their digital treatment plan. This provides a more accurate prediction of tooth movement by incorporating root anatomy and bone structure from the scan. Use this feature for complex cases involving extractions, interdisciplinary treatment, or when precise root positioning is critical.
Dr. Amanda with Straightsmile Solutions discussing when to use the Invisalign ClinCheck CBCT feature
II. Overview of ClinCheck CBCT
A. Relatively new feature, available in the US, Canada, and Australia
B. Integrates CBCT scan into Invisalign treatment planning
C. Can show risk of fenestrations from tooth movements
D. Helps create more accurate treatment plans
E. Does not replace the need for lateral cephalometric x-rays for soft tissue
III. Recommendations for Using ClinCheck CBCT
A. Call Invisalign support to help integrate CBCT scans into ClinCheck
B. Must be done at the start of a case; can’t add later in treatment
C. Useful for complex adult cases, not needed for most teen/child cases
D. Can show risk of bone loss, root proximity
E. Improves accuracy of ClinCheck and reduces risks
F. Still, clinical judgment is needed to interpret predicted fenestrations
IV. Benefits of More Accurate ClinCheck
A. Reduces risks and complications during treatment
B. Ensures proper tracking and fewer refinements needed
C. Allows slower movement velocities if needed
D. Creates accountability loop for provider
E. Leads to better final results
V. Conclusion
A. ClinCheck CBCT is a valuable tool for complex adult Invisalign cases
B. Provides additional diagnostic information to aid clinical judgment
C. Helps create more precise treatment plans and improves outcomes
D. Recommends providers learn how to integrate CBCTs into Invisalign workflow
Pre-Phase 1 Interceptive Treatment and Emotional Maturity in Orthodontic Case Selection
I. Introduction
A. Dr. Amanda from Straightsmile Solutions
B. Explaining “pre-phase 1 Ortho treatment”
II. Phase 1 Ortho Treatment
A. Usually starts around age 7-9
B. Criteria for phase 1 treatment
1. First permanent molars erupted
2. Eruption of lower anterior teeth (5, 6, 7, 8)
3. Ideal: Eruption of upper anterior teeth (7-10)
C. Goal of phase 1 treatment
1. Correct overjets
2. Address negative overbites
3. Manage crossbites (anterior and posterior)
4. Develop arches to prevent impactions and crowding
D. Phase 2 treatment should be simplified if Phase 1 is done correctly
E. Rare cases may not need phase 2 treatment
III. Pre-Phase 1 Ortho Treatment
A. For younger kids with baby teeth or limited permanent teeth
B. Considerations for pre-phase 1 treatment
1. Emotional maturity of the child
2. Parent’s awareness and concerns
3. Potential habits or issues (e.g., open bites, constricted palate)
C. Custom treatment is not recommended for very young kids
D. Simple, off-the-shelf options
1. UT trainer or U concept appliances from Great Lakes Orthodontics
2. Healthy Start appliances (requires certification)
3. Myobrace appliances (another option)
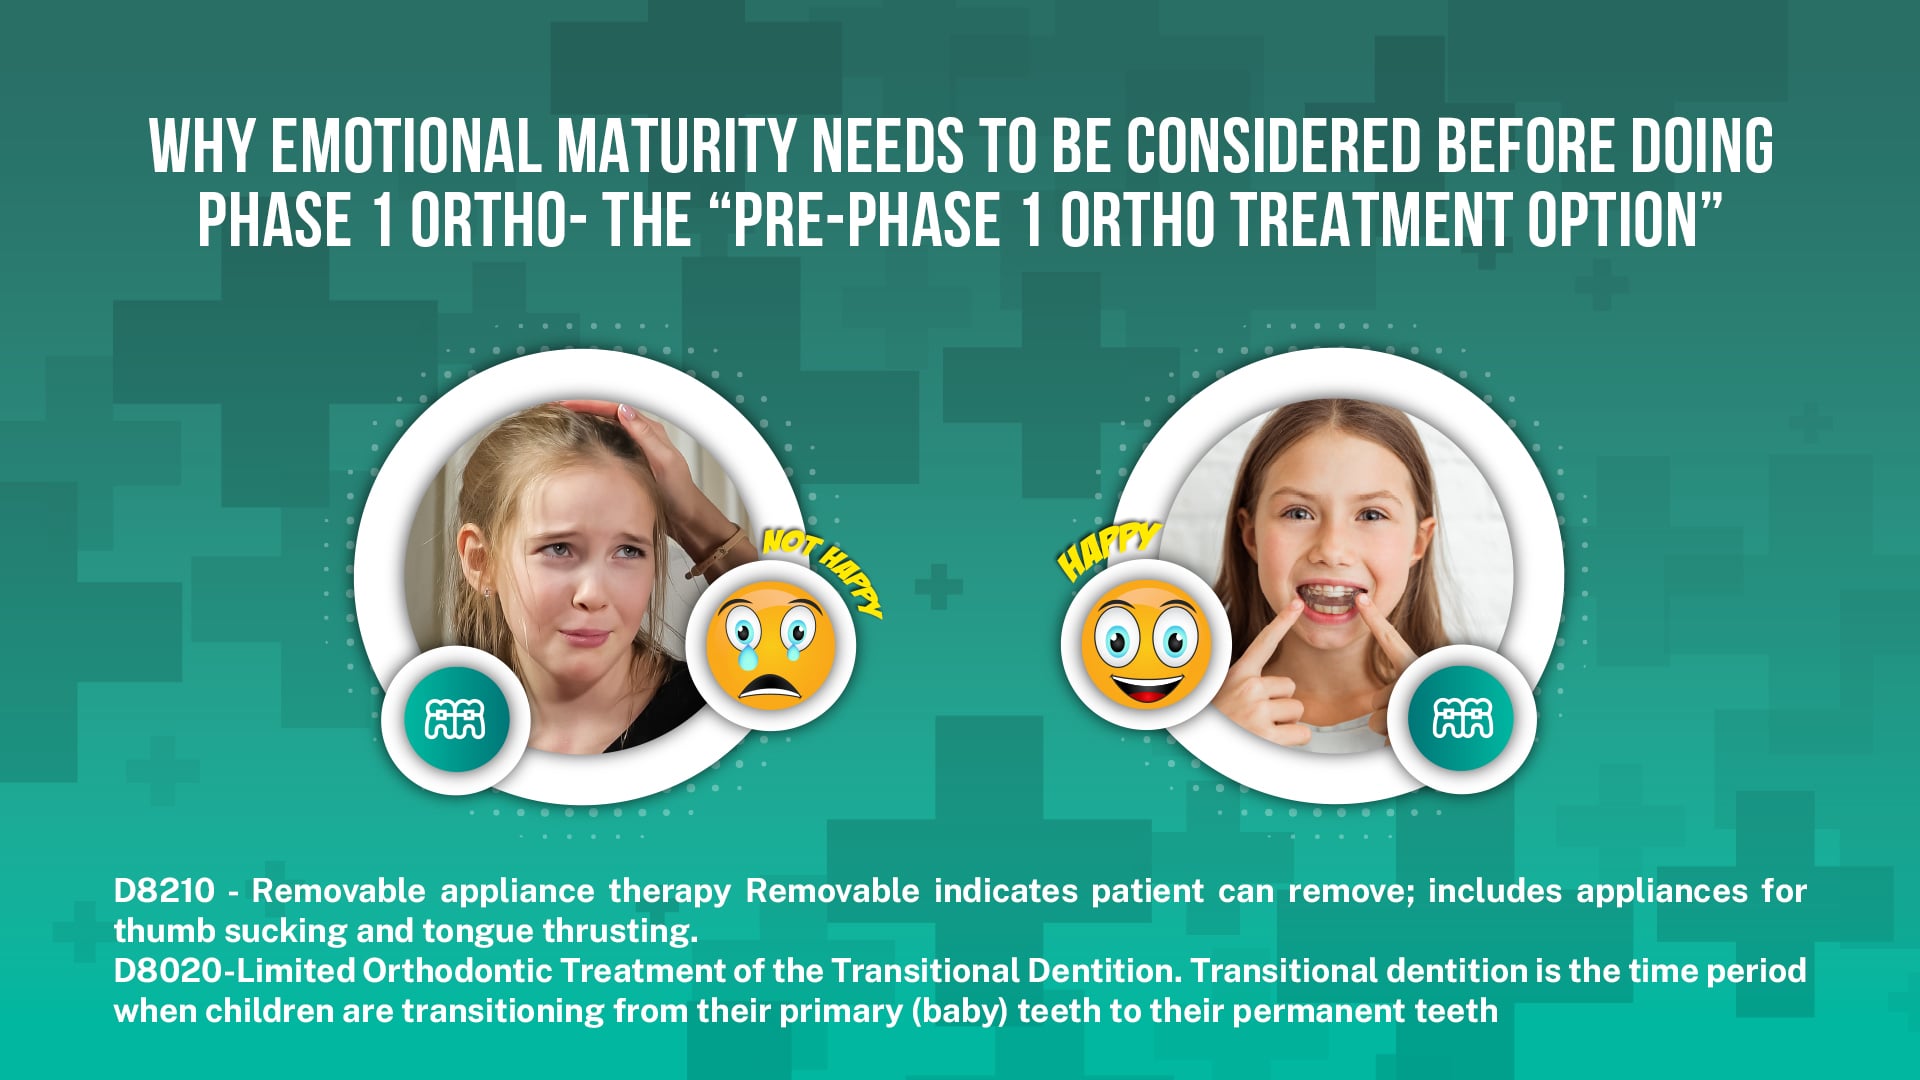
E. Emotional maturity is crucial in pre-phase 1
1. Crying, fidgeting, inability to follow instructions
2. Patience and readiness are essential
F. Reevaluate the child’s readiness over time
IV. Billing and Insurance
A. Insurance may not always cover pre-phase 1 treatment
B. Pre-authorization is recommended
C. Consider the impact on the patient’s lifetime insurance benefits
D. Charging a cash payment or providing credit for future phase 1 treatment
1. Offer a credit if pre-phase 1 goes well and they proceed to phase 1
2. Ensure compliance and motivation
E. Be aware of your state’s laws and regulations regarding billing and insurance
V. Conclusion
Pre-Phase 1 interceptive treatment benefits young patients, but its success relies on a child’s emotional maturity. Emotional maturity is crucial for a comfortable and productive orthodontic experience. Orthodontists must assess emotional readiness and consider alternative approaches when children show unease or uncooperativeness. This ensures a smoother and more successful orthodontic journey for young patients, ensuring a comfortable and productive experience for both the child and the orthodontic team.
White Label vs Alternative Aligner Companies
White Label vs Alternative Aligner Companies
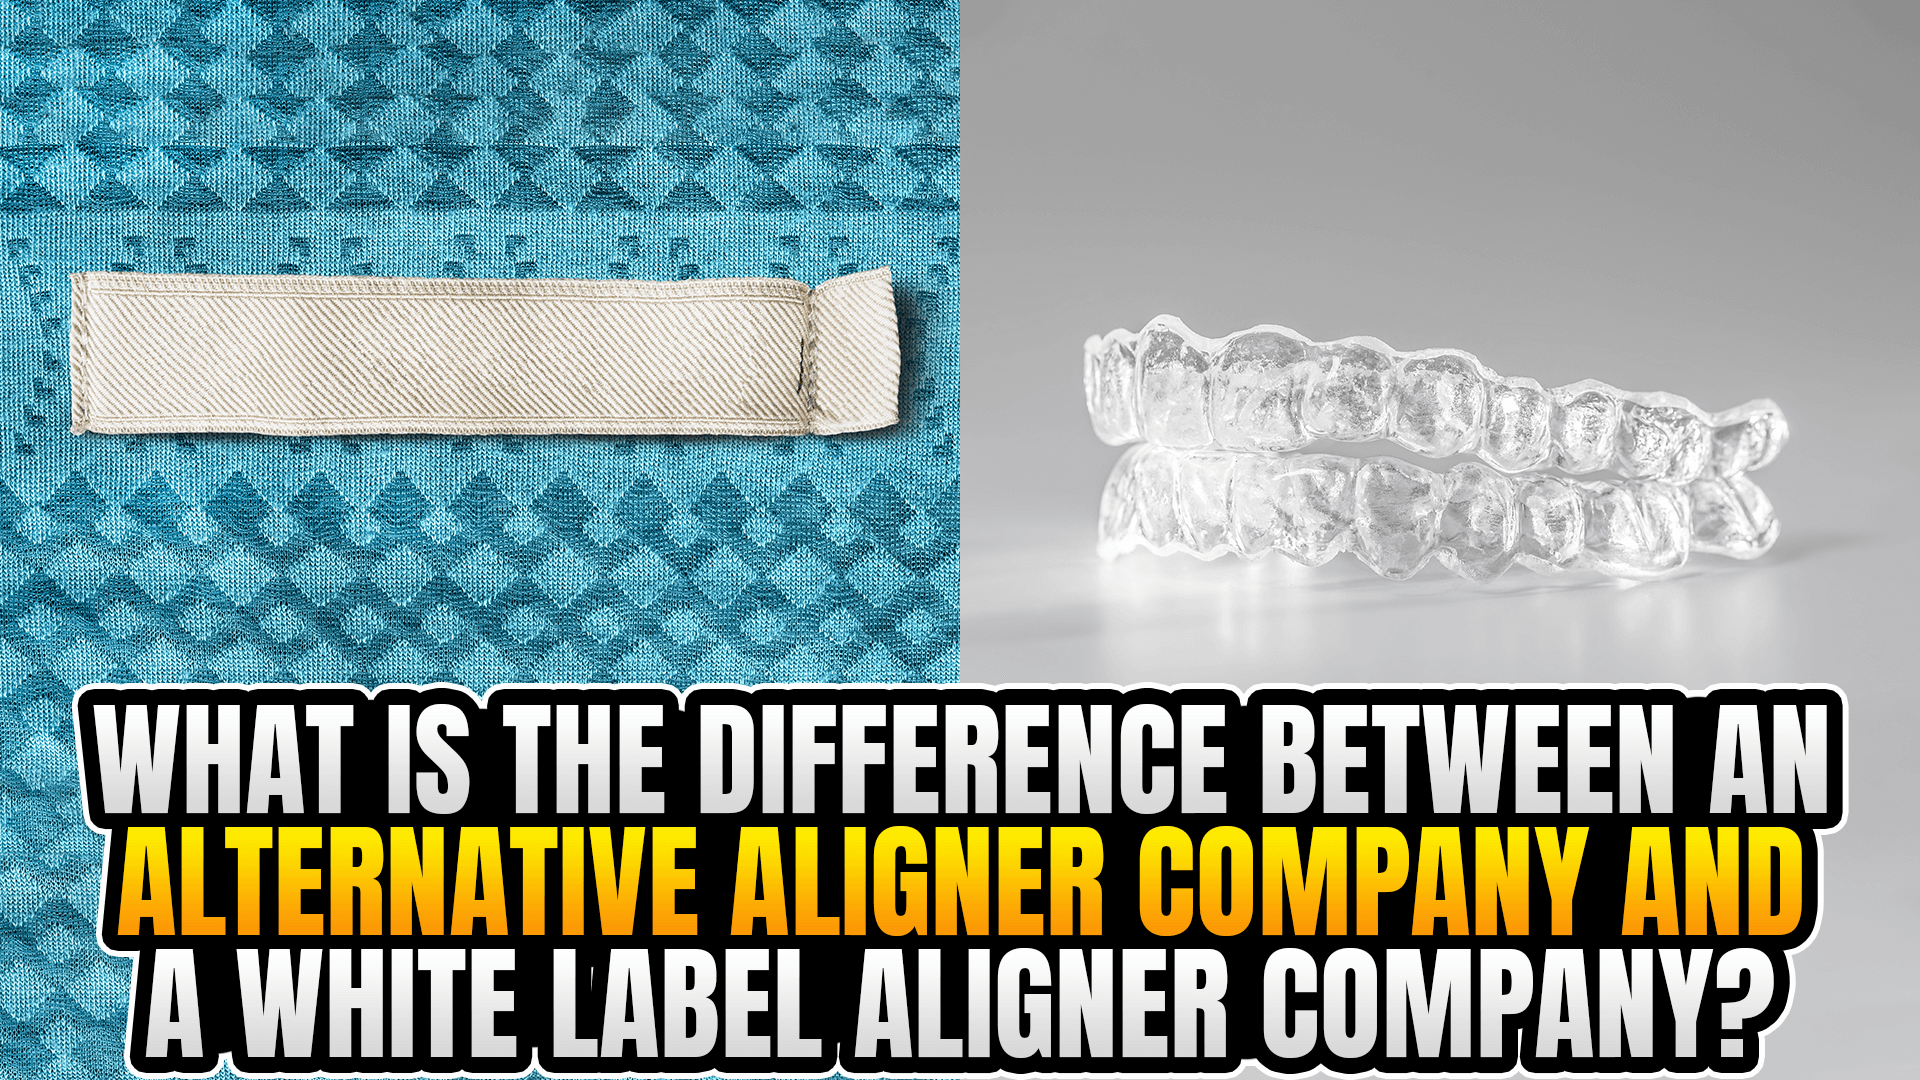
Have you ever wondered about what white label and alternative aligner companies are and how they differ? The differences between white label and alternative aligner companies in orthodontics aren’t always easy to identify, but luckily, we’ve outlined some of the main things you need to know to help with this. Hopefully, this will help you decide where to go for your custom aligners.
What’s the Difference Between White Label and Alternative Aligner Companies in Orthodontics?
When choosing an aligner company, it’s important to consider between investing in in-house aligners or custom aligners. And, of course, if you choose custom aligners, choosing between white label and alternative aligner companies is vital.
Sometimes, both white label and alternative custom aligners are grouped together. However, there are technically subtle differences between custom and white label aligners you should also know.
Alternative Aligners
An alternative custom aligner company is a brand (other than the “big two” brands: Invisalign and ClearCorrect, which patented the custom aligner designs first). Alternative custom aligner companies have branding and will often do marketing and the like to encourage people to try them. These alternative aligners will usually be around 20% more affordable than other options.
White Label Aligners
Another option is white label aligners. White label custom aligners are generally unbranded and can even be made in-house using 3D printers and the like. Alternatively, they may have the branding of the printing company, but they typically won’t have specific aligner branding.
White label aligners are often very affordable compared to branded solutions, and they can be either outsourced or made by your team. However, you will need to pay per aligner or retainer, rather than paying for an unlimited plan. This also means you’ll be paying for every single refinement or revision aligner.
Can All Cases Use Alternative or White Label Aligners?
Green cases are often able to be done with any choice of aligner company; however, if you have a yellow or red case, using Invisalign or getting orthodontics support is generally advisable.
What Will Happen If I Don’t Finish Active Invisalign Orthodontics Cases?
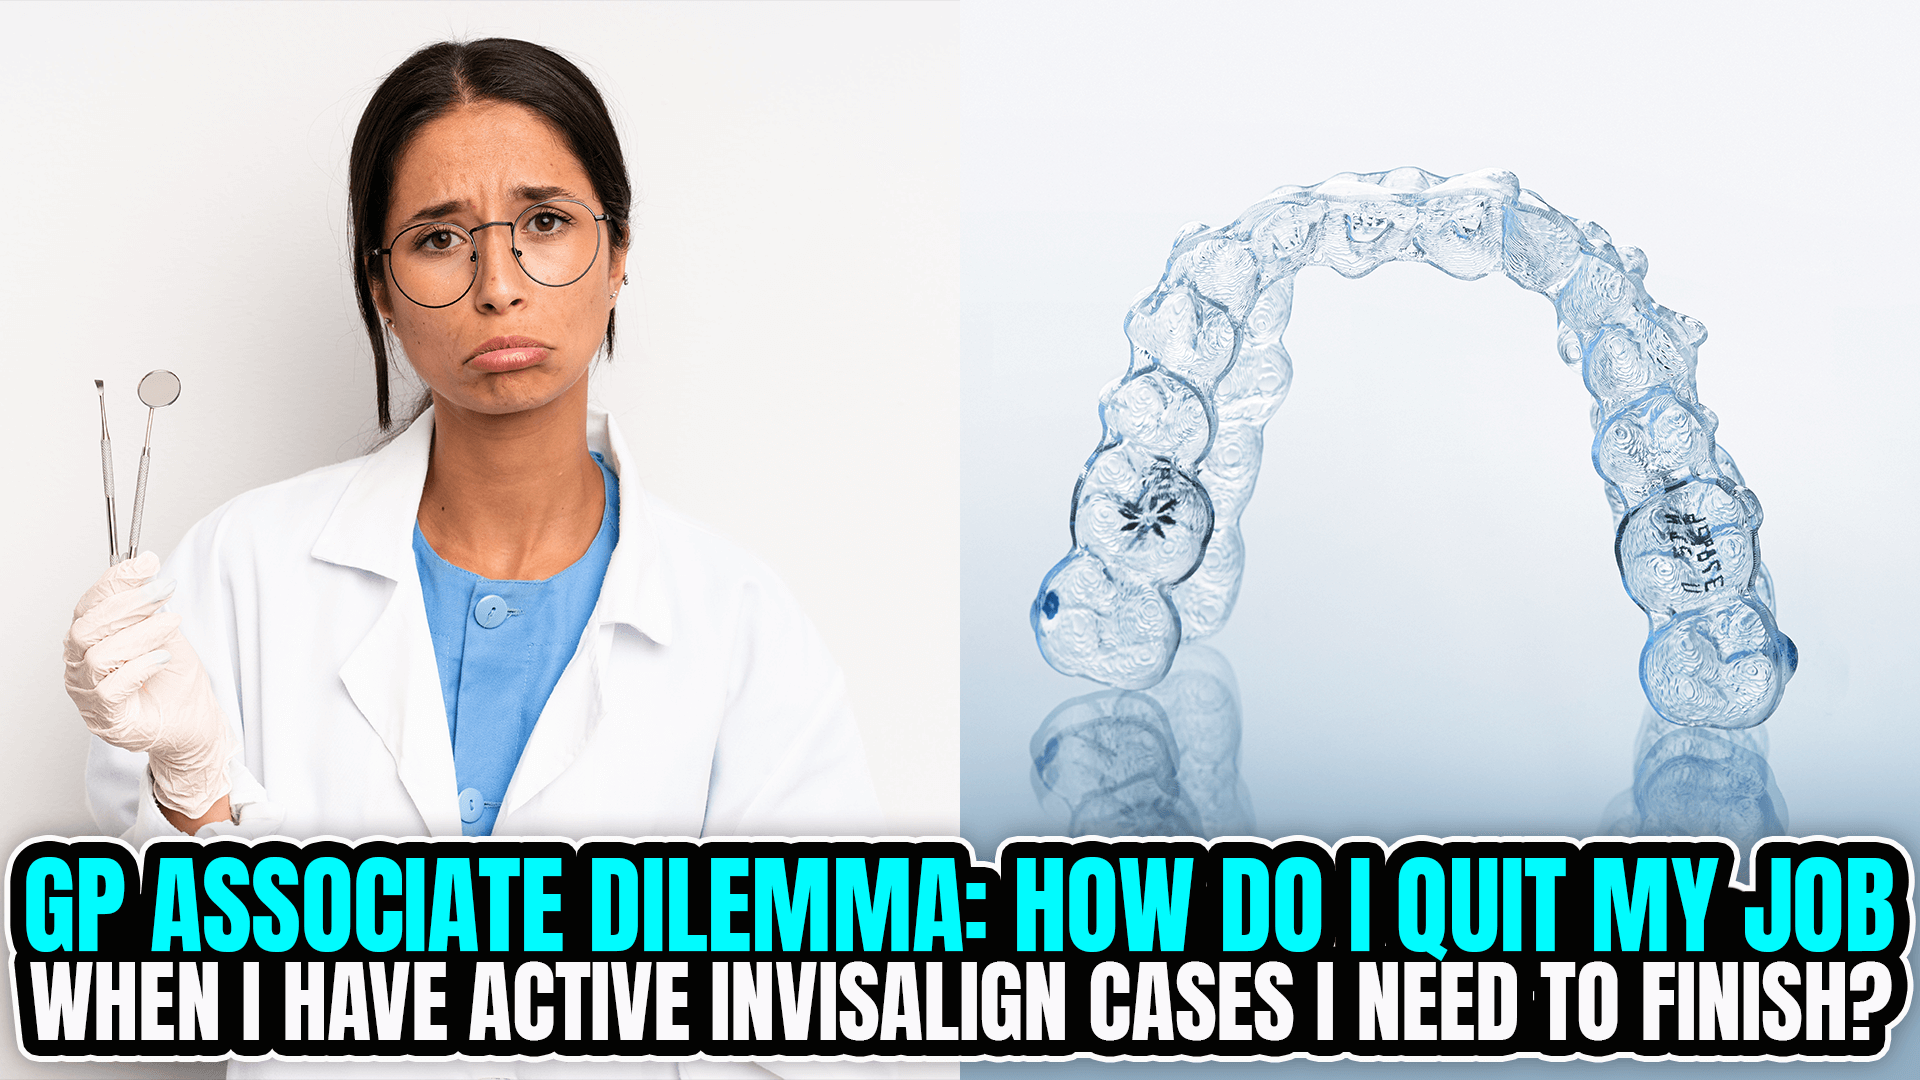
Quitting Your Job with Active Invisalign Cases
Sometimes, things happen outside of our control that can leave us having to leave our jobs behind. Whether it’s a change in circumstances, a family emergency, or the like, knowing how to prepare for these situations is important. However, one topic that’s not necessarily easy to work out is how to address your active Invisalign cases – and we’ve outlined some key things you need to know in today’s orthodontics guide to help.
Do I Need to Finish Active Invisalign Cases Before Leaving?
One of the first questions you may have asked is, do you need to finish your active Invisalign cases before leaving? Well, if you’re an associate, this will likely depend on your contract. If your contract requires you to finish cases, you’ll likely need to adhere to this. The requirements may also depend on whether you’re a business employee or a 1099 contractor.
It’s also worth considering whose Invisalign account the patient falls under (e.g., in your personal account, the owner-doctor’s account, or the company’s account). If the patient is in the owner-doctor’s account, this may mean you have fewer requirements to finish the case. However, if the patient is in your account, you’ll likely need to take responsibility for finishing the case (or arranging for someone else who can). You may be able to transfer the patient to the owner-doctor’s or company’s account.
Will I Get Paid for Unfinished Cases?
There’s no saying whether you’ll get paid for unfinished cases. Check the terms of your contract to see whether you will be paid (and how much) for an active unfinished Invisalign case. Often, however, you won’t be paid all or part of the fee.
What Will Happen If I Don’t Finish Active Invisalign Orthodontics Cases?
If you don’t finish active Invisalign orthodontics cases (or arrange for someone suitably experienced to do so), there’s a significant risk of getting poor reviews on your account. This could lead to patient abandonment and make it harder to get future work in your new area after leaving the previous employer.
Fortunately, here at Straight Smile Solutions, we can help with this! We can help audit your cases, informing you as to the progress of your cases; this makes it easier to transfer cases to the owner-doctor or another associate while giving you peace of mind.
How to Close Open Contacts Posterior Spaces at the End of Invisalign / Orthodontic Treatment

How to Close Open Contacts Posterior Spaces at the End of Invisalign / Orthodontic Treatment
Dr. Amanda – Straight Smile Solutions
I. Introduction
A. Issue: Finished orthodontic treatment, but open contacts persist.
B. Options for resolution.
II. Causes of Open Contacts
A. Insufficient IPR (Interproximal Reduction).
B. Challenge of accurate IPR.
III. Learning Accurate IPR
A. Check Dr. Amanda’s IPR videos on gpwebinar.com.
B. Upcoming free live IPR video in May 2021 (CME units).
C. Sponsored by Garrison Dental; visit their website to sign up.
IV. Options for Resolving Open Contacts
A. Unlimited/Comprehensive Invisalign or Clear Correct Cases
1. Refinement
2. New scan or impression.
B. Invisalign Cases
1. Virtual Power Chain (VPC)
a. Watch Dr. Amanda’s VPC videos for detailed instructions.
b. Risk: Overcrowding; proceed cautiously.
2. Add VPC to any Invisalign case at the end.
C. Other Brands
1. Likely need to do a refinement due to limited options.
D. Circumferential Wraparound Retainer
1. No occlusal plane wires.
2. No stabilizing wires.
3. Risk of space closure interference; no guarantees.
E. Custom Mini Positioner
1. From TP Orthodontics (US patents).
2. Precise placement like a denture wax-up.
3. Customize to close spaces.
F. Considerations for Bands Instead of Brackets
1. Open contacts are also relevant in bands.
Summary
Addressing open contacts and posterior spaces at the end of Invisalign or orthodontic treatment is crucial for achieving a beautiful and functional smile. Through the careful planning and execution of orthodontic techniques, patients can enjoy the benefits of a harmonious bite, enhanced aesthetics, and improved oral health. The journey toward closing these spaces may involve using various appliances and strategies, ultimately leading to a successful treatment outcome. The key takeaway is that post-treatment care and retention are just as vital as the initial phase of orthodontic treatment. With the right approach and commitment, patients can confidently embrace their new smiles, knowing that open contacts and posterior spaces are no longer a concern.
Should I Band Es or 6s in an RPE Case?
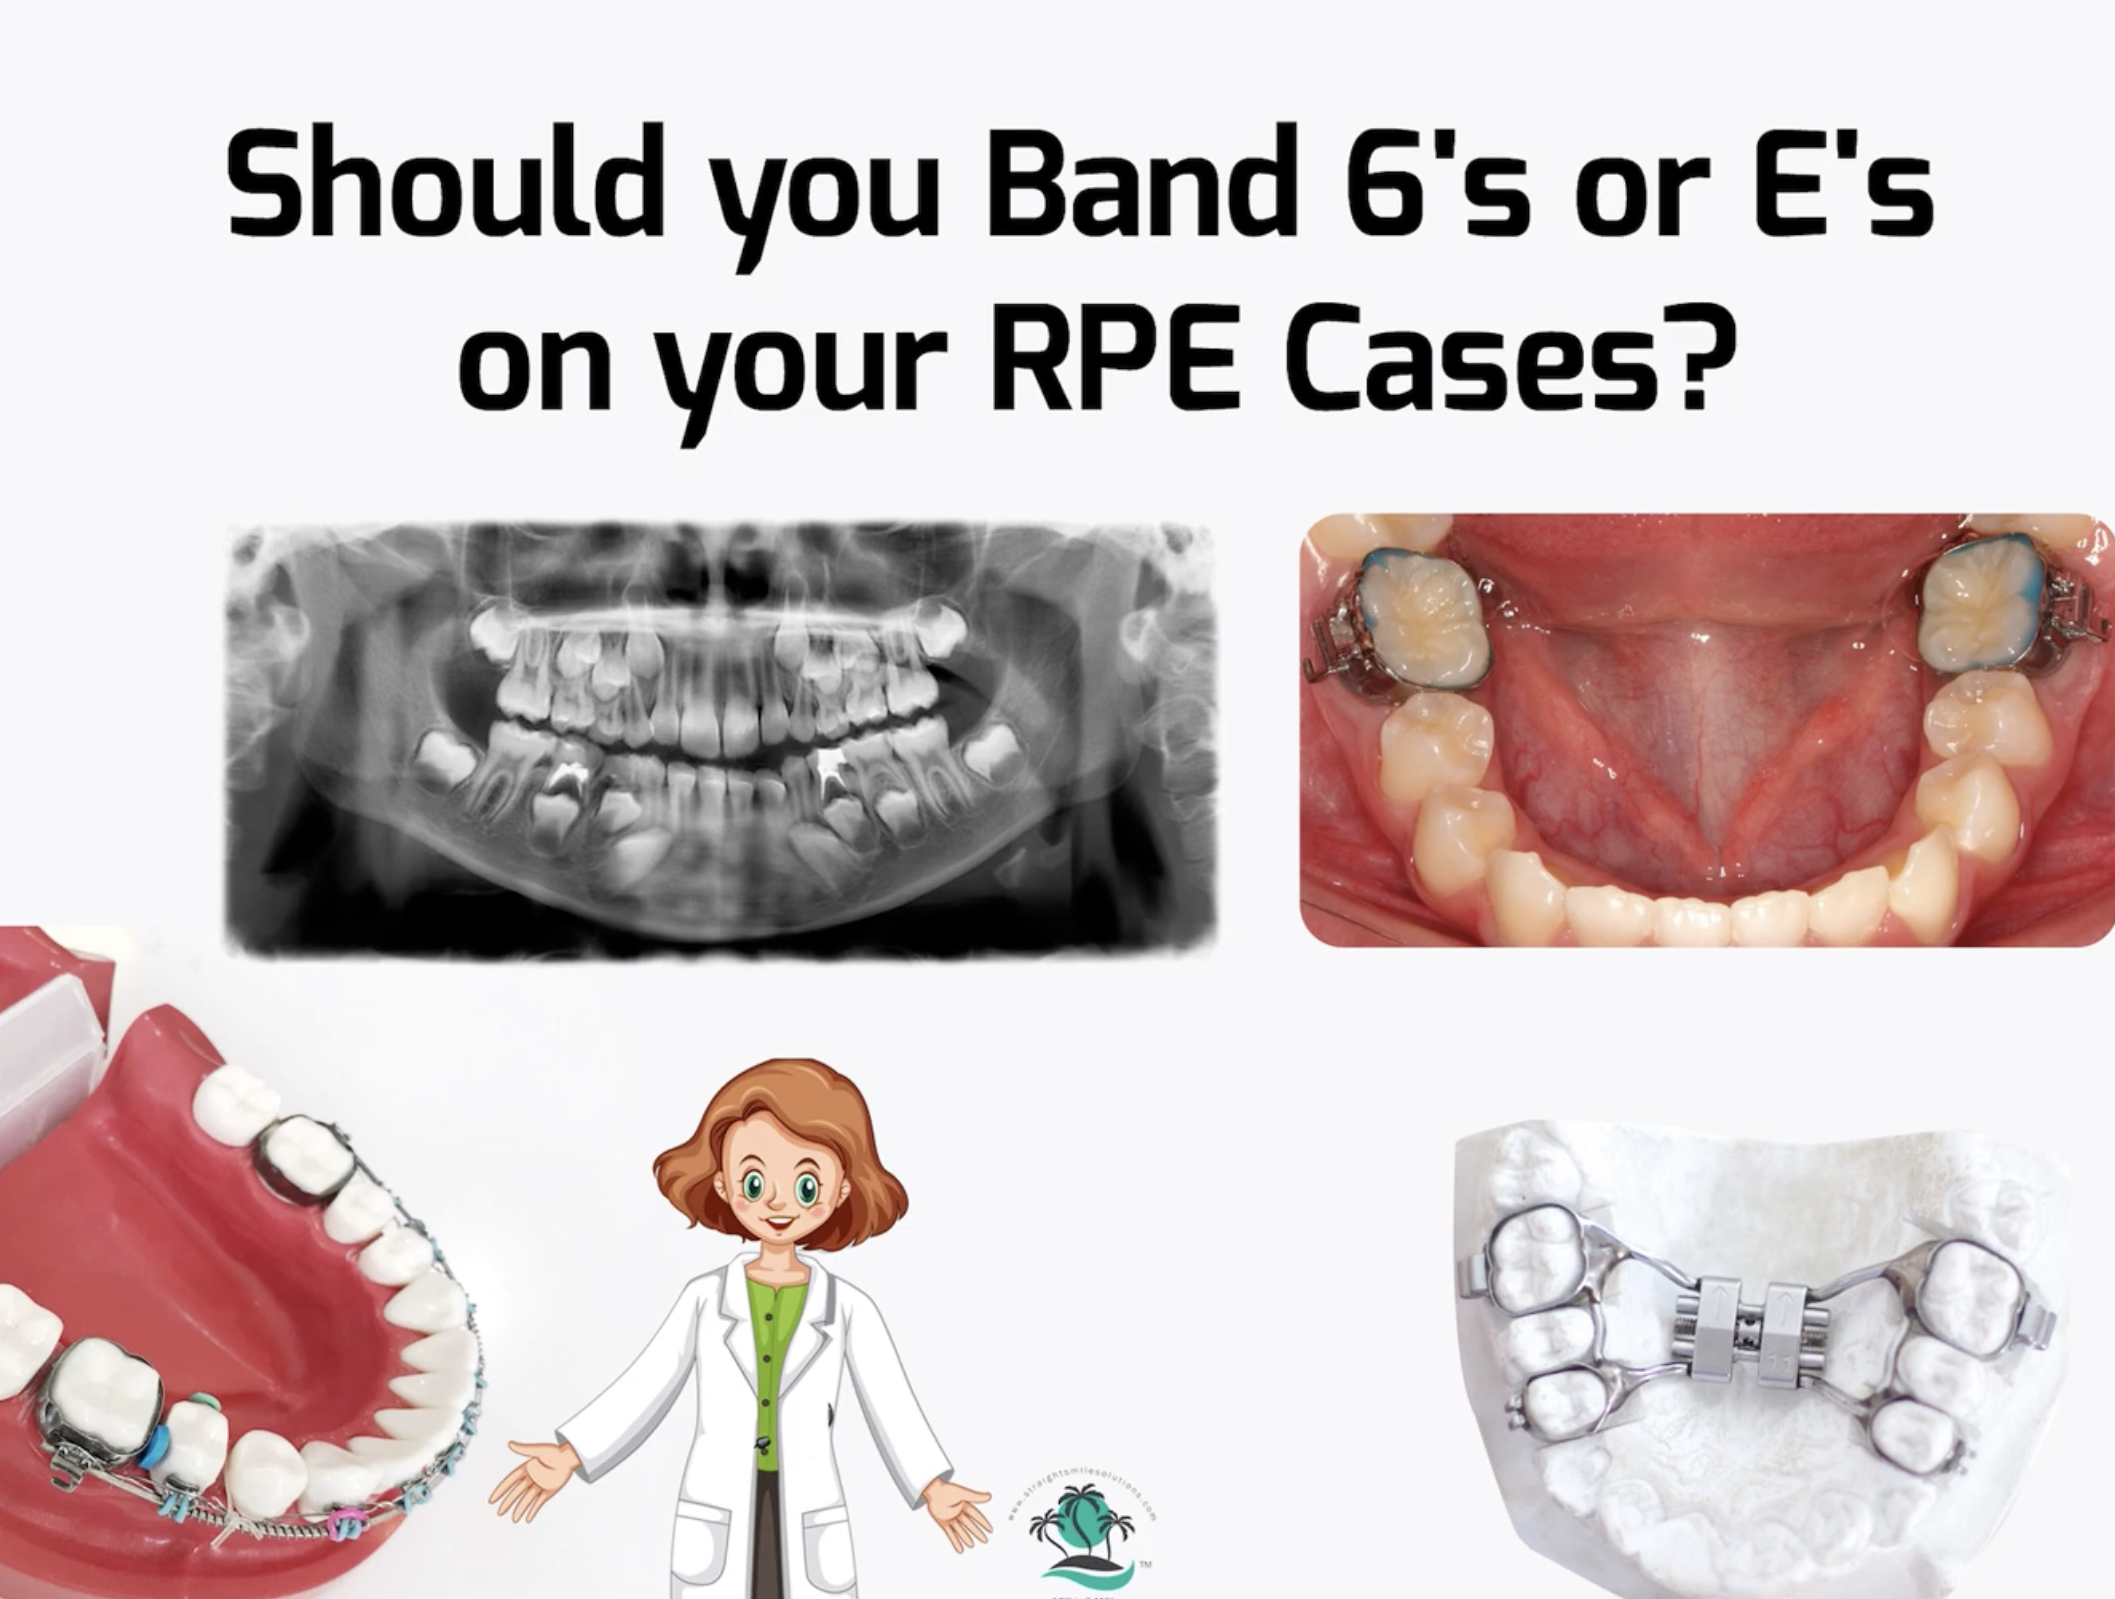
If you have an RPE case, it’s important to consider whether you should be banding Es or 6s. 6s are the first molars that come in when patients are around six years old. Meanwhile, Es are the second baby molars that come in at around the age of two years. However, it’s not clear which you should be banding in RPE, which is where we can help.
Should I Band Es or 6s in an RPE Case?
If you have an RPE case in orthodontics, you’ll need to consider your treatment plan carefully. Ideally, take an x-ray of the patient before going any further, as this can help influence your decision.
The main benefit of banding the Es is that they tend to be a little more comfortable for the patient, and the teeth will fall out later regardless. However, if the Es have begun to fall out and the 6s are through, these can be banded as well.
Critically, if you think that the patient’s baby teeth are likely to fall out during or shortly after the treatment plan, it’s worth not banding those teeth. Check the x-ray and try to make sure that you’ll have at least two to three months to complete the RPE case before any banded Es fall out.
And, of course, a more gradual orthodontics approach may give better results, especially in a general dentistry clinic, so ensuring you have plenty of time to complete the case can help reduce the risk of complications.
Bonding Buttons and Attachments to Crowns: What You Should Know
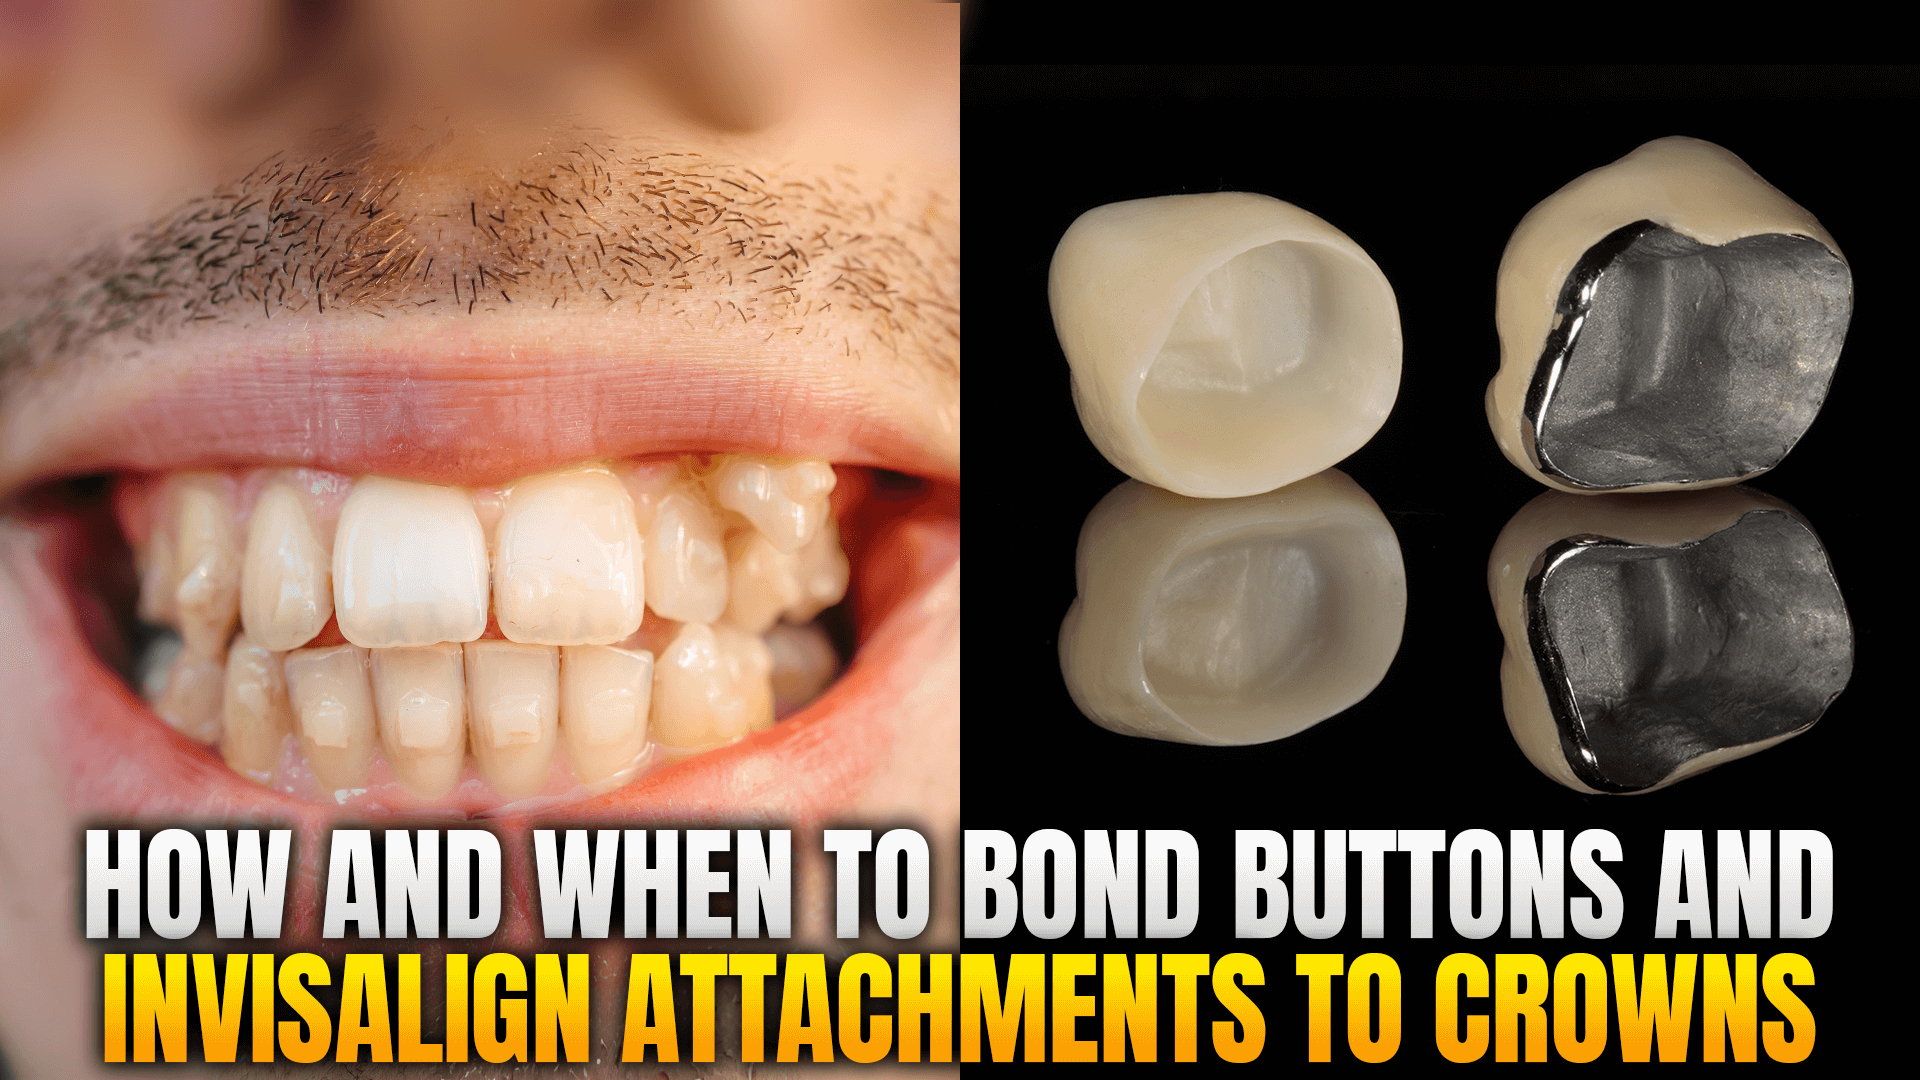
Bonding Buttons and Attachments to Crowns: What You Should Know
If you’ve been taking on Invisalign or clear aligner cases, knowing how to tackle cases with crowns is hugely important. In line with this, today’s brief guide outlines the core things you need to know to help with this.
Should You Bond Buttons and Attachments to Crowns?
If you’ve got a patient with crowns, it’s first important to clarify whether you should even consider bonding buttons and attachments to the crown. Well, for simple cases (e.g., mild to moderate crowding or Class I), you may just be able to bypass the tooth by blocking off buttons or attachments. This is because attachments may be less needed in easier cases. However, for more severe cases (e.g., extreme crowding), you may need a button or attachment.
If you’re not sure, you’ll likely want to run this by an experienced orthodontist first. Luckily, our experts here at Straight Smile Solutions can help with this, so if you need a one-to-one consultation to help with your decision, contact us today and we’d be thrilled to help!
What to Do When You Need a Button or Attachment on a Crown Tooth
If you have a patient who has a severe case and has crown over a tooth, you’ll need to consider the crown material. Crowns are usually made from porcelain, gold, or stainless steel. If the patient has a stainless steel crown, these are usually temporary, so it’s usually best not to do ortho in these cases.
If the patient has a gold crown, you may need to fit a fitted band over the gold. However, you can’t bond or glue a button to metal, so that option’s out (unless you drill a hole in the gold crown).
Finally, for porcelain crowns, you may be able to bond, depending on the type of porcelain. Usually, new porcelain crowns that are shiny won’t bond buttons well, so you may need to drill a hole in the crown to bond. You can also get dedicated porcelain bonding kits.
Always get a written disclaimer before doing the treatment plan so the patient is aware that the crowns may need to be damaged if bonding doesn’t work. Otherwise, you may be liable for the cost of new crowns after ortho finishes.