
StraightSmile Solutions®
Invisalign vs. Alternative Aligners vs. White Label Aligners
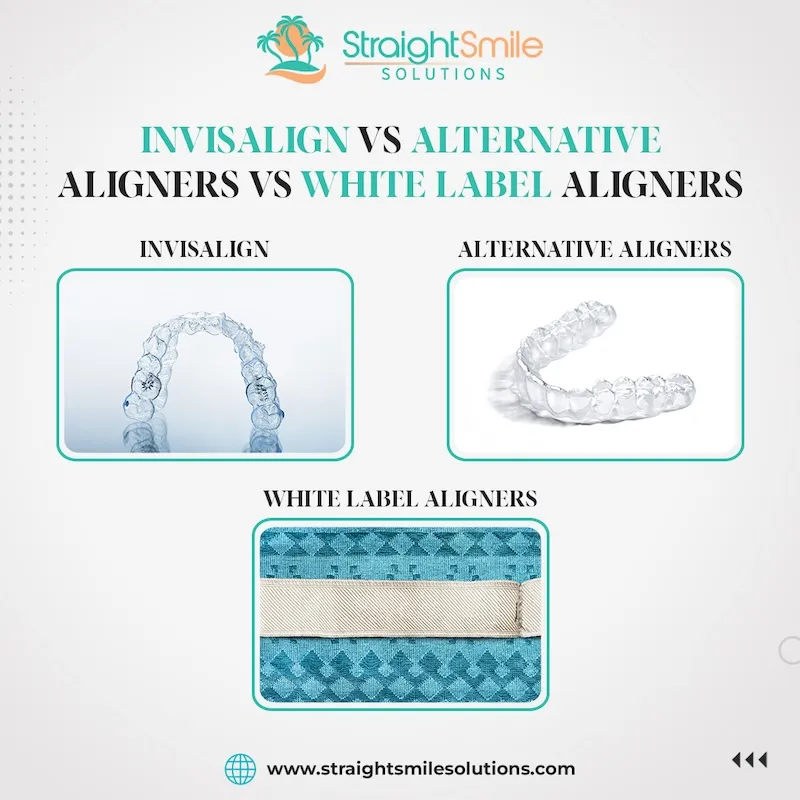
Invisalign vs. Alternative Aligners vs. White Label Aligners
I. Introduction
Dr. Amanda from StraightSmile Solutions. Today, we delve into the fascinating world of orthodontic aligners, breaking down three key terminologies that might be familiar to some but are crucial for everyone involved. At the forefront is the OG of aligner systems – Invisalign, a pioneer since 1998. We explore alternative aligner systems, a diverse landscape with countless brands emerging post-Invisalign patents. Learn the importance of case selection, predictability, and accountability loops for successful outcomes. Lastly, discover the cost-effective realm of white label aligners, offering flexibility and cash flow advantages. Join us on this journey as we unravel the intricacies of modern orthodontics.
II. Invisalign – The OG Aligner System
A. Originated in 1998
B. First exposure in 1998 at UCSF
C. Leading aligner system with advanced features
D. Higher lab fee due to R&D, marketing, and brand awareness
E. Capabilities: Lower jaw growth, expander attachment
F. Continuous innovation but expensive and requires an upfront payment
III. Alternative Aligners
A. Hundreds of brands globally
B. Proliferation post-expiration of Invisalign patents
C. Caution: Quality varies, some good, some not
D. Case selection crucial for success
E. Recommendation: Watch case selection videos for guidance
F. Predictability depends on a reliable ClinCheck and accountability loop
G. Accountability Loop: Virtual or in-person check-ins for each aligner
H. Low revision and refinement rates achievable with proper planning
IV. White Label Aligners
A. Term: Unbranded aligners from the manufacturing system
B. Cost: Setup price ranges from $90 to $200
C. Process: Third-party setup, local lab manufacturing
D. Appearance: Generic, unbranded aligners
E. Branding legality: Check FDA approvals for custom branding
F. Cost-effectiveness: Lower lab fees, around $18-$25 per aligner
G. Batch printing option for cost control
H. Accountability Loop crucial for success
V. Choosing Between Options
A. Invisalign
1. Benefits: Advanced features, continuous innovation
2. Drawbacks: Expensive, upfront payment, higher lab fees
B. Alternative Aligners
1. Benefits: Variety, case-specific suitability
2. Drawbacks: Quality varies, and thorough case selection is crucial
C. White Label Aligners
1. Benefits: Cost-effective, batch printing option
2. Drawbacks: Generic appearance, accountability, Loop essential
VI. Conclusion
Navigating the world of aligner systems requires a thoughtful consideration of various options. Invisalign is the pioneer, boasting advanced features at a higher cost. Alternative aligners, numerous in variety, offer viable choices if the right case is selected and a predictable setup is ensured. White label aligners provide a cost-effective alternative, allowing flexibility in batch printing and minimizing upfront expenses. However, success hinges on maintaining an accountability loop, whether virtual or in-person. Choosing the most suitable system depends on individual preferences, desired outcomes, and financial considerations. With the right knowledge and strategic approach, practitioners can effectively incorporate aligner systems into their orthodontic practice.
Fixing a Mental Labial Fold

Fixing a Mental Labial Fold
Some patients may demonstrate a mental labial fold (otherwise known as a mentalis fold or mental labial angle, among others). It’s potentially possible to measure the angle of the mental labial fold as part of your orthodontics service,
What Angle Suggests a Mental Labial Fold?
It’s not always clear where a case is actually indicative of a mental labial fold. However, measuring the angle in this region can allow you to determine whether there is this type of fold present in a patient more accurately.
Generally speaking, the most attractive angle is generally considered to be between 107 and 118 degrees, although ranges up to 140 may be considered still within that normal category. Anything significantly outside of that range, such as below 98 degrees or above 160.
Can An Excessive Mental Labial Fold be Fixed with an Orthodontics Treatment Plan?
In many cases, an orthodontics treatment plan can be a successful option to help resolve an excessive mental labial fold, which is worth keeping in mind. However, in order to fix these cases with orthodontics, you will usually need to start very young (often in Phase 1). It will often also be combined with oral myofunctional therapy.
The cause of these cases can vary significantly. Sometimes, it’s simply a complication of Class 2 and a big chin bud. However, it can also be the result of habits (often lip habits) and certain types of strains.
In an adult, to resolve excessive mental labial folds, jaw surgery and plastic surgery will likely be needed, potentially including fillers and recontouring. Contact an orthognathic surgeon and an OMT if you have an older patient experiencing this sort of challenge to ensure it is properly addressed.
What is Hybrid Orthodontics?
What is Hybrid Orthodontics?
If you have been looking to start offering orthodontics for general dentists, there’s a lot you’ll potentially need to keep in mind – and hybrid orthodontics is just one such example here. In line with this thought, today, we’re looking at some of the main things you should know about hybrid orthodontics, including what this service is and how it might work for your needs.
What is Hybrid Orthodontics?
Hybrid orthodontics is a slightly different approach to regular orthodontics services, where you use two different systems to get a better outcome. Usually, a hybrid orthodontics treatment plan will begin with braces to address harder movements before progressing to aligners for finishing cases. However, this could be done in reverse, or you may want to use a functional appliance such as a palatal expander or twin block.
Why Hybrid Treatments Can be Useful
Not all movements are necessarily easy to complete, and some may be easier to address with either braces or aligners. As such, a hybrid orthodontics treatment plan can potentially offer the best of both worlds for general dentists doing certain movements. In particular, braces are particularly effective for tricky moves, such as high canines, a very rotated premolar tooth, or uprighting a molar. Meanwhile, aligners can be more effective for some other types of movements, usually more delicate ones.
This approach can help to save a significant number of aligners, which saves a great deal of money and makes the treatment plan a lot easier too. This is also a great way to save on lab fees, potentially even allowing you to use a white label or alternative aligner brand.
RED LIGHT CASE SELECTION- DO NOT TAKE THESE CASES!
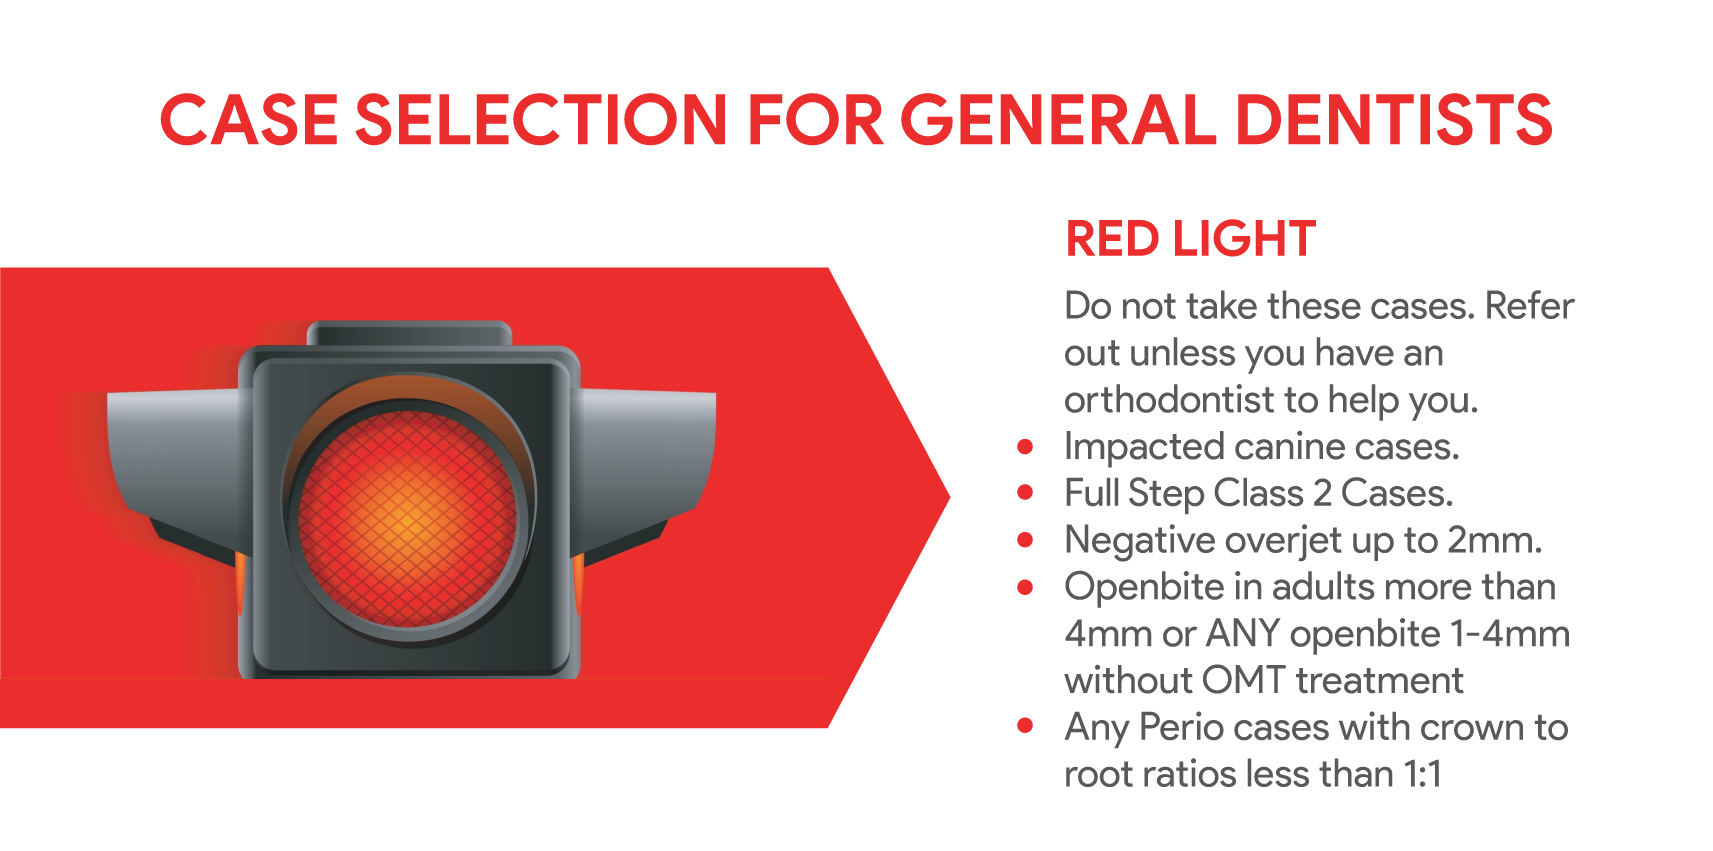
RED LIGHT CASE SELECTION- DO NOT TAKE THESE CASES!
I. Introduction
Hey, it’s Dr. Amanda, the face behind StraightSmile Solutions. If you’ve been following my journey, you might have caught some of my earlier videos, particularly those color-coded green, yellow, and red. Today, I bring you an updated version as I gear up for an exciting webinar on May 7th – it’s free, and you’ll snag two CE units! Check out my website to register. Now, let’s dive into the nitty-gritty. Red light cases are the ones I strongly advise against for general dentists. Trust me; these are best left to the orthodontists. From canine impactions to tricky class two cases and challenging open bites, these are potential headaches and liabilities you don’t want on your plate. Stay tuned for more insights, and don’t forget to hit the like button and subscribe – it helps fuel my coffee addiction and covers those overhead expenses. Now, let’s navigate the world of orthodontics together!
II. Webinar Announcement
● Date: “May 7th.”
● Free: “It’s free.”
● CE Units: “Get two CE units.”
● Registration: “Sign up at my website, StraightSmile Solutions.”
III. Channel Promotion
● Request: “Please like and subscribe.”
● Appreciation: “I appreciate it; it pays for my coffee and overhead expenses.”
IV. Red Light Cases
● Definition: “Red light cases are cases I don’t want you to take as a general dentist.”
● Orthodontist Recommendation: “Pass them off to orthodontists.”
● Headaches and Liability: “Taking these cases can lead to trouble and potential liability.”
V. Highlighted Red Light Cases
● Canine Impaction: “Avoid canine impaction cases with exposures.”
● Full Step Class II Cases: “Don’t take full step Class II cases, especially in non-growing patients.”
● Negative Overjack Cases: “Exercise caution with major Class III cases, especially in non-growing patients.”
● Open Bite Adults: “Avoid open bite cases in adults exceeding 4 mm without OMT treatment.”
● Open Bite Kids/Adults: “No open bite cases without OMT treatment, and ensure a proper report.”
VI. OMT Treatment Requirement
● Clarification: “OMT treatment means oral M functional therapist.”
● Verification: “Require a report from OMT stating completion and recommendations.”
VII. Crown to Root Ratio
● Definition: “Paral cases with an unfavorable crown-to-root ratio less than 1:1.”
● Stability Concern: “More crown above the bone than root inside can lead to instability.”
● Periodontist Involvement: “Mandatory involvement of a licensed periodontist at every step.”
VIII. Conclusion
Dr. Amanda from StraightSmile Solutions emphasizes the importance of avoiding red light cases for general dentists. These challenging cases, including canine impactions with exposures, full-step class two cases in non-growing patients, negative overjet cases, and open bite cases, especially without oral functional therapy, pose significant challenges and potential liabilities. Dr. Amanda advises against taking these cases unless there’s orthodontic collaboration and warns about the necessity of a licensed periodontist’s involvement in cases with an unfavorable crown-to-root ratio. The insights shared in her videos serve as a valuable guide for dentists navigating the complexities of orthodontic cases, underlining the significance of specialized expertise and careful consideration in treatment planning.
What are Yellow Light Cases?
What are Yellow Light Cases?
Knowing the correct approach to pick easy orthodontics cases isn’t always the simplest, and if you are a new general dentist just getting started in offer ortho services with clear aligners, knowing the difficulty of each different treatment is vital. Luckily, we’ve outlined some of the main things you need to know about “yellow light” cases as follows – situations that may need a slightly more cautious approach.
What are Yellow Light Cases?
When it comes to orthodontics, not all cases are necessarily easy, nor can they be tackled with just any clear aligner brand. Here at Straight Smile Solutions, we refer to many of these cases as yellow light cases, or “warning” cases – situations in which you should only consider progressing if you have the support of a professional, qualified orthodontist on your side. This is especially true for your first fifty cases or so, and you should continue to get support until you are extremely advanced with orthodontics, including braces, clear aligners, and Phase 1.
Examples of Yellow Light Cases
If you see any of the following in your clinic, there’s a good chance they’re yellow light cases and will need support from a professional orthodontist to tackle them safely.
- Mixed dentition cases
- Slight Class 2 cases (molars and canines up to 4mm)
- Edge to edge anterior crossbite
- Deep bite and overbite cases (where more than 50% of the lower incisors are covered)
- Open bite cases in children, provided that the etiology is diagnosed and treated first (always get an OMT to do a functional evaluation and sign off the case in writing and ensure habits are controlled before starting)
- Mild periodontal disease with past attachment loss, provided that a 1-month evaluation is completed and charted first and that pockets are 3mm or less
- Posterior crossbite cases in children under 15 years old (don’t tackle this in adults!)
Keeping these tips in mind should help you decide whether or not to take on a case. If you’re unsure, don’t panic; our orthodontics experts here at Straight Smile Solutions can help you choose the right approach for your yellow light cases.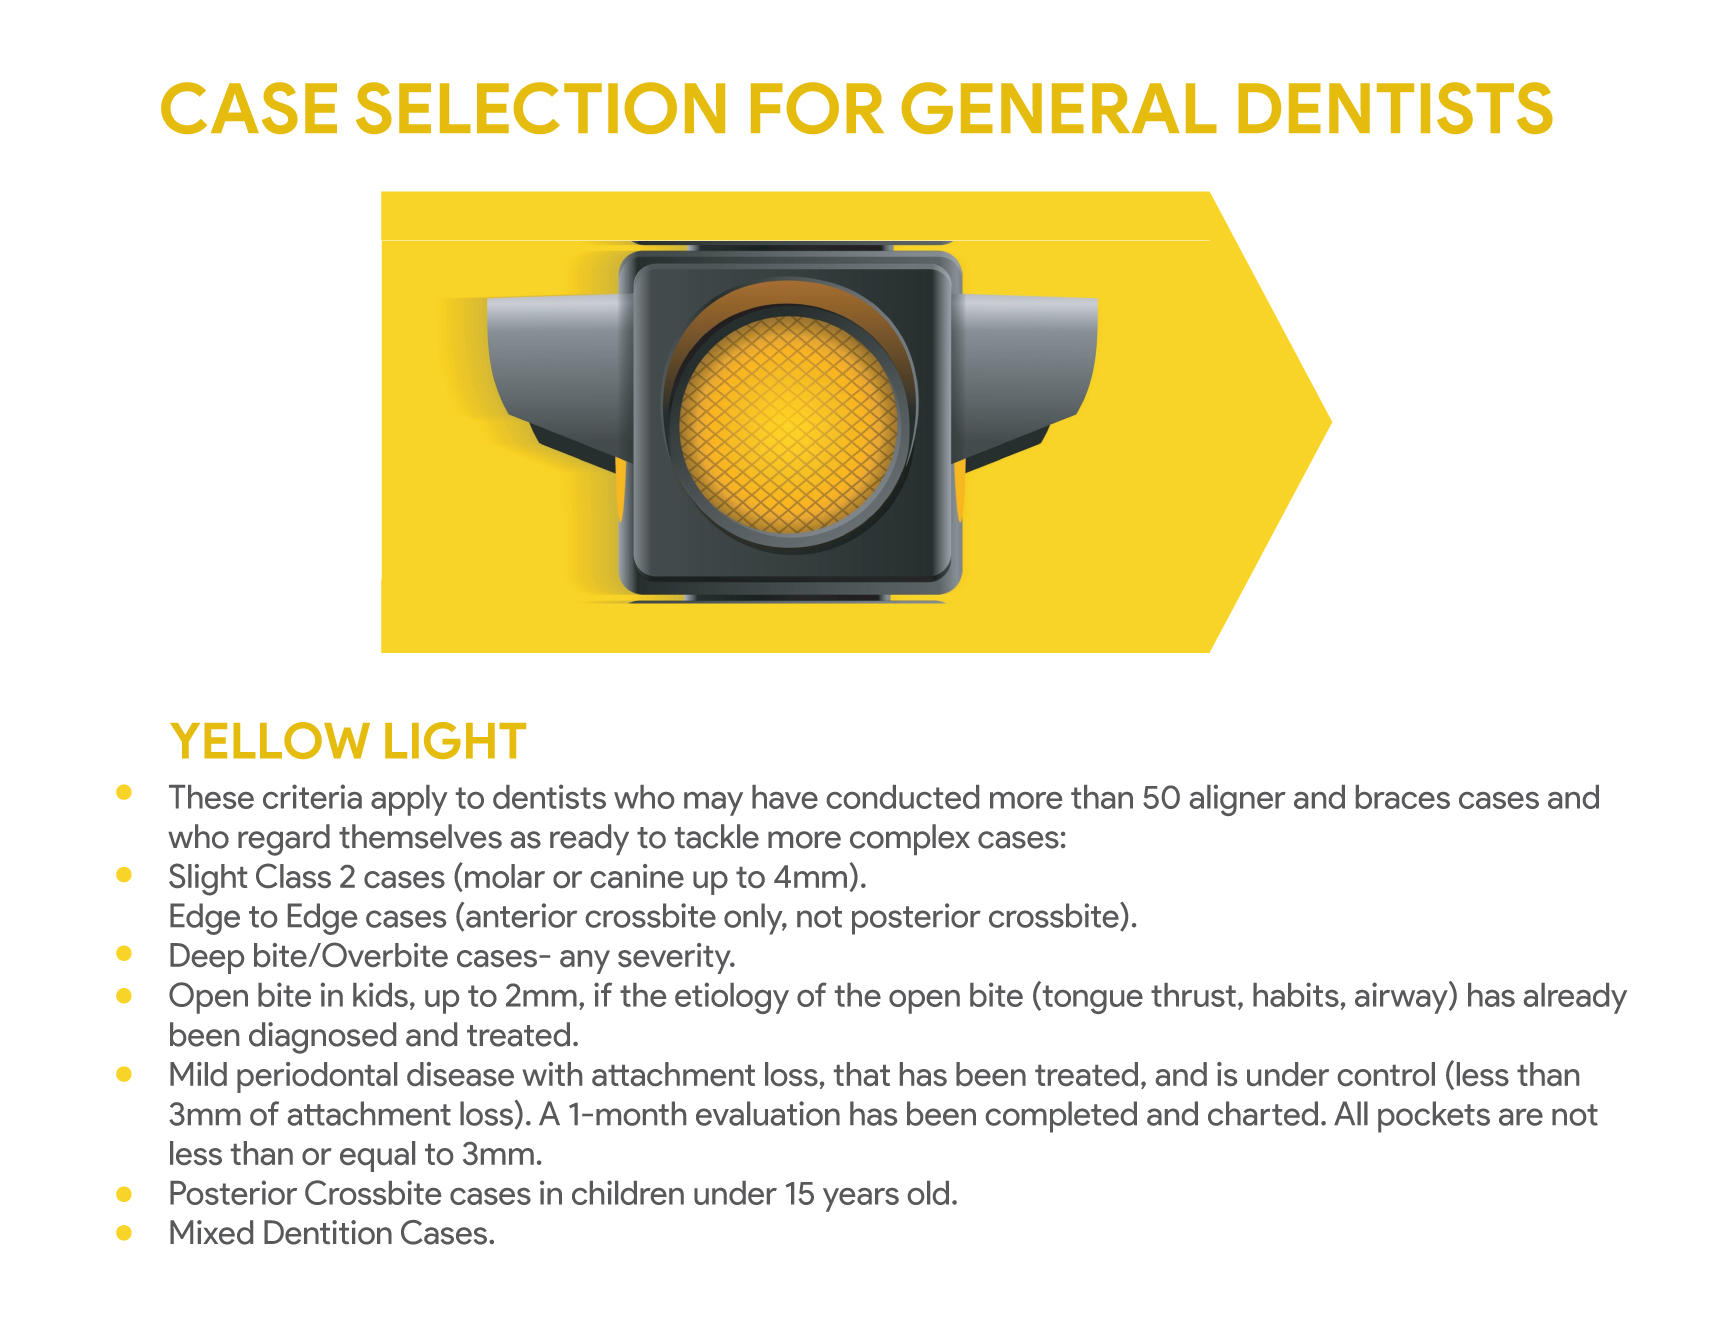
What are Green Light Cases?
As a general dentist venturing into the orthodontics world, understanding the different types of cases you might be presented with is hugely important. This can significantly impact your choice of clear aligners and can determine whether you’ll be tackling easy orthodontics or more difficult cases. As such, today’s brief guide has outlined some of the main things you should know about “green light cases” to help make selection easier.
What are Green Light Cases?
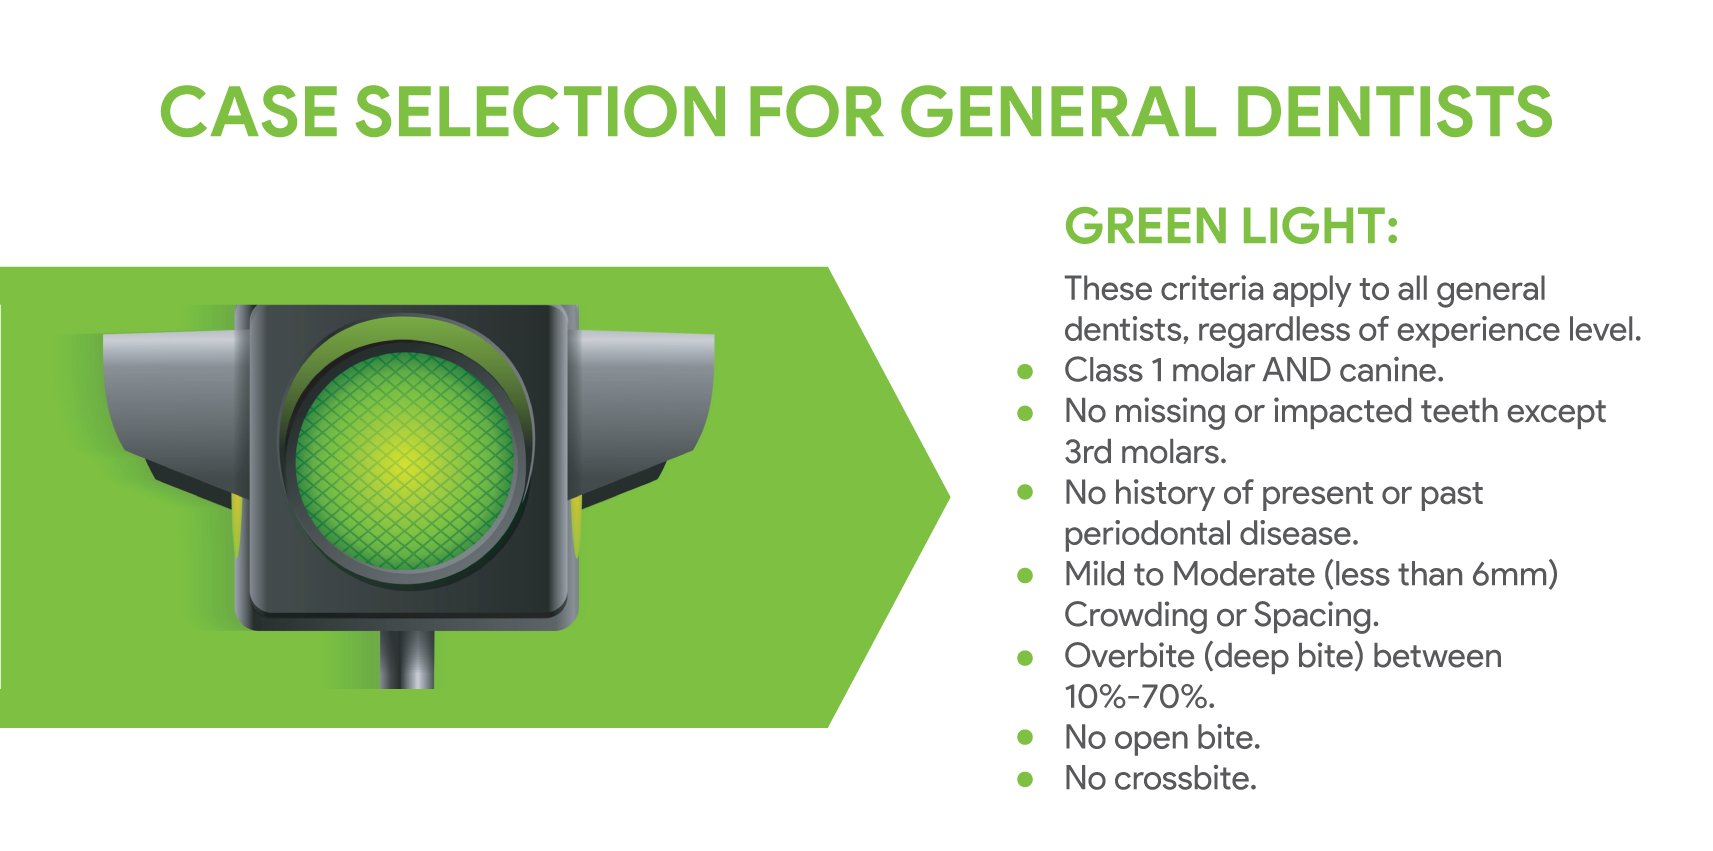
Green light cases are great examples of easy orthodontics treatments that are simple and straightforward to tackle. These cases are great options for new general dentists to take who are just getting started in the ortho field. Plus, you can use almost any clear aligner systems for these cases.
Examples of Green Light Cases
Green light cases can include patients who fit into the following examples:
– Class 1 molars and canines
– No missing or impacted teeth (excluding 3rd molars)
– No history of periodontal disease
– Moderate or mild crowding or spacing (6mm or less)
– Minor overbite and deepbite cases between 10% and 70%
– No openbites or crossbites
Usually, these will be permanent teeth cases or relapses. They are very quick and simple to address and make for incredibly easy orthodontics cases while you’re learning the ropes.
Getting Good Outcomes With More Effective Treatment Planning: The Dentist Drives the Bus!
Getting Good Outcomes With More Effective Treatment Planning: The Dentist Drives the Bus!
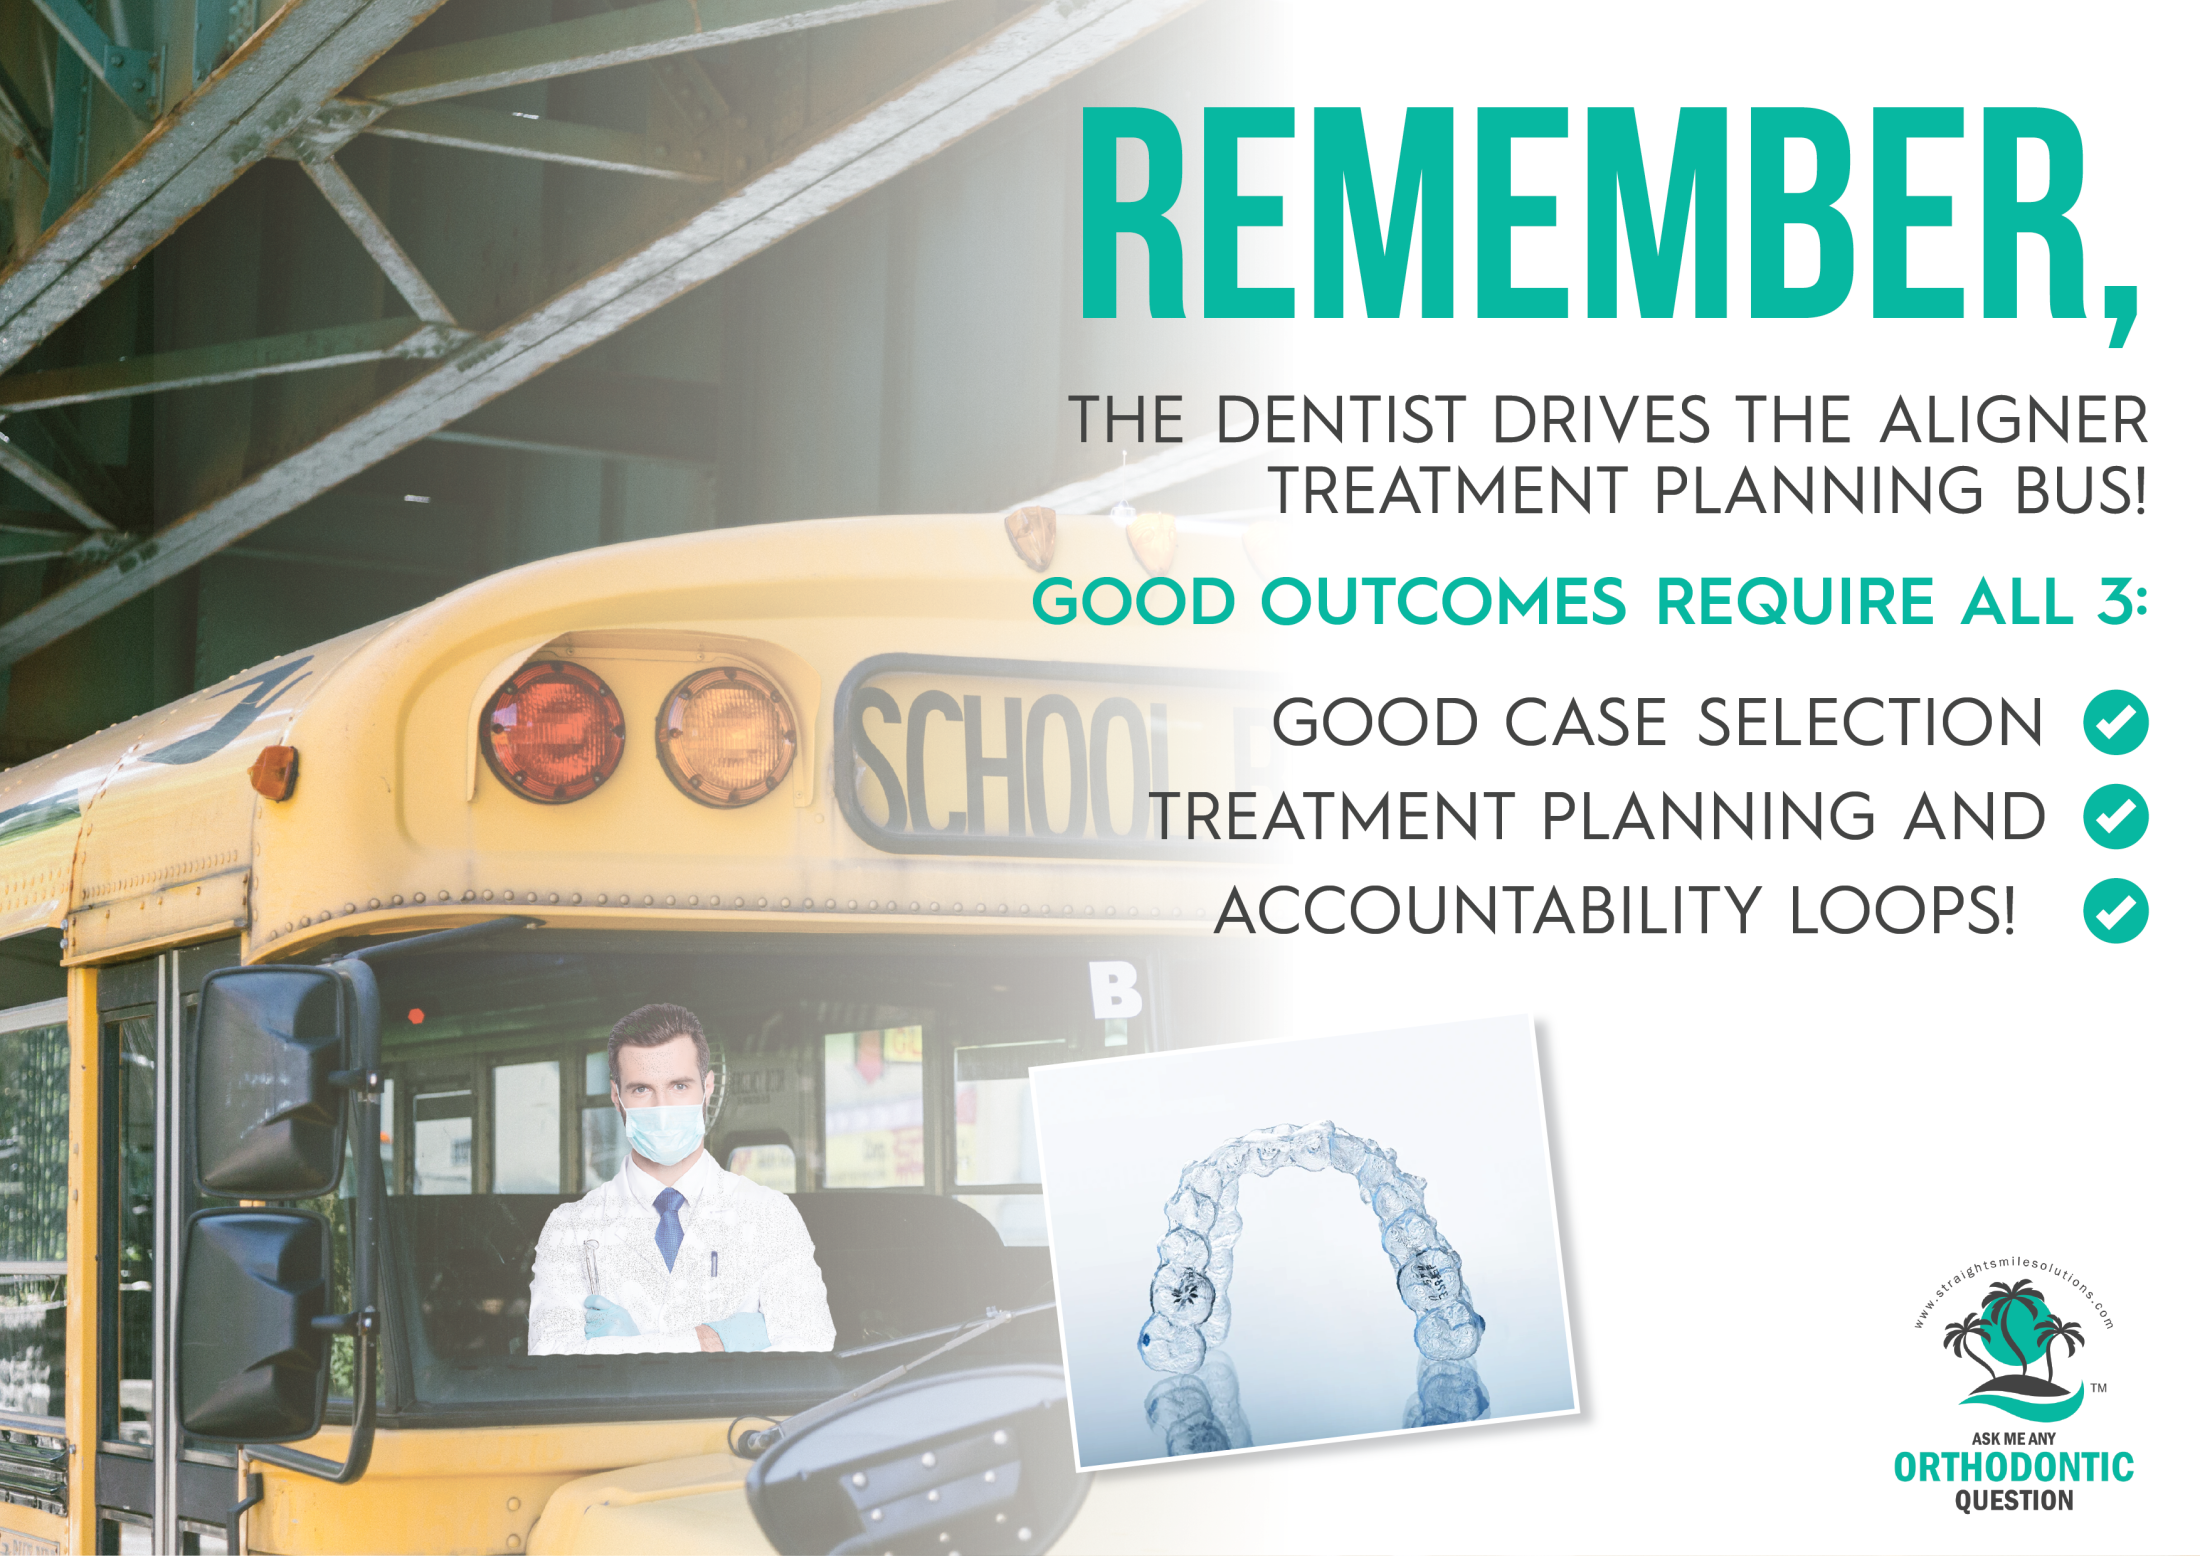
When it comes to treatment planning, as an orthodontics professional, ensuring you are “at the helm” when it comes to your patient’s care is essential. Indeed, dentists need to drive the aligner treatment planning bus, as it were, to achieve good results. However, all too many people assume that, because clear aligners are so easy to use, they should leave things up to their technicians. This is actually a potentially major mistake, and we’ve outlined several key reasons why as follows.
Don’t Just Rely on Your Technicians for Treatment Planning
It’s tempting, especially when things are busy, to simply rely on your technicians for treatment planning. However, your technicians are not thoroughly trained when it comes to orthodontics treatment planning, and usually, their focus is on quantity (not necessarily quality). After all, they have quotas to meet.
In line with this, ensuring that you are telling technicians how a treatment plan should look for an individual patient is vital. To start with, good case selection is clearly essential, as the technicians are unlikely to refuse a case just because it’s difficult; green cases are the best bets here and can work with any aligner brand (you may need to double it).
From there, proper treatment planning is essential. If you are unsure about how to treatment plan for individual patients, partnering with a professional orthodontics advisory team, such as ours here at Straight Smile Solutions, can really help.
Always ensure every case also has an accountability loop (virtual loops are common these days). Patients need very clear instructions and verbiage for their aligners to work effectively and be used correctly. Tracking photos are especially important here, at minimum once every three aligners, to ensure that the patient’s progress is continuing as expected. So, don’t chance it; always keep this in mind to ensure better results.
When Additional Invisalign / Clear Aligner Attachments are Needed?
 When completing Invisalign and clear aligner cases, it’s crucial to know when you need additional attachments on the incisors – and if the teeth are incredibly slippery and hard to grab, this may well be needed for your needs. In line with this, we’ve outlined some key things you need to know to help.
When You Need Additional Aligner Attachments in Invisalign / Clear Aligner Cases
If you are trying to intrude, extrude, or rotate the incisors, there’s a good chance that these will be incredibly slippery. In this scenario, you may need a handle or additional attachments on the teeth to keep everything in place.
When Do I Need Additional Attachments?
It’s not always clear if you should add additional attachments, but the best way to determine this is often to work the case up to ideal. Then, using the double it philosophy, get the movements, and check the tooth movement table. If this shows extrusions or rotations on the incisors, it may be worth adding an extra attachment.
Premolars and canines usually have a height of contour, which helps ensure they generally have better attachment anyway. For these, you may want to rely more heavily on the TMA alongside the TMT. This allows you to complete a movement assessment; if this shows a complicated movement, usually with a black or blue dot, you’ll almost certainly want to add an attachment (unless it’s an intrusion case).
However, if the case is borderline but does require extrusion or rotation, it isn’t always clear whether you should use extra Invisalign or clear aligner attachments. If the score is around 0.05, you probably won’t need extra, but 0.5 scores may need more attachments (or monitor the tooth to see whether it moves as expected or if it goes off track, in which case, you’ll need an extra attachment).
Using BIG ALIGNER BRAND Resources to help Identify Cases for Alternative or White Label Aligners

Using BIG ALIGNER BRAND Resources to help Identify Cases for Alternative or White Label Aligners
I. Introduction
Dr. Amanda from StraightSmile Solutions. In today’s intro, I want to delve into the world of using existing big aligner brands—although I won’t name them—specifically their free treatment planning resources. If you’re curious about alternative aligner companies or white-label aligner companies, join my upcoming webinar on May 7th at 7 p.m. Eastern. It’s free, offers two CE units, and you can sign up (limited to 999 attendees). Now, let’s explore how you can leverage the resources of big aligner brands for ideal cases before considering alternative options.
II. Webinar Announcement
A. Date and time: May 7th at 7 p.m. Eastern
B. Location: StraightSmileSolutions.com, under “Classes”
C. CE units offered
D. Limited slots (999 people) – first come, first served
E. Recording availability for later viewing
F. Clarification on synchronous vs. on-demand viewing
III. Membership Requirements for Aligner Brands
A. Big Aligner Brand 1 and Big Aligner Brand 2
1. Costs associated with joining
2. Quick vs. class-based registration
B. Recommendation for using Big Aligner Brand 1 for its extensive resources
IV. Utilizing Big Aligner Brand 1 Resources
A. Photo Loader
1. Functionality for cropping and orienting photos
2. Direct import into the dashboard
B. Inface Resources
1. Game-changing tools for various case types
C. Bolton Button
1. Significance in class one case
2. Recommended for determining lower IPR need
D. CBCT Integration
1. Insights on arch expansion and proclination limits
V. Case Workup and Decision-Making
A. Working up cases using the free resources
B. Analyzing options for treatment plans
1. Determining aligner count
2. Consideration of IPR and sequential distalization
C. Exploring the option of transferring cases to alternative aligner companies
D. Caveats and limitations of alternative aligner companies
VI. White Label Aligner Companies
A. Overview of white-label aligner companies
B. Cost structure (per aligner)
C. Considerations before choosing white label
1. Tracking game and accountability loop
2. Importance of virtual resources for check-ins
VII. Webinar Focus and Conclusion
Dr. Amanda from StraightSmile Solutions provides valuable insights into leveraging the resources of major aligner brands, particularly for treatment planning. Emphasizing the use of free tools offered by these brands, she encourages orthodontic professionals to explore options before considering alternative aligner companies or white-label services. The importance of thorough case evaluation, including the consideration of factors like IPR, virtual accountability loops, and adherence to terms and conditions, is highlighted. Dr. Amanda’s intention is not to divert cases from established brands but to empower practitioners with knowledge and options for optimal patient care. For further details, she invites professionals to join her upcoming webinar on May 7th, offering two CE units for attendees.
When Should I Be Retreating for Free?

When Should I Be Retreating for Free?
In some situations, finishing orthodontics cases may not always be as straightforward as it ought to be. This can leave you potentially having to offer free retreatments and revisions as part of your orthodontics service – which can no doubt have a vast impact on your bottom line. But when should you be retreating for free? Well, this largely depends on the paperwork that was completed at the time of booking orthodontics treatments.
What Paperwork Should I Be Completing?
As part of your orthodontics service, ensuring you have provided patients with the necessary information and paperwork is crucial.
A good retainer program is one of the most important aspects of reducing the need for free retreatment in your orthodontics cases. Indeed, a successful retainer program is vital for finishing cases successfully; however, it’s also integral that the patient and staff understand this fully. You’ll also need to ensure the patient signs all of the necessary paperwork and that there is a suitable aftercare plan in place to monitor results when finishing cases. Provided all of these factors are met, the cause of the problems will likely be the patient’s fault for not following instructions, and you usually won’t be liable for providing free retreatments.
Some key questions to ask yourself when determining when you should be retreating for free are:
1. Do you have the right paperwork?
2. Did the patient understand and sign the right paperwork?
3. Do you have a policy, and what does this cover (e.g., warranties, retreatments, breakage, retainer visits, missed visit protocols, etc)?
4. Did the patient understand and sign the right policy?
5. Did you complete thorough documenting?
6. Did your front office contact the patient for their retention appointments / recall?
These questions can help you determine who is at fault in a retreatment case – helping you decide who is liable to pay when finishing cases with retreatment. However, if you have a particularly valuable long-term, high-value patient, you may want to consider offering a free retreatment or a partially-free treatment to thank them for their loyalty and support.
Overall, developing a good after-care policy is essential to reduce the risk of retreatments (and, critically, to protect your business from having to fund these retreatments due to the patient’s fault). However, always keep in mind that, before you retreat (be it paid or for free), any newly arisen or previously missed issues will need fixing first.