
StraightSmile Solutions®
Using Braces to Expand the Lower Arch in Phase 1 Patients
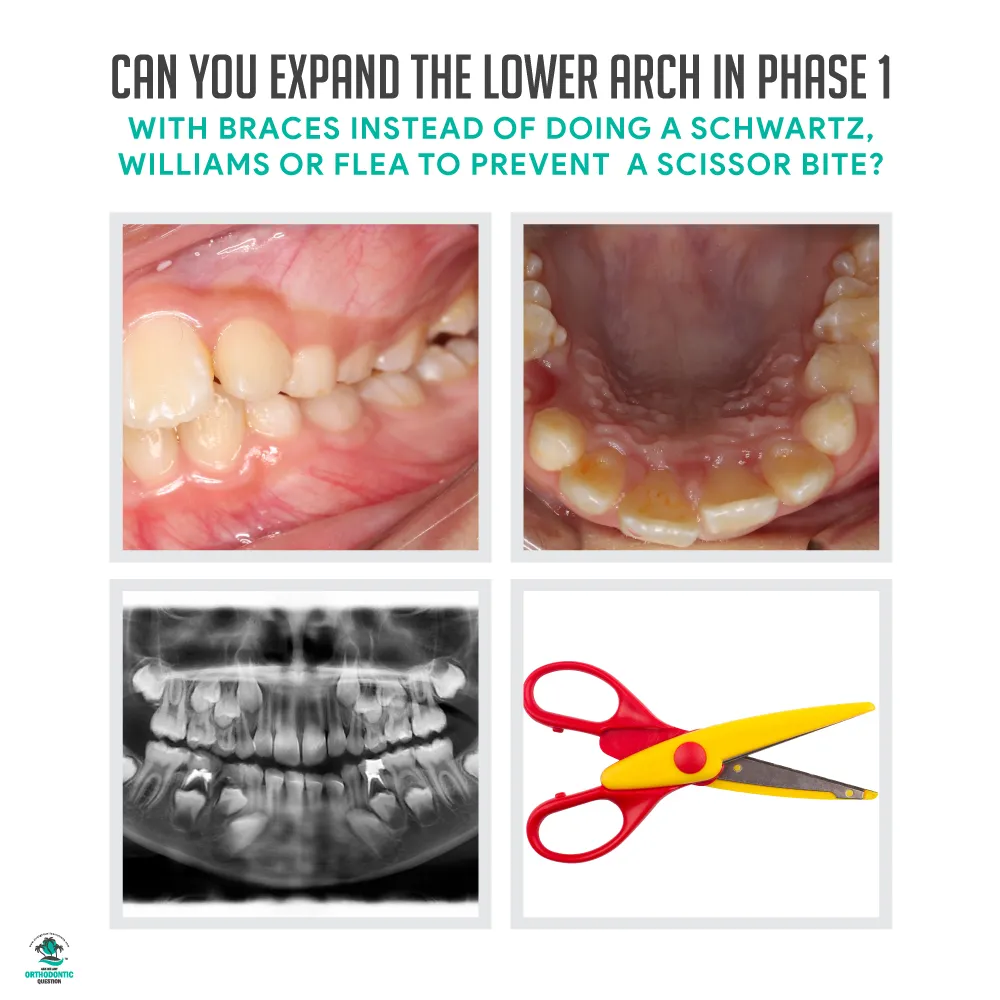 Using Braces to Expand the Lower Arch
Phase 1 patients can present a unique range of challenges and possibilities, and considering the different options to optimize your orthodontics treatment plan is crucial. As part of this, we’ve outlined some of the core things you need to know about using braces in your orthodontics treatment plans to expand the lower arch in phase 1 patients, including whether this is a quick or practical solution versus doing a Schwartz, Williams, or Flea.
Can I Use Fast Braces to Expand the Lower Arch?
While there are several ways that you can potentially expand the lower arch in Phase 1 patients, and since the lower arch does not have a suture, it is just tipping. In line with this thought, braces (and aligners) can potentially be used to expand the lower arch in mixed dentition patients, provided that the patient isn’t likely to be losing teeth soon.
However, it’s worth noting that some patients may still need Schwartz, Flea, or Williams in order to create a wide and balanced bite.
How Using Braces Compares to Schwartz, Flea, or Williams
Some of the most common alternatives to expanding the lower arch with braces is to use a Schwartz, Flea, or Williams approach. These may be important in cases where fast braces aren’t going to be suitable to expand the lower arch.
The main example of this is when the patient is missing teeth since two lower teeth must be bonded in order for uprighting to work. Furthermore, after checking the pano, it’s also crucial to check whether the patient is likely to have any teeth attempting to erupt; if there are any that may come through any time soon, don’t attempt to use braces to expand the lower arch, as bonding the teeth together with braces can potentially do a significant degree of harm to the patient.
If the patient isn’t missing any teeth, using braces can help to give comparable results as with Schwartz, Flea, or Williams cases (but without the same lab fee costs). However, regular checkups and reports are vital to ensure the normal progression of the orthodontics case. If the patient does not attend recall appointments, you may be liable for patient abandonment.
How to Approach Implants in Missing Laterals Cases: Literature Review

Missing laterals cases can present a range of challenges and complexities, and as part of this, knowing how to tackle implants can be a little trickier than usual. This is a topic that’s been tackled in a recent piece of literature by Taylor M Olsen and Vincent G Kokich Sr, and we’re briefly assessing their recommendations for achieving best retention in missing lateral incisor cases for teens awaiting implants.
Why Retention is Needed for Missing Laterals Cases
In missing laterals cases, retention is vital to ensure the patient is ready for their implants when the time comes. Indeed, it can potentially be up to a decade before the implant is given, so effective retention will be integral.
Many people will use regular Essex or Hawley retainers with a pontic for retention, but the roots are potentially likely to re-converge over time. In turn, this will prevent the patient from getting their implant, requiring another extended period of orthodontics.
The chances of this happening is around 11% (more than one in ten patients) and this may be due to inconsistent wear. As such, keeping an eye on the patient’s progress is highly important to ensure the retainer is working as intended. This is especially critical in cases where the patient is unlikely to have the implant fitted for several years, as the chance of the retainers being used incorrectly can be quite high.
What You Need to Know About Missing Incisors and Canine Substitution in Orthodontics
 What You Need to Know About Missing Incisors and Canine Substitution in Orthodontics
Some orthodontics cases can be a little trickier than the norm, and when you have a patient who presents with missing lateral incisors, this can definitely leave you feeling unsure. However, this is actually one of the most common types of missing teeth (after the third molars and second premolars). As such, we’ve outlined some key things you should know when tackling these orthodontics cases to help you create the ideal treatment plan.
What to do When the Lateral Incisors are Missing
If you catch a missing incisors case early, you may be able to move the canines into the position of the lateral incisors and use a veneer to reshape the teeth. Another common option is to move the canines back and laterfit an implant as part of the treatment plan.
However, if you leave these cases until later, the teeth will usually move to fit the spaces themselves, which can make it harder to re-open the space. In more mature cases, as a result, you may want to consider recontouring the teeth or getting a veneer. However, ideally, tackle these cases at a younger age to help give the best results from an aesthetic perspective.
Tackling Misshapened (Peg) Laterals
Sometimes, a patient might not be missing their laterals, but they may be misshapen or malformed. Peg laterals are usually a genetic issue, as with missing lateral incisors. You may need to consider bonding or veneers (among other things) as part of the treatment plan to correct the bite.
Looking to Purchase a GP Practice with Active Bracket and Wire Patients?
Looking to Purchase a GP Practice with Active Bracket and Wire Patients?
I. Introduction
Dr. Amanda from StraightSmile Solutions sheds light on acquiring a dental practice with existing bracket and wire orthodontic cases. Drawing on her extensive experience, she emphasizes the importance of thorough auditing, urging potential buyers to scrutinize every detail. Dr. Amanda shares valuable insights on the nuances of buying practices with Invisalign cases, advising viewers to explore her YouTube channel for comprehensive guidance. She stresses the significance of progress records, X-rays, and photos for each case, warning against hidden liabilities. The discussion extends to considerations like treatment philosophy, airway focus, and meticulous case handling, offering a roadmap for a successful practice transition. Dr. Amanda also extends her expertise to assist in virtual or in-person audits for those seeking professional guidance navigating this complex terrain.
II. Importance of Auditing Orthodontic Cases
- Need for a thorough audit
- Progress records and their significance
- Identifying red flags in existing cases
- The impact on the value of the practice
III. Invisalign-Specific Considerations
- Comprehensive cases only
- Timeframe for case completion
- Importance of progress reports
IV. Audit Process for Orthodontic Cases
- Utilizing reports for a complete patient list
- Examining each case individually
- Ensuring no patient is left behind
- Addressing active treatment on patients’ teeth
V. Red Flags in Orthodontic Cases
- Lack of regular patient visits
- Patient abandonment issues
- The impact on practice value
VI. Treatment Philosophy Alignment
- Importance of shared treatment planning philosophy
- Airway-focused treatment considerations
- Utilizing advanced diagnostic tools
VII. Recommendations for GP Practices with Brackets and Wire Ortho
- Detailed patient audit process
- The challenge of patient abandonment
- Evaluating treatment planning philosophy
VIII. Assistance from StraightSmile Solutions
- Virtual vs. in-person audit options
- Cost considerations for virtual assistance
- Addressing challenges with paper charts and records
IX. Evaluating Accounts Receivable
- Overview of accounts receivable considerations
- Implications of auto-bill and upfront payments
- Profitability concerns in finishing GP Ortho cases
X. Selling Practices with Fixed Ortho
- Challenges in selling practices with fixed ortho
- Suggestion to finish cases before selling
- Phasing down ortho services for an easier transition
XII. Additional Considerations
- Examination of accounts receivable
- Discussion on the profitability of completing GP Ortho cases
- Recommendation to finish cases before selling the practice
XIII. Conclusion
Dr. Amanda from StraightSmile Solutions emphasizes the importance of thorough due diligence when considering buying a dental practice with existing bracket and wire orthodontic cases. She recommends auditing each case, ensuring they have progress records, x-rays, and photos. Dr. Amanda warns against acquiring practices with patients near the three, four, or five-year mark in their treatment, suggesting focusing on cases within the first two years. She stresses the need for meticulousness in auditing, especially for Invisalign cases, and cautions against inheriting liabilities. Additionally, she advises aligning treatment planning philosophies and being cautious about practices with excessive extractions or jaw surgery cases. Lastly, she suggests finishing fixed ortho cases before selling a practice to enhance its marketability.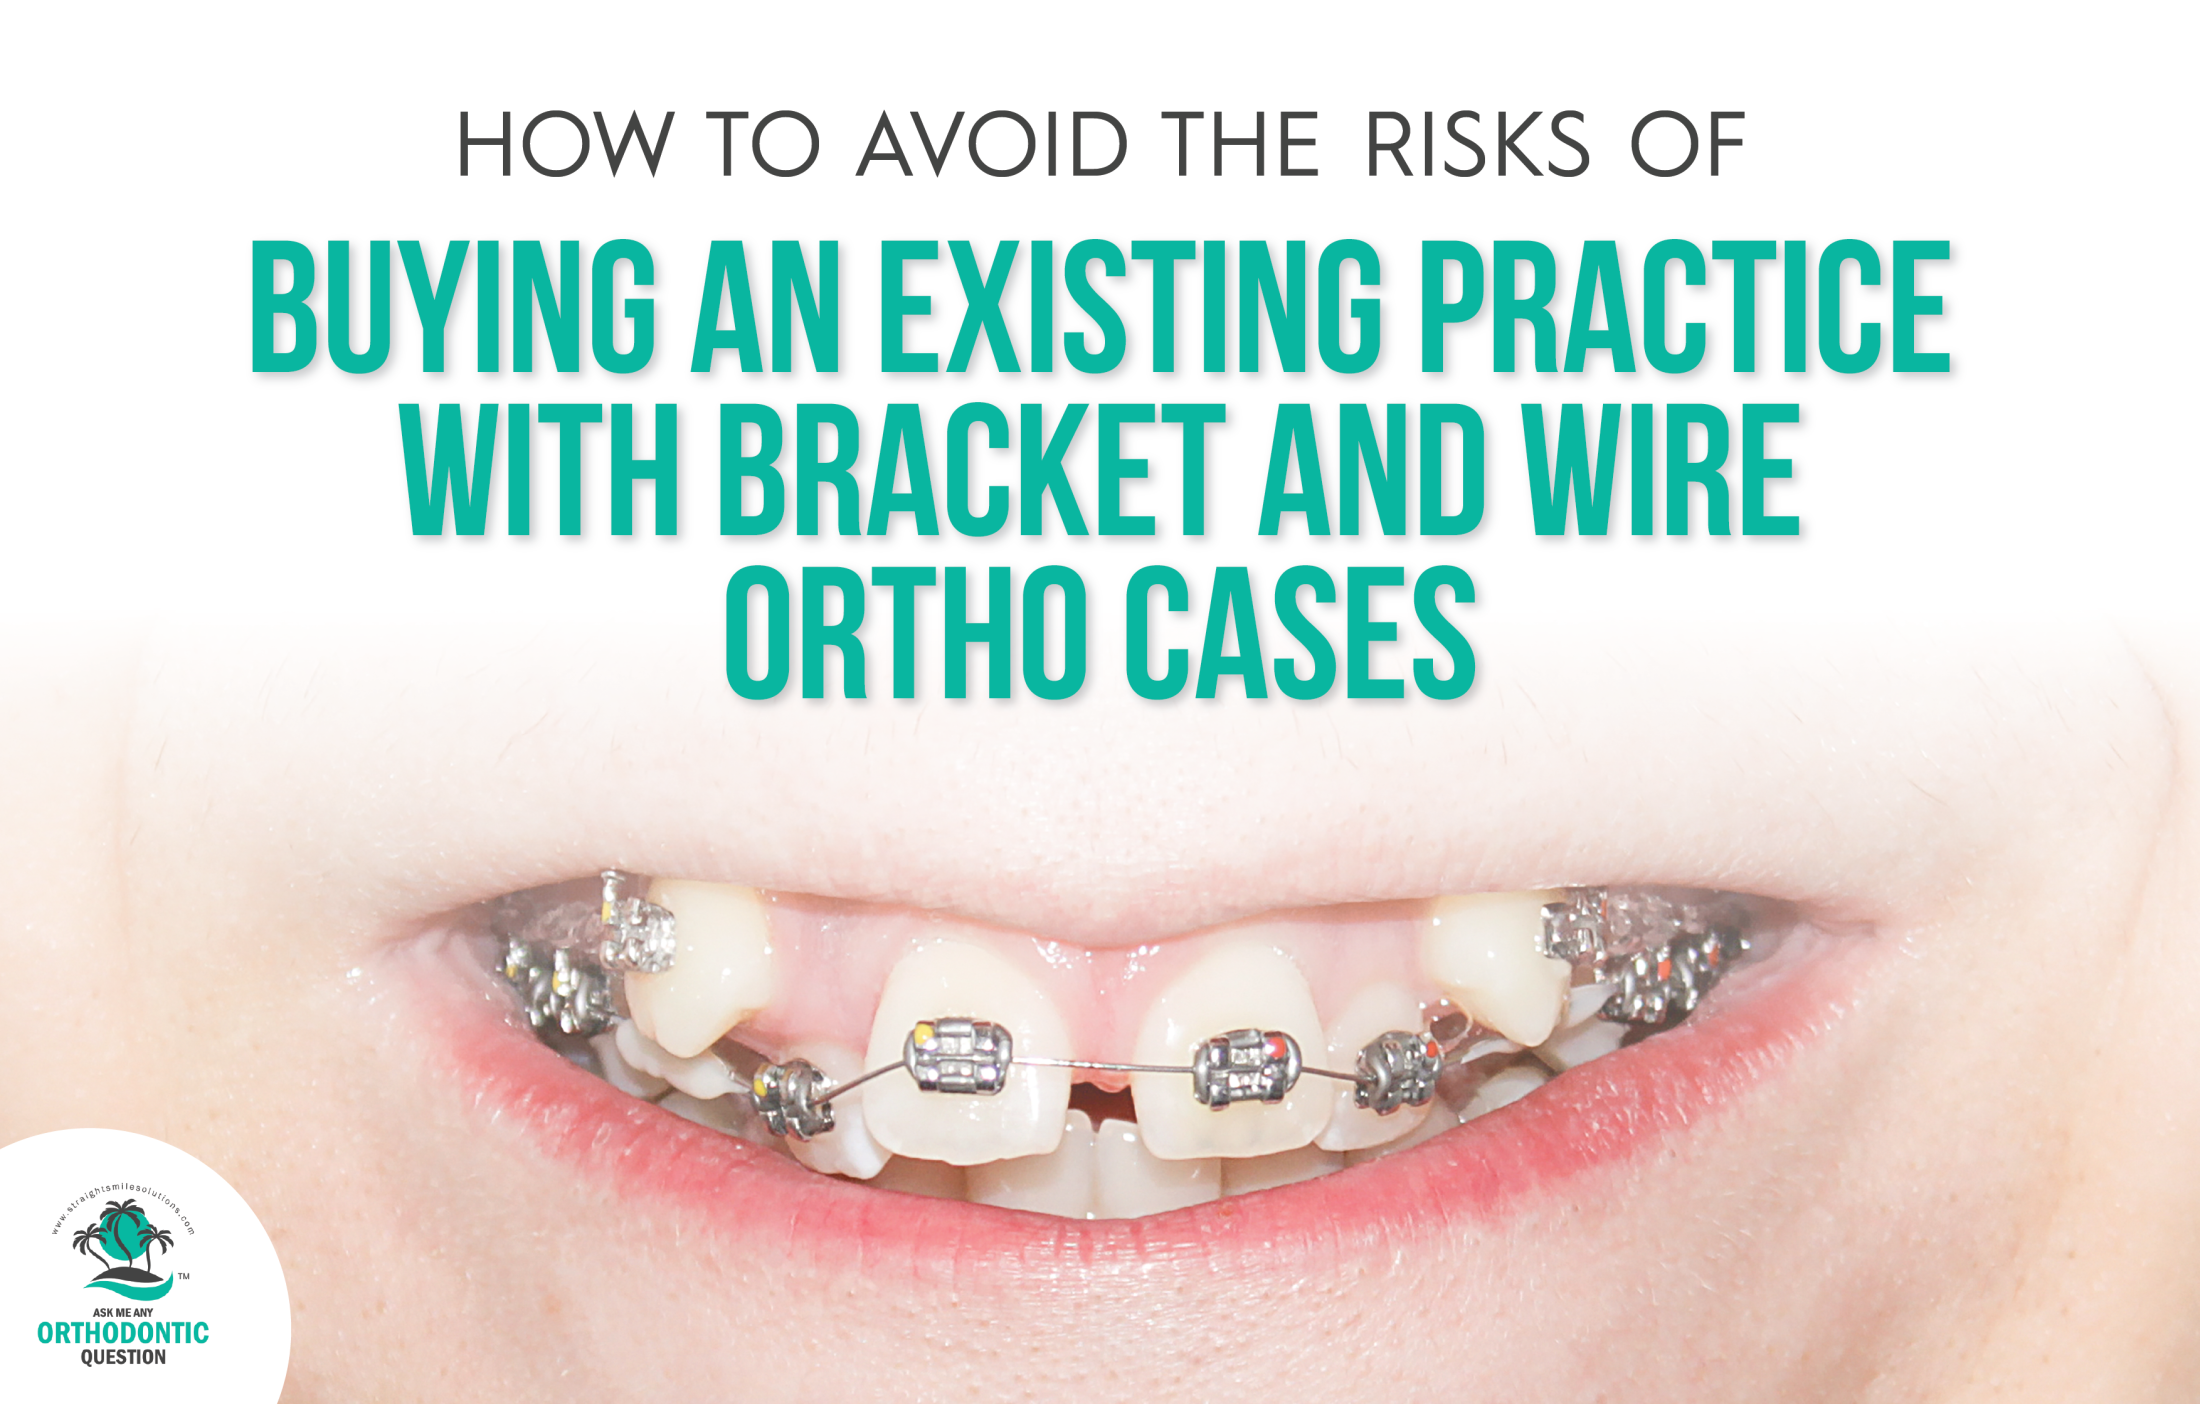
Free Invisalign ClinCheck 6.0 Resources to Help you Identify and Treatment Plan EASY Green Cases
Free Invisalign ClinCheck 6.0 Resources to Help you Identify and Treatment Plan EASY Green Cases
I. Introduction
Dr. Amanda from StraightSmile Solutions delves into the intricacies of green light aligner cases in her engaging discussion. She emphasizes the importance of understanding what constitutes a green light case and why one should consider these aligners. Stressing the need to collaborate with orthodontists for personalized guidance, Dr. Amanda highlights the value of experience in identifying pitfalls and nuances. In this specific segment, she hones in on free Invisalign Clin Check 6.0 resources, providing valuable insights on how to identify green light cases independently, especially for those hesitant about orthodontist costs.
II. Importance of Working with an Orthodontist
- Personalized guidance for 1-3 months
- Orthodontists’ expertise in identifying pitfalls, risks, and tricks
- Recommendation to avoid relying solely on services like Invisalign Go
III. Green Light Aligner Case Characteristics
- Limited iterations of malocclusion cases
- Ease of handling once identified
- Compatibility with various aligner companies
IV. Recommended Aligner Companies for Green Light Cases
- Invisalign
- ClearCorrect
- White label aligners
V. Free Invisalign ClinCheck 6.0 Resources
- Requirement for ClinCheck and iTero
- Importance of Invisalign Practice App for taking photos
- Utilizing CBCT machine for ClinCheck 6.0
- Compatibility check with Invisalign
- Uploading CBCT data challenges and solutions
VI. Identifying Green Light Cases
- Criteria: 2-3 millimeters of crowding or spacing
- Use of CBCT in the plan
- Analysis of warning indicators (fenestrations, red outlines)
- Caution against expanding beyond biologic width
VII. Key Steps in Utilizing the Invisalign Practice App
- Capturing photos for case assessment
- Free availability for Invisalign doctors
- Exploring available content on app usage
VIII. Yellow Light Cases
- Acknowledgment of cases with higher complexity
- Recommendation to work with an orthodontist or use provided resources
- Emphasis on avoiding missteps in treatment
IX. Addressing Concerns About Orthodontist Costs
- Assertion that costs are reasonable
- Personalized guidance for first 50 cases
- Value of peace of mind, understanding, and team resources
X. Challenges and Solutions
- Acknowledging the initial clunkiness of CBCT upload
- Understanding the significance of red outlines and warnings
- Defining non-green light cases with examples (e.g., fenestrations)
- Emphasizing the power of CBCT in treatment planning
XI. Conclusion
Dr. Amanda from StraightSmile Solutions emphasizes the significance of understanding and identifying green light aligner cases. With a wealth of content on her YouTube channel, she guides viewers through the nuances of these cases, stressing the importance of not relying solely on services like Invisalign Go. Dr. Amanda recommends working with an orthodontist for personalized guidance, especially in the initial phases. The discussion shifts towards utilizing free Invisalign ClinCheck 6.0 resources to identify green light cases, underscoring the necessity of tools like ClinCheck, iTero, and CBCT machines. The conclusion stresses the value of investing in proper resources to avoid complications and highlights the benefits of collaborating with orthodontic professionals for long-term success.

How to Throw a Productive Invisalign Party
How to Throw a Productive Invisalign Party
I. Introduction
Dr. Amanda from StraightSmile Solutions is discussing the world of Invisalign parties, or Invisalign days, and shares her insights. She found a podcast on Spotify about these events, which can be divided into two types: those starting with initial cases and those after Invisalign is in practice. The podcast covers strategies for both scenarios, internal and external marketing, budget considerations, and key elements for a successful event. Whether you’re new to the Invisalign world or a seasoned practitioner, there’s something valuable for everyone. For more information, visit straightsmilesolutions.com or contact Dr. Amanda for a chat.
II. Types of Invisalign Parties
- Two types: Pre-launch and Post-launch
- Pre-launch: Before introducing Invisalign in the practice
- Market internally and externally
- Cost-effective internal marketing to an existing patient base
- Post-launch: After 6-12 months of Invisalign scans
- External marketing required
- Involves ads, direct mails, and significant budgeting
III. Importance of Invisalign Wellness Scans
- Regular scans for patients from age six and up
- Use the iTero outcome simulator for effective planning
- Collaboration with orthodontists for scan review and diagnosis
IV. Pre-launch Invisalign Party Strategies
- Give away one case for free
- Offer crazy discounts for patients starting on the day of the party
- Generate hype and excitement to encourage immediate sign-ups
- Utilize marketing channels like Facebook, Instagram, and Direct Mail
V. Post-launch Invisalign Party Strategies
- External marketing is crucial
- Requires a budget for ads, direct mails, food, drinks, and additional staff
- Event timing: Either on a Saturday or in the evening (3:00 p.m. to 8:00 p.m.)
- Team involvement is essential: Hygienists, doctors, back office, and front office
- Set realistic event caps and overbook due to expected no-shows
- Consider using Eventbrite for easy management and promotion
VI. Team Incentives
- Provide bonuses for team members based on milestones achieved
- Encourage full participation and commitment
- Rewards for hitting specific start goals within 24 hours
VII. Budget Considerations
- Realistic investment estimate: At least $10,000 per event
- Profit calculation: Even with discounts, expect significant profit per case
- Emphasizes the importance of not cutting corners for a successful event
VIII. Keys for Successful Party
- Hype and bonuses for achieving case start goals
- Respond within 24 hours while excitement is high
- Hire help to manage event logistics
- Hire specialist like orthodontist as needed
- Can yield $30k+ profit if executed properly
IX. Conclusion
Dr. Amanda from StraightSmile Solutions provides valuable insights into organizing successful Invisalign parties. She emphasizes the importance of distinguishing between two types of events – one before launching Invisalign in your practice and another after 6 to 12 months of Invisalign Wellness scans. Dr. Amanda highlights the significance of strategic marketing, both internally and externally, for optimal results. The investment required for hosting such events is stressed, but she assures that with proper planning, the potential profits outweigh the costs. The key takeaway is the need for enthusiasm, engagement, and bonuses for the entire team to make these events a resounding success in promoting orthodontic services.
How to Make an iTero Wellness Scan Profitable

How to Make an iTero Wellness Scan Profitable
I. Introduction
Introducing Dr. Amanda from StraightSmile Solutions. She recently delved into a fascinating topic on a podcast: the Itero Wellness Scan. Having advocated for comprehensive patient scans with Itero technology for years, Amanda emphasizes its invaluable role in occlusion education. Despite cost concerns, she offers creative solutions like patient-owned tip libraries. Amanda envisions the Itero Wellness Scan as a standard of care akin to other essential dental practices. Her expertise extends to diverse applications, from orthodontics to retainers, night guards, and beyond. Check her YouTube channel for a wealth of Itero insights and revenue-generating strategies.
II. Amanda’s Advocacy for iTero Scans
Emphasis on the significance of iTero scans
Mention of iTero’s display, functionality, and outcome simulator
Importance of easy patient communication regarding occlusion
III. Historical Context of Dental Practices
Evolution of dental practices and standards of care
Comparison with past practices (perio probing, X-rays, oral cancer screening)
IV. Utilizing iTero for Revenue Generation
Amanda’s YouTube channel – Straight Smile Solutions
iTero’s role in revenue generation and start-ups
Broadening usage beyond orthodontics
V. Challenges and Cost Considerations
Concerns about profitability
Discussion on the cost of iTero tips
Possibility of building codes for occlusion scans
VI. Innovative Solutions for Tip Handling
Creation of tip libraries or storage for each patient
Encouraging patients to bring their tips to appointments
Billing patients for the tip if not brought to appointments
VII. Frequency and Recommendations
Suggested frequency of iTero Wellness Scans (at least annually)
Benefits of sequential monitoring of occlusion changes
Highlighting the scan’s ability to capture disease progression
VIII. In-Depth Analysis through iTero Scans
Capability to analyze occlusion, crowding, and bite balance
Integration with Invisalign Practice App for advanced simulations
Demonstrating the power of iTero scans in treatment planning
IX. Cross-Training and Scan Personnel
Delegating iTero scans to various team members
Addressing potential licensing concerns for scan personnel
Comparisons with direct-to-consumer scan practices
X. Building Confidence and Collaboration
Working with orthodontists for case evaluation
Building confidence over time through experience
Collaboration for challenging cases and referrals when necessary
XI. Expanding Services Beyond Orthodontics
Opportunities for additional services based on iTero scans
Retainers, night guards, mouth guards, splints, and bleaching trays
Application in pediatric dentistry (expanders, phase one appliances)
XII. Profit potential
Wellness scans drive significant new revenue
Hundreds of thousands in revenue are commonly seen
Critical to use scans properly and consistently
XIII. Who can perform scans
Hygienists, assistants, and front office in most states
Double check the state dental practice act
Use qualified staff
XIV. Conclusion
Amanda from StraightSmile Solutions emphasizes the transformative potential of the iTero Wellness scan in dental practices. Advocating for routine occlusion scans, she highlights iTero’s user-friendly display and outcome simulator as powerful tools for patient education. While acknowledging concerns about profitability, she suggests creative solutions such as tip libraries or patient billing. Stressing the scan’s value in tracking occlusion changes over time, she encourages practitioners to explore the diverse applications, from orthodontics to retainer checks. Amanda asserts that incorporating the iTero Wellness scan can be clinically beneficial and a lucrative practice enhancement
Learn from SmileDirectClub Mistakes- Never Offer a Lifetime Guarantee on Ortho or Retention

I. Introduction
Dr. Amanda, the visionary behind StraightSmile Solutions, is dedicated to optimizing orthodontic practices. She delves into lessons learned from Smile Direct Club, emphasizing the importance of avoiding critical mistakes. Dr. Amanda advises against purchasing practices with lifetime guarantees and stresses the need for meticulous contract scrutiny. Her retention playlist and courses on straightsmilesolutions.com offer invaluable insights, urging orthodontists to safeguard their practices against potential liabilities and navigate the complexities of orthodontic management wisely. Learn, adapt, and thrive in the ever-evolving landscape of orthodontic care.
II. Key Mistakes to Avoid
- Never buy a practice with a lifetime guarantee
- Emphasis on the importance of reading patient contracts
- Risks associated with lifetime guarantees
- Importance of debond and retainer contracts
- Red flag if these contracts are absent
- Addressing concerns for orthodontists and general dentists
III. Patient Beliefs and Retention
- Understanding patient beliefs about treatment handling
- Significance of patient perceptions in orthodontic practice
- Impact of improper handling on reviews and patient satisfaction
- Risks of relapse and the need for proper documentation
- Importance of clear communication in patient contracts
- Dr. Amanda’s perspective on managing retention cases
IV. Educational Resources
- Retention playlist on StraightSmile Solutions
- Dr. Amanda’s content on retention-related issues
- Availability of information in phase one and Straightwire courses
V. Straightsmile Solutions Courses
- Phase one course overview
- Addressing proper orthodontic procedures and documentation
- Ensuring a solid foundation for orthodontic practice
- Straightwire course availability at StraightSmileSolutions.com
- Access to courses for orthodontic practitioners
- Focus on the importance of correct paperwork for a practice sale
VI. Risks of Buying Practices with Guarantees
- Null and void nature of guarantees in practice purchases
- Patient perceptions contrary to legalities
- Negative impacts on patient trust and reviews
VII. Orthodontic Liability
- Managing orthodontic liability through proper paperwork
- Aligning paperwork with industry standards
- The importance of meticulous record-keeping for potential practice sale
VIII. Alternative Warranty Programs
- Dr. Amanda’s suggestion for warranty programs
- Advantages of yearly payment models
- Balancing revenue stream without incurring large upfront costs
IX. Lessons from Smile Direct Club
- Analyzing mistakes made by Smile Direct Club
- Extracting valuable insights for orthodontic practitioners
- Applying lessons learned to avoid similar pitfalls
X. Conclusion
Dr. Amanda emphasizes the importance of careful consideration and diligence in orthodontic practice, particularly regarding patient contracts and guarantees. Her insights, as shared on straightsmilesolutions.com, shed light on the potential pitfalls of buying practices with lifetime guarantees or offering them without thorough documentation. Learning from the mistakes of companies like Smile Direct Club, Dr. Amanda stresses the significance of clear and comprehensive patient agreements, ensuring the proper handling of retention cases to avoid potential liabilities. Her advice is a valuable guide for orthodontists to safeguard their practices, reputation, and patient relationships, reinforcing the importance of sound business practices in the field.
How to Make Money Using the BEST Parts of SmileDirectClub
I. Introduction
Dr. Amanda from StraightSmile Solutions is a trusted authority in the evolving landscape of orthodontics. Dr. Amanda delves into the post-Smile Direct Club era, highlighting crucial considerations for dental practitioners. With over 2,000 patients in the U.S. alone seeking completion or a retention plan, she emphasizes the need for adapting practices. Dr. Amanda explores the appeal of virtual consultations, providing insights into innovative approaches that attracted patients to Smile Direct Club. Drawing on her extensive knowledge of the orthodontic field, she advocates for flexibility in treatment plans and virtual check-ins and explores cost-effective options like batch printing.
II. Current Landscape of Orthodontic Cases
- Over 2,000 patients in the US need case completion or retention plans
- Encouragement to identify such patients in individual practices
- Utilizing social media and office communication to reach out to affected patients
III. Identifying Positive Aspects of Smile Direct Club
- Embracing virtual consultations
- Appeal to busy patients, especially younger demographics
- Incorporating flexibility in treatment options
- Virtual Check-ins
- Utilizing technology for efficient patient follow-ups
- Enhancing patient experience with remote engagement
- Flexible Treatment Plans
- Offering shorter treatment durations
- Providing options for partial treatments based on patient preferences
IV. Virtual Consultations and Tracking
- Benefits of virtual consultations
- Catering to busy schedules
- Appealing to tech-savvy patients
- Implementation of Virtual Tracking
- HIPAA-compliant options
- Importance of prompt responses to virtual inquiries
- Engaging potential patients through online screening
- The goal of transitioning inquiries to in-person consultations
V. Adapting to Patient Preferences
- Recognizing the aversion to frequent in-office visits
- Introducing alternatives like virtual consultations
- Encouraging flexible treatment plans
- Leveraging Technology
- Integration of virtual consults into orthodontic protocols
- Utilizing scripting and timely responses for effective engagement
VI. Considerations for Treatment Plans
- Acknowledging the appeal of alternative treatment plans
- Encouraging flexibility in the duration of treatment plans
- Promoting improved or limited plans based on patient preferences
- Stressing the need to assess risks, benefits, and alternatives before proceeding with altered treatment plans
- Financial Considerations
- Addressing patient preferences for flexible payment options
- Recommending alternatives to traditional financing methods, such as Care Credit or compassionate financing
- Introducing batch printing as a cost-effective white label aligner service
VII. Alternative Aligner Brands and Financing Options
- Exploring alternatives to mainstream aligner brands
- Mentioning the consideration of alternative aligner brands
- The importance of understanding lab fees and patient qualifications
- Discussion on financing options
- Recognizing challenges with traditional financing methods
VII. Conclusion
Dr. Amanda emphasizes the need for dental practitioners to adapt their practices in light of the challenges Smile Direct Club (SDC) faces. With SDC’s decline, over 2,000 patients may require case completion or retention plans, allowing dental professionals to step in. Dr. Amanda highlights key aspects that attracted patients to SDC, including virtual consultations, flexible treatment plans, and the appeal of minimal in-office visits. Incorporating innovative approaches, such as virtual consults and flexible treatment options, is underscored for attracting busy, tech-savvy patients. Staying informed and implementing these strategies can position dental practices to thrive in the evolving landscape.
How to Make Money Buying up and Flipping Bread and Butter Dental Practices

How to Make Money Buying up and Flipping Bread and Butter Dental Practices
I. Introduction
A. Introduction to Dr. Amanda and StraightSmile Solutions
B. Focus on buying a dental practice for financial success
C. Assertion that it’s a no-lose situation with a secret sauce
II. Key Factors in Buying a Dental Practice
A. Location is crucial
1. Proximity to dental schools
a. Preferably in an area with multiple dental schools
b. Large dental school within an hour or two
2. Desirable location
a. Attractive to people
b. Convenient parking
B. Practice type and clientele
1. Bread and butter dental practice
a. Established
b. Core services: crown and bridge
2. Loyal clientele
a. Long-time patients
b. Potential for new grads influx
III. Strategic Focus for Success
A. Avoid certain specialties
1. No Ortho
a. Opportunity for new grads to handle
2. No implants
a. Allows for specialized work later
3. No sleep-related services
a. Focus on existing services due to a high hygiene schedule
B. Leveraging hygiene schedule
1. A packed hygiene schedule is an asset
2. Allows for the owner to focus on specialty work
3. New grads can manage the bread-and-butter cases
C. Advantageous timing in the market
1. Current environment with cautious lending
2. New grads are more cautious due to loan situations
3. Potential for better deals on practices
4. Opportunity for established individuals to secure favorable deals
IV. Advantages of the Current Landscape
A. Caution in the new grad market
1. New grads less eager to jump into ownership
2. Caution due to loan situations
B. Win-win situation
1. More stability for established individuals
2. Easier to secure favorable deals
V. Overcoming Challenges
A. Need for proper systems
1. Importance of setting up effective systems
2. Digital dentistry advancements
a. Accessibility from home
b. Tools like Open Dental
B. Remote management
1. Utilizing technology for remote practice oversight
2. Remote billing options
VI. Encouragement and Assistance
A. Dr. Amanda’s assurance
1. Buying and running a practice is not overly challenging
2. Systems in place make it easier, especially with digital dentistry
B. Offer for assistance
1. Willingness to help with questions
2. Specialized support for setting up systems and operations in Ortho
VII. Establishing Systems and Operations
A. The importance of having well-defined systems in place
1. Streamlining operations for efficiency
2. Remote management of various aspects of the practice
B. Overcoming challenges and potential hurdles
1. Guidance on setting up systems for orthodontic practices
2. Dr. Amanda’s availability for assistance and advice
VIII. Conclusion
Dr. Amanda from StraightSmile Solutions emphasizes a strategic approach to buying a dental practice for immediate financial success. The key factors she highlights include choosing a location near dental schools, ensuring an appealing practice location with parking, and focusing on a well-established bread-and-butter dental practice with loyal clientele. Dr. Amanda suggests initially steering clear of orthodontics, implants, and sleep-related services, allowing new grads to handle the core dental procedures while the owner focuses on specialty work. With the current cautious lending climate for new graduates, Dr. Amanda sees a suitable time for established practitioners to secure deals and succeed by implementing efficient systems, leveraging digital dentistry, and running practices remotely.