StraightSmile Solutions®
The Hidden Conflict in Pediatric Airway Care: Fee-For-Service vs. Insurance-Driven Orthodontics
 The Hidden Conflict in Pediatric Airway Care: Fee-For-Service vs. Insurance-Driven OrthodonticsWhen it comes to early childhood health, few topics are growing as rapidly as the intersection of tongue-ties, airway optimization, and Orofacial Myofunctional Therapy (OMT). Addressing these issues early can completely reshape a child’s facial growth, sleep quality, and long-term health.However, many parents and practitioners encounter a major roadblock that has nothing to do with medicine, and everything to do with business models. The type of practice you choose—Fee-For-Service (FFS) versus Insurance-Driven—drastically changes how, when, and if these critical pediatric interventions are delivered.Here is a look at how these two business models impact early childhood airway care.The Pillars of Early Interceptive CareBefore diving into the business side, it is vital to understand the three pillars of early pediatric airway wellness:Tongue Releases (Frenectomies): Snip or laser restrictions to allow the tongue to rest on the roof of the mouth.Airway Optimization: Expanding the jaws early to ensure clear, unobstructed nasal breathing.OMT (Orofacial Myofunctional Therapy): Muscle physical therapy to train the tongue, lips, and cheeks to swallow and rest correctly.When these three therapies work together, they guide proper facial development. When ignored, they can lead to mouth breathing, sleep issues, and severe orthodontic crowding later in life.The Reality of the Insurance-Driven ModelInsurance-driven practices play a vital role in making standard dental care accessible to the public. However, the traditional insurance model was designed for reactive care—filling cavities or straightening crooked teeth with braces once a child is teenagers. It was not built for proactive, preventative airway wellness.The Coding Trap: Insurance companies rely on rigid code sets. Because therapies like OMT or early pediatric expansion are viewed by insurance as “not medically necessary” or “developmental,” claims are frequently denied.The Waiting Game: Insurance models often require a problem to become severe before they cover treatment. A practitioner may see an airway issue developing in a 5-year-old, but insurance may not cover intervention until the child fails a sleep study or develops severe skeletal issues years later.Time Constraints: Because insurance reimbursement rates are low, these practices must operate on higher patient volume. A comprehensive airway or OMT evaluation takes significant time, which a high-volume schedule simply cannot support.The Freedom of the Fee-For-Service (FFS) ModelA Fee-For-Service practice does not contract directly with insurance companies. Instead, parents pay the doctor directly for care (though they can often submit the receipts to their insurance independently). This structural freedom completely changes the clinical approach.Proactive, Early Intervention: FFS practitioners can treat a child the moment a restriction or airway issue is spotted—whether they are 4 months old or 4 years old. They do not have to wait for an insurance company’s permission.Customized, Multi-Disciplinary Care: Because they are not bound by insurance codes, FFS doctors can easily blend tongue-tie releases, airway expanding appliances, and OMT into one cohesive treatment plan.Extended Appointment Times: FFS models allow doctors to spend more time with each patient. This is crucial for infants struggling with feeding or young children who need patience and coaching during myofunctional therapy sessions.Making the Right Choice for Your ChildThere is no right or wrong model, but there is a right model for your specific goals.If you are looking for standard orthodontic alignment once your child is older, an insurance-driven practice is highly cost-effective. However, if your child is showing early signs of mouth breathing, snoring, restless sleep, or nursing struggles, seeking out an airway-focused, Fee-For-Service provider can give you access to immediate, comprehensive care during your child’s most critical growth windows.Investing in early airway health and proper muscle function today can prevent complex, invasive surgeries and intense orthodontic treatments tomorrow.Disclaimer: This blog post is based on the industry insights shared by StraightSmile Solutions and is for informational purposes only. Always consult with a qualified airway dentist, orthodontist, or myofunctional therapist regarding your child’s health.
The Medicalization Model: 5 Changes Shaping the Future of Orthodontics
 The Medicalization Model: 5 Changes Shaping the Future of OrthodonticsThe traditional orthodontic business model is broken. For decades, specialists relied on an easy pipeline: primary care dentists funneled teenagers to orthodontists to get braces. Today, that landscape has changed. Primary care dentists now routinely treat straightforward aligner cases in-house. Meanwhile, true orthodontic care has shifted from cosmetic tooth-straightening toward managing airway health and skeletal growth as early as age three.The problem is that orthodontists spend years providing free consultations, growth monitoring, and specialist coordination without compensation. To thrive, the industry must pivot from a retail cosmetic model to a structured medicalization model. Here is how modern practices are restructuring their frameworks.1. The Airway & Growth Subscription ModelUnder the legacy model, early growth observation is provided as a complimentary service to build a patient pipeline. In the medicalization model, this becomes a dedicated service tier. Parents pay a monthly or annual subscription fee to monitor children aged 3 to 7. This fee compensates the clinician for sleep screening, habit tracking, and coordinating care with external specialists, stabilizing practice cash flow early on.2. Unbundling Diagnostics from HardwareMedical doctors are paid for their diagnostic expertise, not just the physical procedures they perform. Orthodontics must decouple the initial clinical assessment from the appliance. Practices should implement standalone fees for comprehensive airway and developmental assessments, charging explicitly for specialized data collection like CBCT analysis. To evaluate how your current diagnostic pricing stacks up against industry standards, you can request a practice assessment through StraightSmile Solutions.3. Medical Insurance Billing ImplementationBecause airway constraints and growth developmental issues are fundamental health conditions, billing should shift away from dental coverage limits. Utilizing a dedicated medical billing service allows practices to file claims under standard medical CPT codes. Medical insurance plans often bypass the restrictive lifetime maximum caps typical of standard dental insurance, reflecting the true scope of these health interventions.4. Formalization of “Phase Zero” CareClinical standards currently recognize Phase 1 (interceptive treatment at ages 7–9) and Phase 2 (full comprehensive treatment). The modern model introduces Phase Zero. This early intervention specifically targets toddlers and young children exhibiting signs of airway dysfunction, mouth breathing, or poor oral habits. It establishes a formalized, billable treatment category acknowledged by insurers for preventative wellness.5. Transition to Time-Based BillingCharging a single flat fee for an unpredictable, multi-year treatment window invites scope creep and administrative overhead. The future demands time-based professional fees where patients establish a financial retainer agreement. Billable units are systematically deducted from the retainer as the doctor spends time reviewing digital setups or coordinating external care. If you need step-by-step guidance on implementing these digital workflow configurations, you can book a direct clinical consultation with the team at StraightSmile Solutions.By shifting the focus from simply moving teeth to protecting systemic health, practitioners can safeguard both patient outcomes and the financial integrity of their profession.🦷 Dental & Medical DisclaimerThe information provided in this article is intended for general educational and informational purposes for licensed dental professionals only. It does not constitute dental, medical, or legal advice. Practitioners should consult with their respective state boards, legal counsel, and certified medical billers before altering their billing frameworks or clinical protocols.
ODL Lab Converting a Fixed TPA/FBP to Removable – Lingual Sheaths and Distal Lock Bands (Goshgarian)
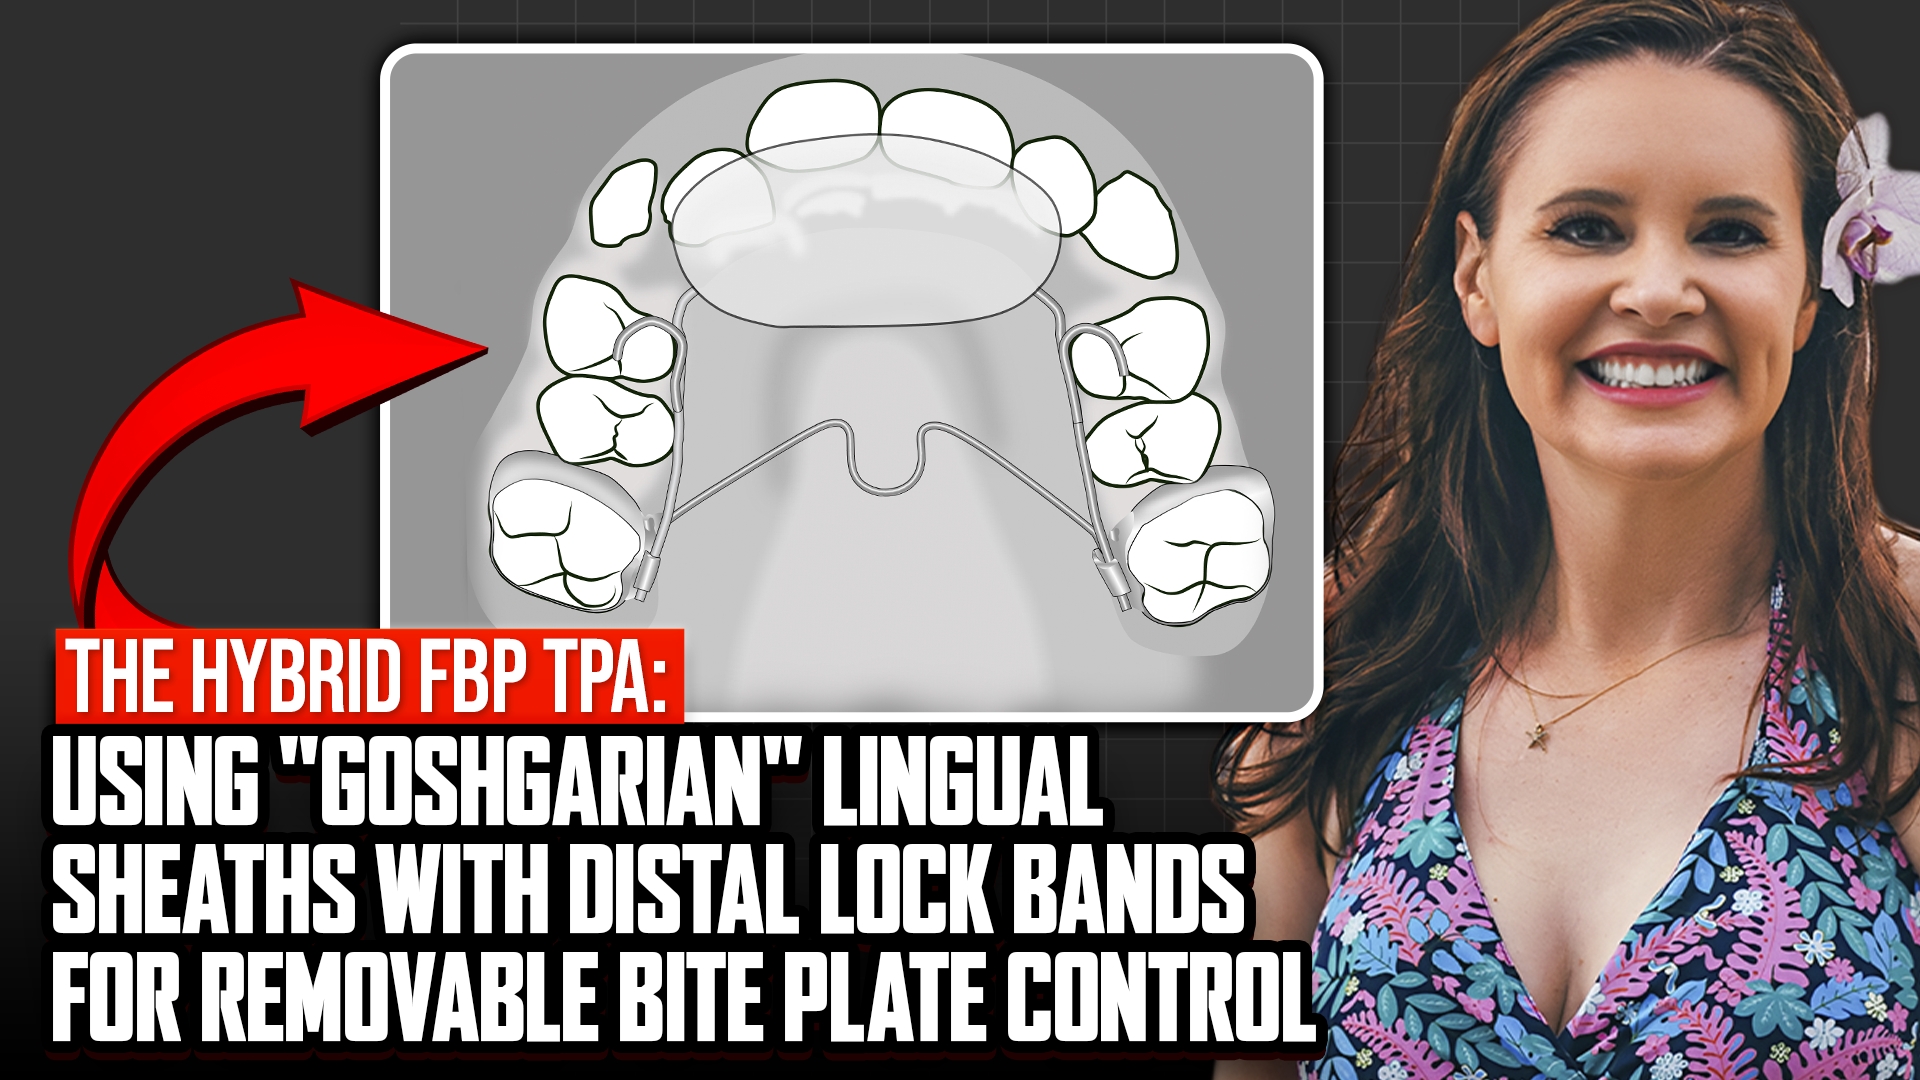 ODL Lab Converting a Fixed TPA/FBP to Removable – Lingual Sheaths and Distal Lock Bands (Goshgarian)
I. Introduction
Dr. Amanda from StraightSmile Solutions highlights a favorite hybrid appliance: the TPA (transpalatal arch) with a fixed bite plate (FBP).
It’s ideal for mixed-dentition Class II cases with deep bites where teeth are erupting unpredictably.
A lab modification makes the entire unit removable; a game changer for bite checks.
II. What the Appliance Does
Helps level the curve of Spee on the lower arch.
Holds the upper first molars back, preserving “E-space” (about 1-1.5mm of Class II correction).
You can leave it in for 5-7 months, then easily remove it to check progress.
III. The Removable Modification; Lingual Sheaths + Distal Lock Bands
The appliance uses Goshgarian lingual sheaths with distal lock bands.
The whole anterior bite plate and TPA section can be pulled out as a unit while the bands stay cemented on the molars.
After checking the bite (tap, tap, grind), you can reinsert the unit; no need to debond bands.
IV. Additional Benefits and Customization
You can cut off the anterior bite plate if the deep bite is resolved, but you still need to hold E-space.
The design is thick and locks teeth in place; you could even add a groove to make it a “Rickinator” for other mechanics.
Bands can also have soldered brackets for future braces.
V. Important Clinical Note
Cementation technique is critical. If you cement it without proper draw, the removable unit won’t come out.
Don’t bend the appliance when pulling it out.
VI. The Bottom Line
This hybrid TPA/FBP with lingual sheaths and distal lock bands gives you the best of both worlds: fixed bite control with removable convenience.
Ask your lab for “Goshgarian lingual sheaths with distal lock bands.”
Great for early Class II deep bite correction without committing to full braces or Invisalign MA.
Understanding Tongue-Ties: Symptoms, Types, and Feeding Solutions
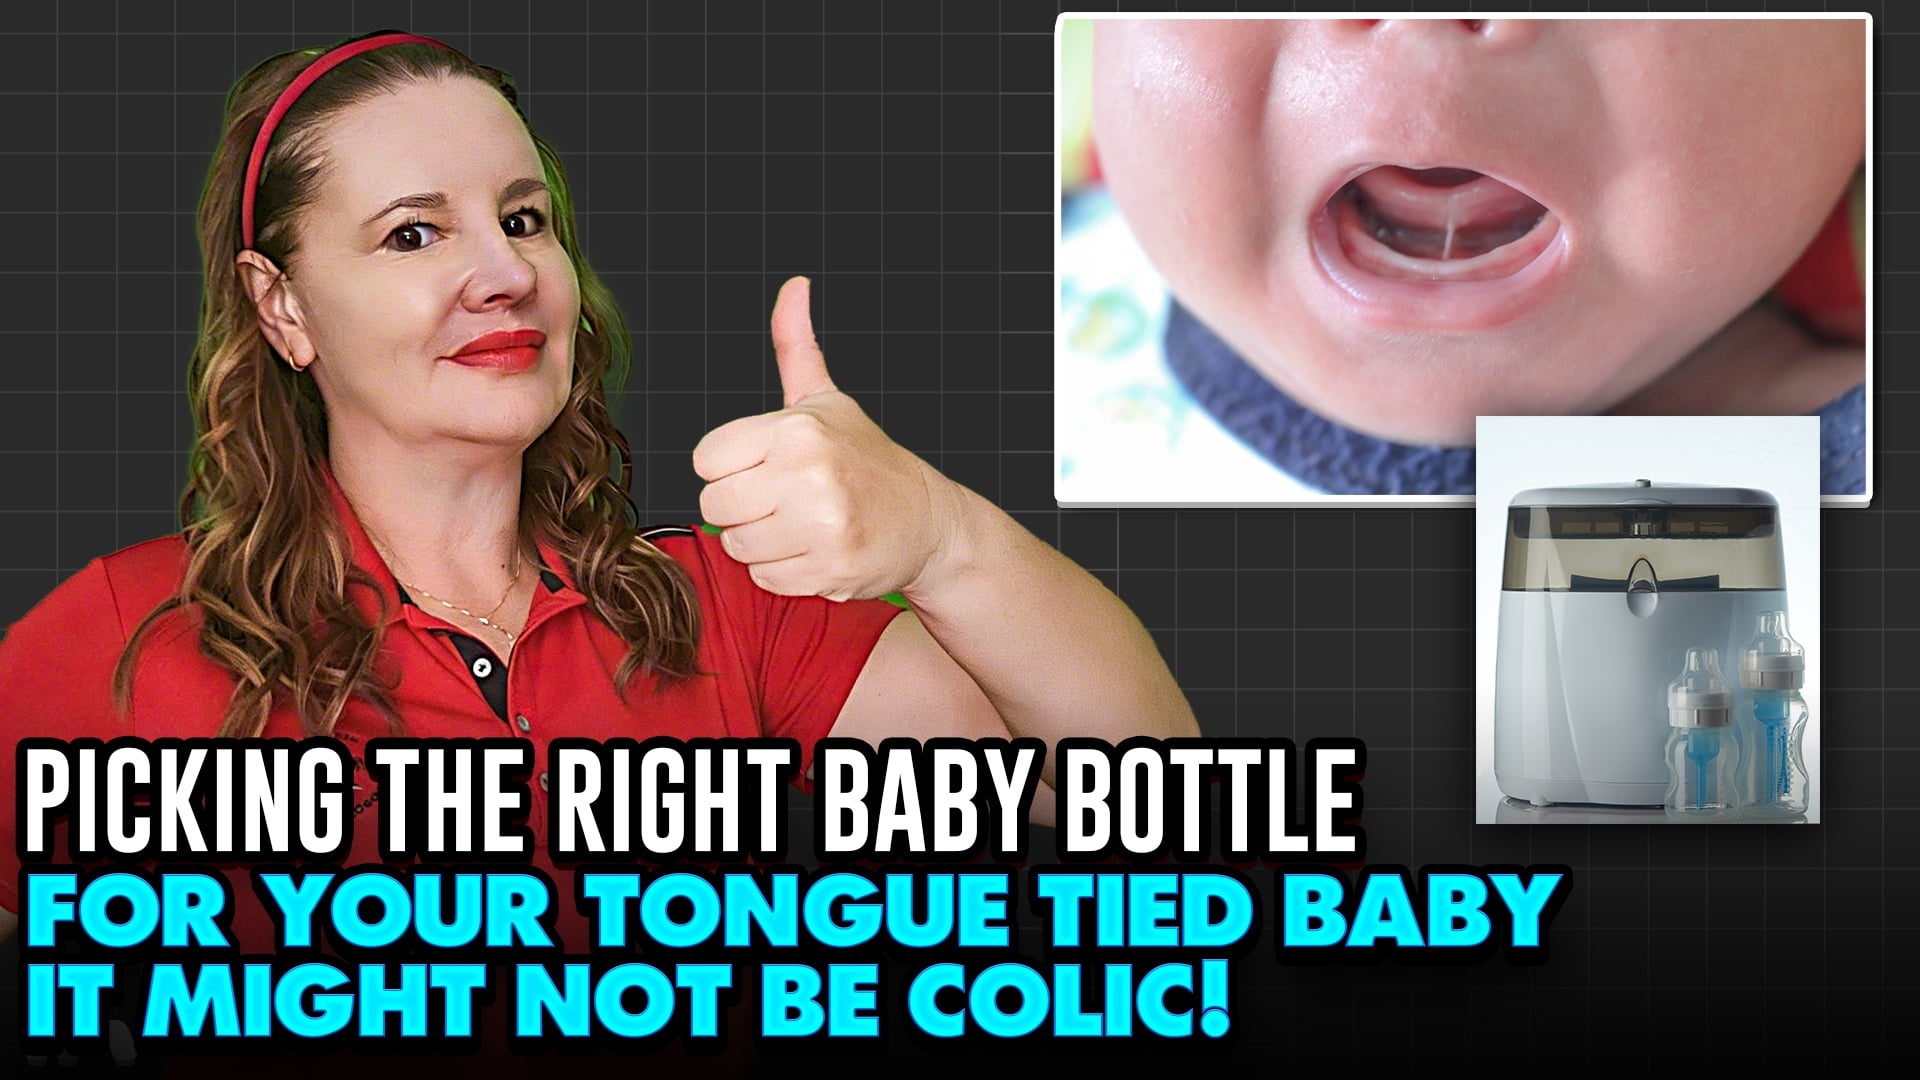 Understanding Tongue-Ties: Symptoms, Types, and Feeding SolutionsIs your baby struggling to feed, crying constantly during meals, or failing to gain weight? These heartbreaking challenges often point to a common, treatable condition: tongue-tie (ankyloglossia).Identifying the SignsTongue-tie occurs when the membrane connecting the tongue to the floor of the mouth is too short or thick.In infants, look for:Repeatedly losing a firm latch on the breast or bottle.Severe fussiness and crying during feeding cycles.Poor weight gain despite a steady milk supply.In older children, symptoms manifest as:Speech articulation difficulties.Gagging, choking, or intolerance of specific food textures.Inability to poke the tongue past the lower teeth.Restless sleep and nighttime awakenings.Anterior vs. Posterior TiesNot all tongue-ties look the same. They generally fall into two categories:Anterior Ties: Located near the front tip of the tongue. These are highly visible and easily diagnosed during a standard pediatric exam.Posterior Ties: Hidden further back or embedded beneath mucous membranes. They are virtually impossible to see visually. While a child with a posterior tie might briefly touch the roof of their mouth, they cannot sustain it. This restricts the mid-tongue elevation required for a proper feeding vacuum.Bottle Management StrategiesIf your baby is struggling, modifying your bottle system and feeding style can bypass structural restrictions:Nipple Shape: Choose narrow-neck nipples with a gradual slope (such as Dr. Brown’s Narrow, Pigeon, or Lansinoh). Avoid wide-base nipples, as narrow profiles allow the tongue to cup the underside naturally.Slow Flow: Use extra-slow or preemie flow rates to keep the fluid from overwhelming your baby’s airway.Paced Feeding: Hold your baby upright or side-lying. Keep the bottle horizontal so your baby dictates the flow speed, and introduce regular pauses to minimize swallowed air.Treatment OptionsFamilies can manage tongue-ties through non-surgical therapy or a quick corrective procedure:Conservative Care: Use feeding positions like the upright koala hold to shift the jaw forward. Work with a feeding therapist on oral motor exercises to relax tense facial muscles.Surgical Release (Frenulotomy): A specialist makes a precision incision to release the tight tissue. If you choose surgery, you must perform daily post-operative oral stretches to prevent the tissue from reattaching as it heals.Disclaimer: Latching difficulties can stem from many causes, including a recessed jaw or neonatal infections. Always consult a licensed pediatrician or lactation specialist for a personalized evaluation.
Is AI Botching Your Ceph Numbers? What Dentists Need to Know
 Is AI Botching Your Ceph Numbers? What Dentists Need to KnowArtificial intelligence is transforming orthodontic diagnostics, but recent shifts show that automated cephalometric analysis may be botching your numbers. While AI promises speed and efficiency for busy dental practices, relying blindly on automated tracing can lead to flawed treatment plans and poor patient outcomes. Practitioners must understand the limitations of AI-generated cephalometric metrics to safeguard their clinical accuracy.The Risks of Automated Ceph TracingMany dental professionals use automated software to quickly calculate skeletal and dental relationships. However, current AI models frequently struggle with specific structural variations:Anatomical Variations: Unique patient anatomy often confuses standard machine-learning algorithms.Poor Landmark Identification: Misplacing crucial points like the A-point, B-point, or porion skews the entire diagnostic output.Image Artifacts: Shadowing, patient movement, or dental restorations easily degrade AI accuracy.Lack of Clinical Judgment: AI lacks the context of a patient’s soft tissue profile and functional dynamics.How to Protect Your Practice and PatientsDentists should treat AI diagnostics as a preliminary draft rather than a final answer.Always Verify Landmarks: Manually review every single cephalometric point plotted by the software.Cross-Reference Clinically: Ensure the numbers match the clinical presentations observed during the intraoral examination.Select Premium Software: Use validated, high-quality diagnostic platforms that allow easy manual overrides.Next Steps for Your PracticeIf you want to optimize your diagnostic workflow, I can provide additional insights. Let me know:Which cephalometric tracing software you currently useIf you are experiencing discrepancies in skeletal or dental metricsWhether you focus primarily on interceptive pediatric cases or adult aligner treatments
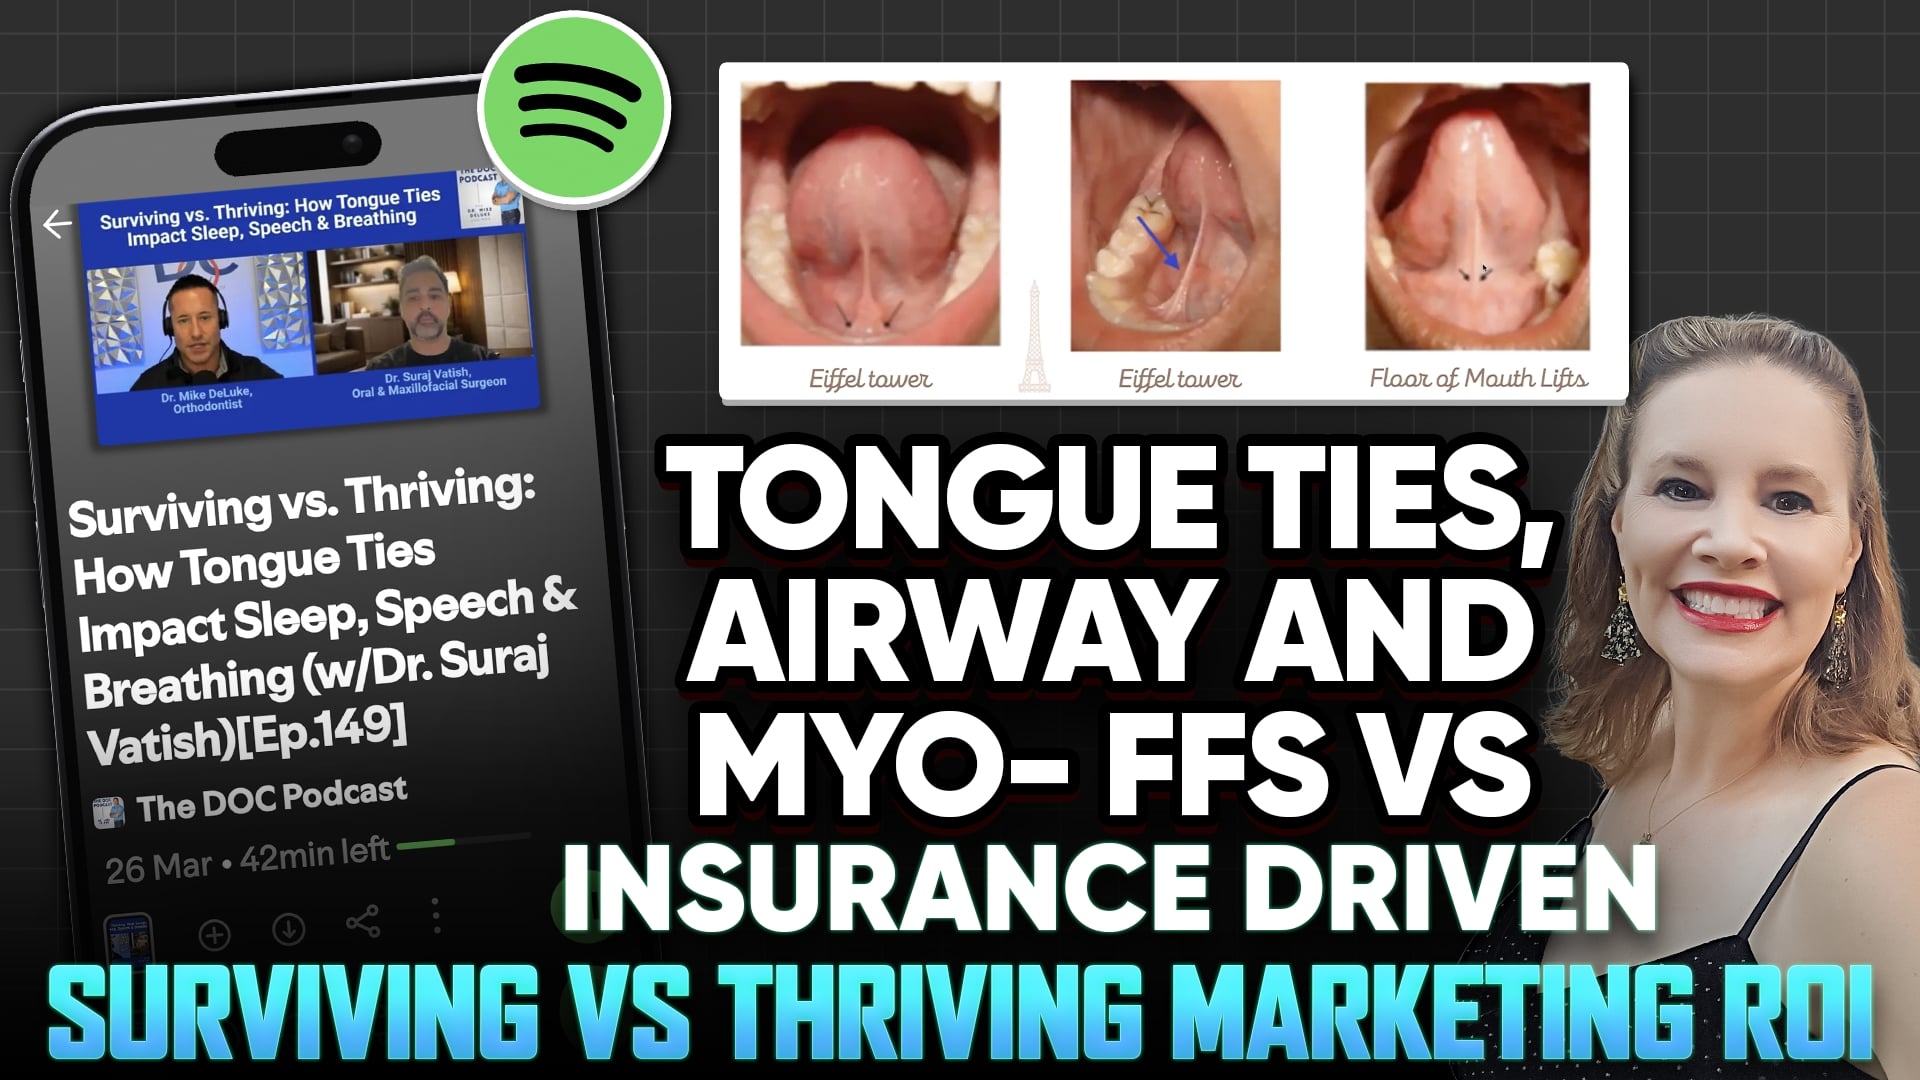
Beyond the Kool-Aid: Finding the Truth in Orthodontic Airway Health
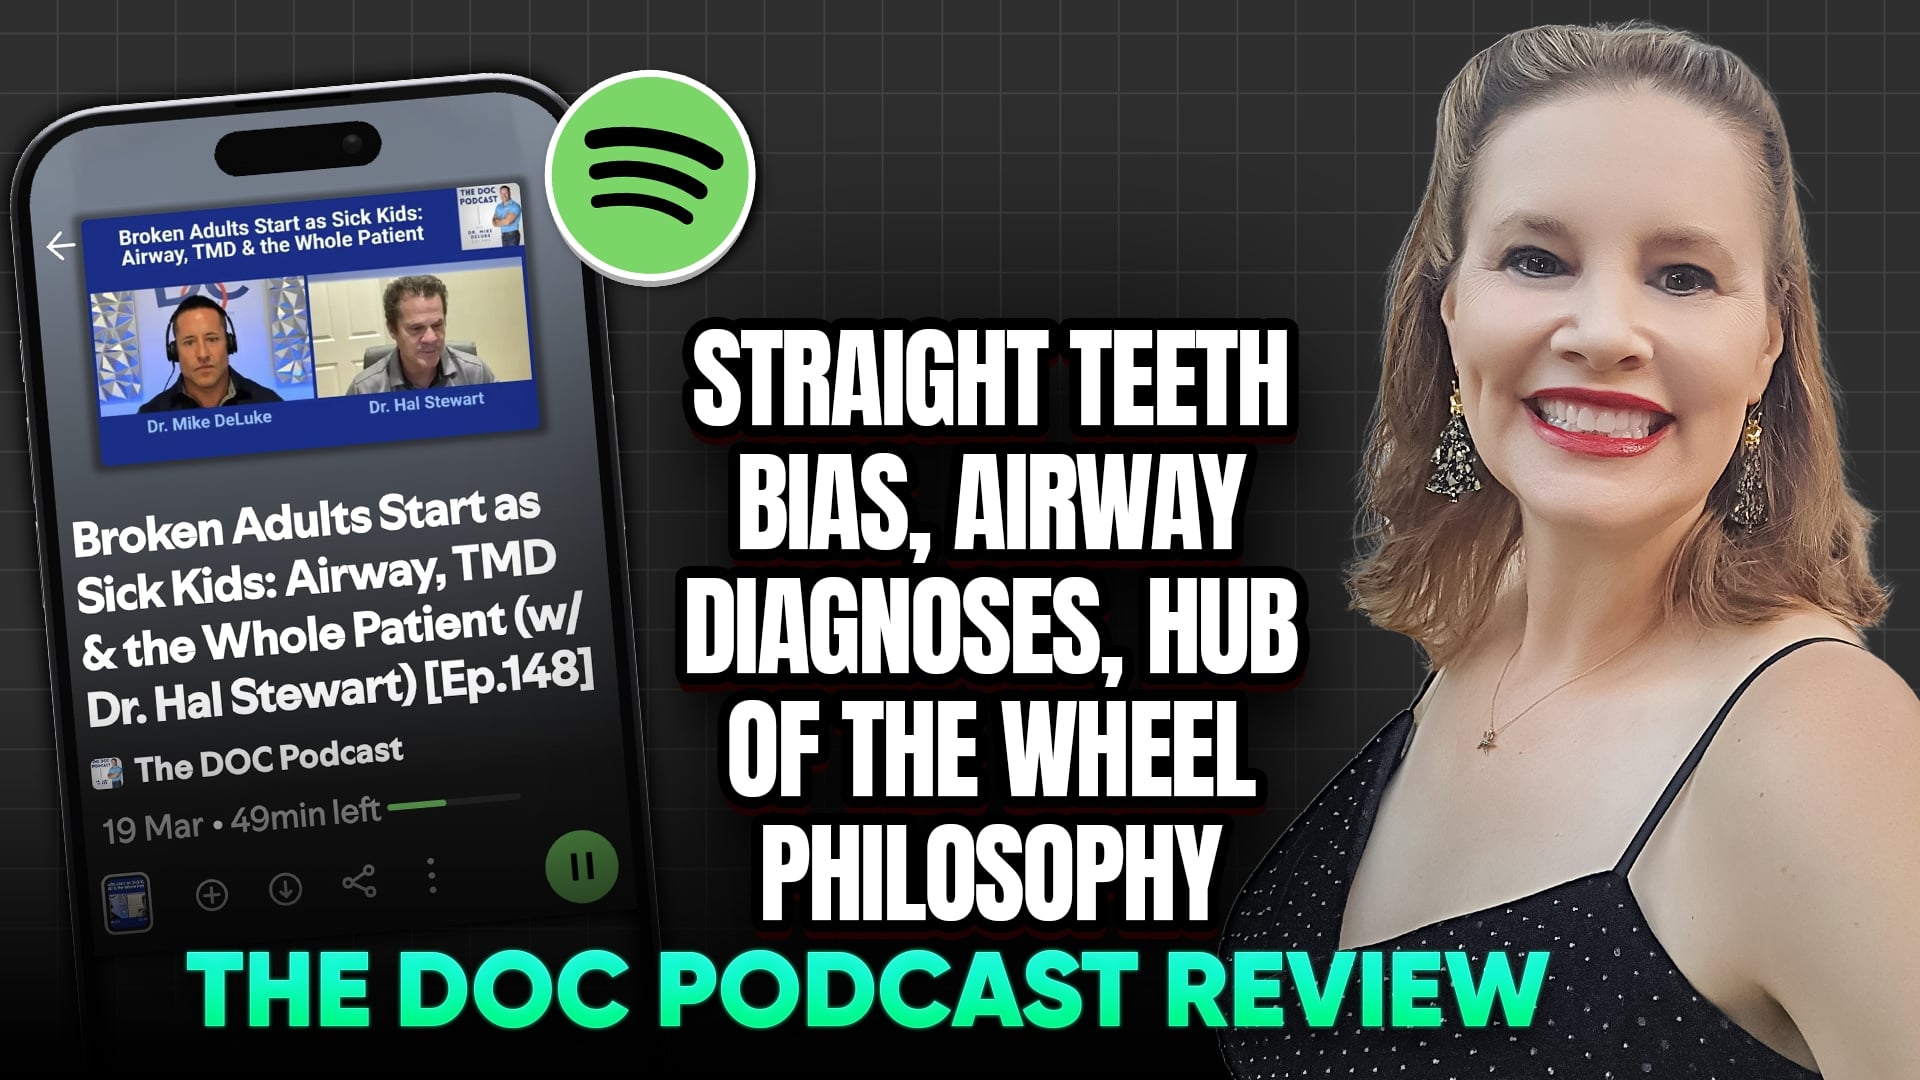 Beyond the Kool-Aid: Finding the Truth in Orthodontic Airway HealthThe dental podcast landscape is often filled with biased perspectives. Key Opinion Leaders (KOLs) frequently speak under corporate contracts. This limits their clinical opinions.However, a recent episode of The DOC Podcast breaks through the noise. Hosted by Dr. Mike Duke, the episode tackles the ongoing debate over airway health. It compares the positions of the American Association of Orthodontists (AAO) and the American Dental Association (ADA).The Problem with the AAO ModelThe AAO white paper places orthodontists strictly under the direction of medical doctors. It views pediatric airway issues strictly as medical problems. Orthodontists following this model cannot treat children without clear physician approval.This creates massive real-world issues:Pediatrician gaps: Most pediatricians have no training in orthodontics.Patient limbo: Children wait for care while parents face delays.High costs: Unnecessary, expensive laboratory sleep tests are forced upon families.False premises: The model falsely implies orthodontics automatically cures sleep apnea.In reality, tooth movement cannot fix non-orthodontic structural issues like tongue-ties.A Better Way: The Collaborative ApproachDr. Duke and dental expert Steve Kstensson advocate for a practical philosophy. Dentists are uniquely positioned to catch early craniofacial underdevelopment. Small upper or lower jaws are easily spotted during routine cleanings. Airway screening should be standard practice for every general and pediatric dentist.This collaborative workflow protects patients while respecting boundaries:1. Nose-First PhilosophyAll airway health begins with proper nasal breathing. Dentists must actively screen for chronic mouth breathing.2. Wearable TechnologyDentists can distribute simple, overnight screening tools to patients. This allows the office to capture crucial biological data cheaply.3. Medical CooperationThe recorded data is sent directly to medical colleagues. MDs handle final diagnoses without requiring expensive sleep lab stays.4. Active Referral NetworksOrthodontists must work closely with myofunctional therapists, speech-language pathologists (SLPs), and ENTs. This treats the root cause of the breathing issues.Take Back Your DomainDentists do not need to diagnose medical conditions to protect young patients. Gathering data and recognizing early skeletal changes falls firmly within dental expertise. It is time to move past restrictive corporate positions. We must implement physiological airway screening into daily practice.
When Retainers Pose a Risk
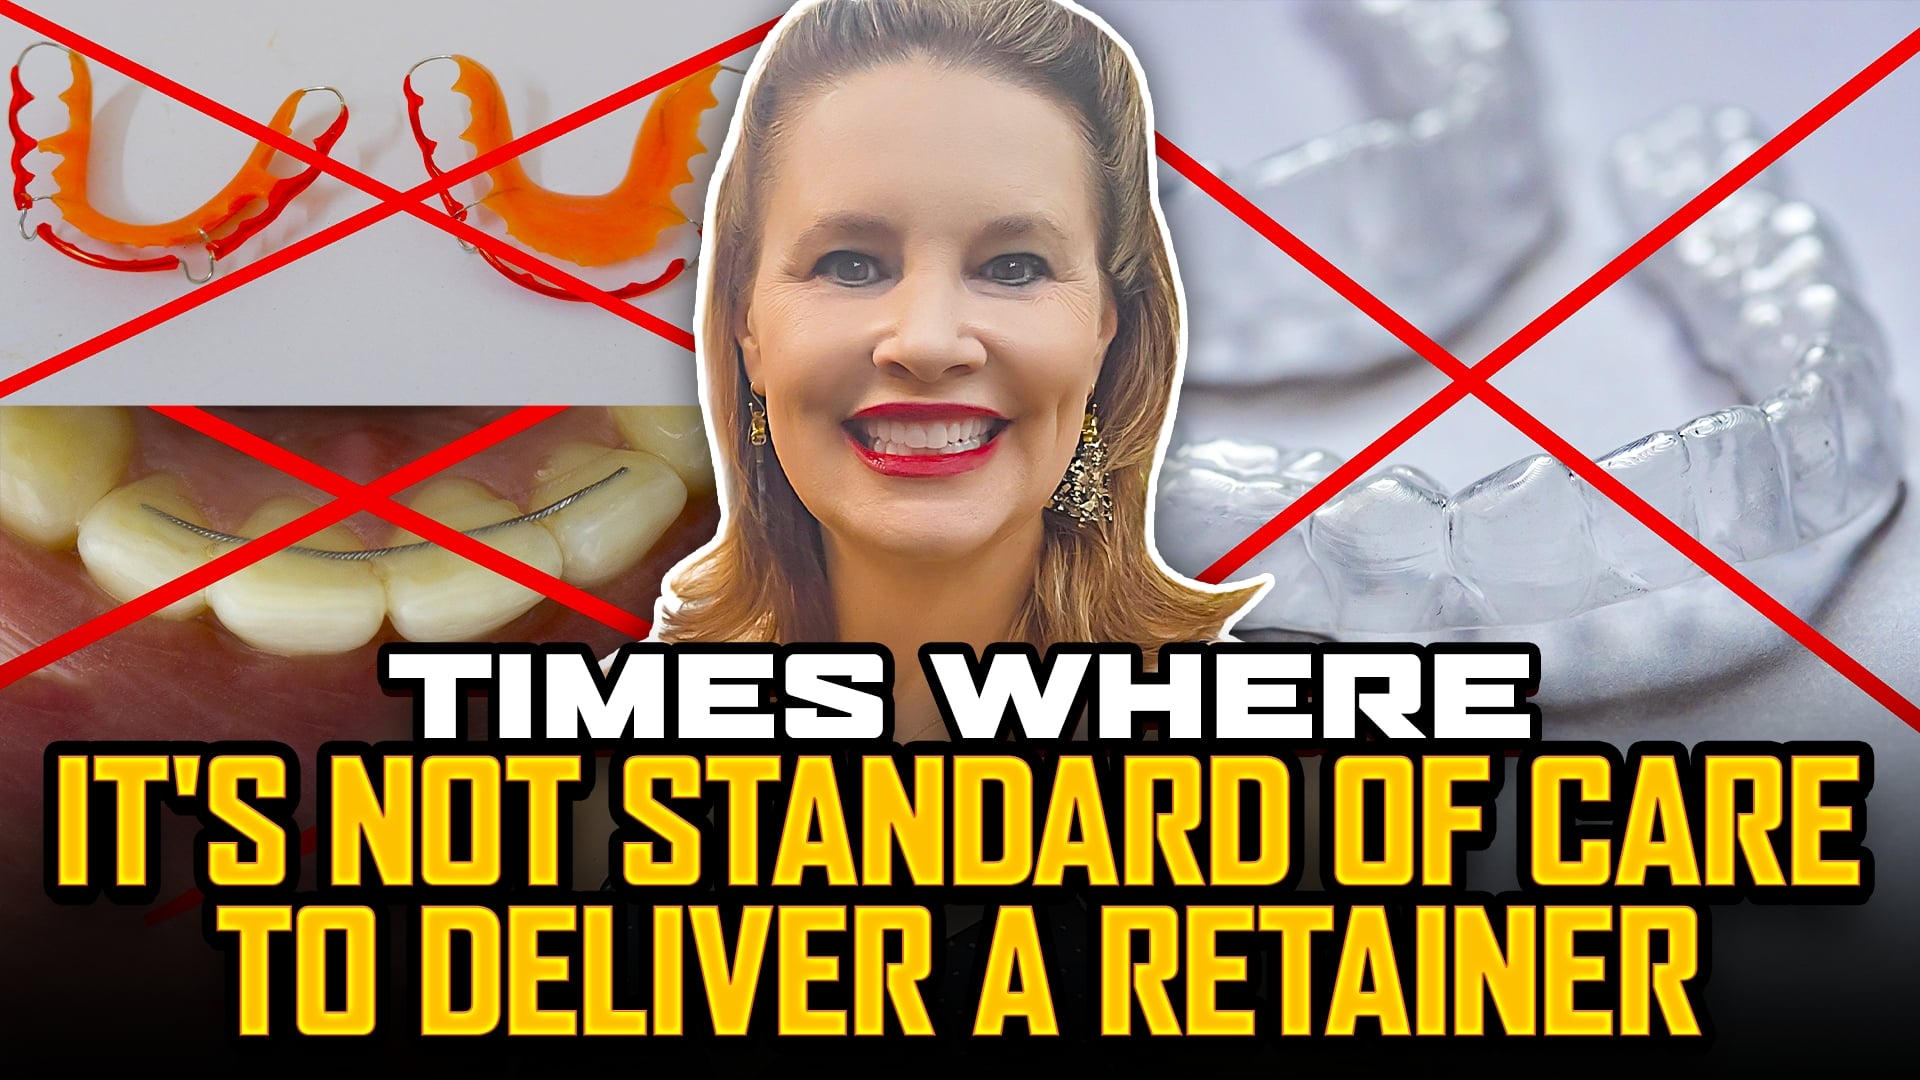 When “Standard of Care” Means NO Retainer: Navigating Complex Orthodontic Decisions
The common orthodontic advice is to “wear your retainers for life.” However, there are critical instances where providing a retainer may actually contradict the standard of care. Dr. Amanda of StraightSmile Solutions delves into these rare scenarios where delivering a retainer might do more harm than good.
Understanding the Rule Behind Retention
Teeth are held in place by the periodontal ligament (PDL), which acts like tiny “bungee cords” with memory. When teeth are moved, these cords naturally want to pull them back to their original positions. While bone growth is generally stable, tooth movement always carries a risk of relapse.
Dr. Amanda outlines several situations where the risks of a retainer may outweigh the benefits:
– **Hygiene & Pathogen Breeding Grounds**: If a patient struggles with maintaining proper hygiene, clear aligner-style retainers can become breeding grounds for bacteria, potentially leading to severe dental issues. In such cases, a Hawley retainer, which allows for better cleaning, may be a safer option, or in extreme situations, no retainer until hygiene improves.
– **Periodontal Issues**: For patients with active periodontal disease, certain retainers can trap plaque and worsen bone loss. While “perio splints” are an alternative, the primary focus should always be on health rather than alignment.
– **Unfinished Treatment**: If treatment is prematurely terminated due to health concerns, root resorption, or patient non-compliance, providing a retainer for a sub-optimal result can lead to legal complications.
Communication: Your Best Defense
Documentation is crucial. If a decision is made not to provide a retainer, thorough charting must explain why the standard of care led to that conclusion. Patients should never be caught off guard regarding their retention needs; discussions should begin on day one and continue throughout treatment. Transparency in conversations
Custom and Semi-Custom 3D AI Braces vs IDB – Dynaflex, Brius, KLOwen, InBrace, LightForce
 Custom and Semi-Custom 3D AI Braces vs IDB – Dynaflex, Brius, KLOwen, InBrace, LightForce
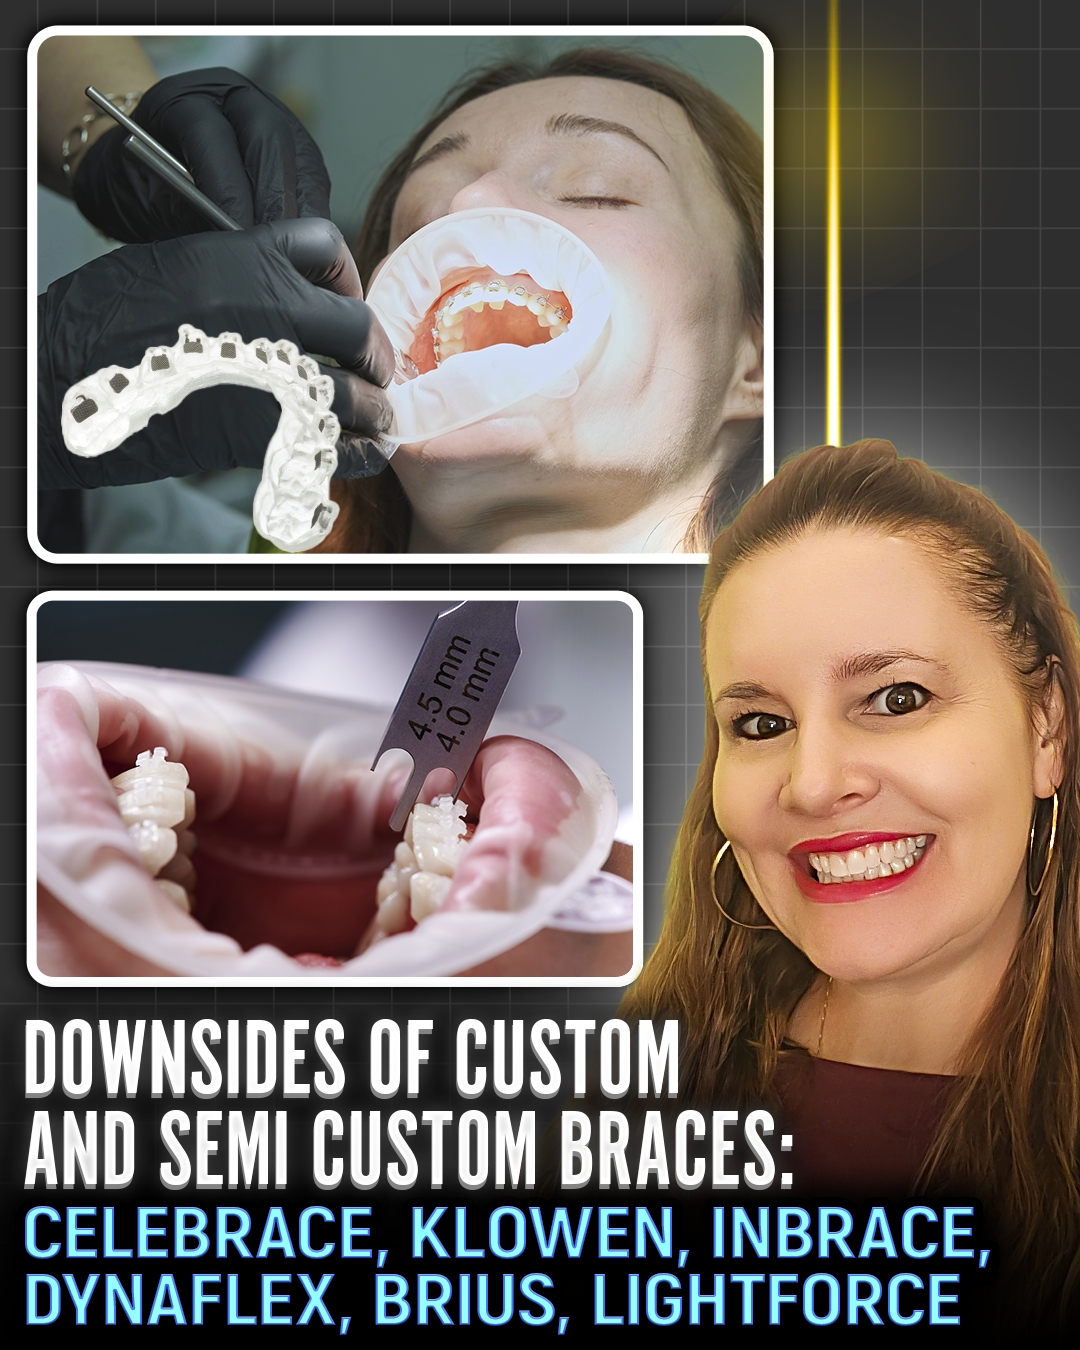
I. Introduction
Dr. Amanda from StraightSmile Solutions breaks down the growing world of custom and semi-custom 3D/4D brackets.
Brands covered: LightForce, Brius, KLOwen, InBrace, Dynaflex, and others.
These are heavily marketed at orthodontic meetings (AAO), but are they worth the cost?
II. The Traditional Alternative Stock Brackets
Stock brackets have been used for generations. They work for 99.5 – 99.9% of patients.
Modern stock brackets cost less than $1 each, especially when bought in bulk.
With proper indirect bonding (IDB), stock brackets produce excellent results.
III. Why Custom Braces Exist
Custom brackets are 3D printed to fit each patient’s unique tooth anatomy.
Benefit: eliminates “teeter-totter” issues on oddly shaped teeth.
May reduce treatment time by a few months (studies suggest ~40%, but IDB alone already saves time).
Trade-off: much higher cost (lab fees reported $2,500 – $3,000 per case, more than Invisalign lab fees).
IV. Brand-Specific Observations
LightForce: 3D printed ceramic, highly aesthetic, but fragile, and takes weeks to fabricate. Makes sense only for high-fee cash practices ($10k-12k per case).
Brius: Lingual independent mover system. Dr. Amanda notes aggressive bot activity when criticized.
InBrace / Dynaflex: Lingual or custom digital workflows similar to standard IDB with a premium price.
KLOwen: Hybrid semi-custom metal brackets with digital workflow not clearly different from basic IDB.
V. The Bottom Line for General Dentists
Every general or pediatric dentist should use indirect bonding (IDB), as it eliminates placement errors.
But you do NOT need expensive custom brackets. Use stock brackets with a low-cost IDB service (e.g., DIBS AI for a few hundred dollars per case).
Custom braces are a niche product for tech-enthusiasts, cash-pay adults, and practices charging premium fees.
For most Phase 1 and comprehensive cases, stock brackets + IDB is the most efficient and cost-effective choice.
The Hidden Cost of Convenience: Is AI Remote Monitoring Making Orthodontists Extinct?
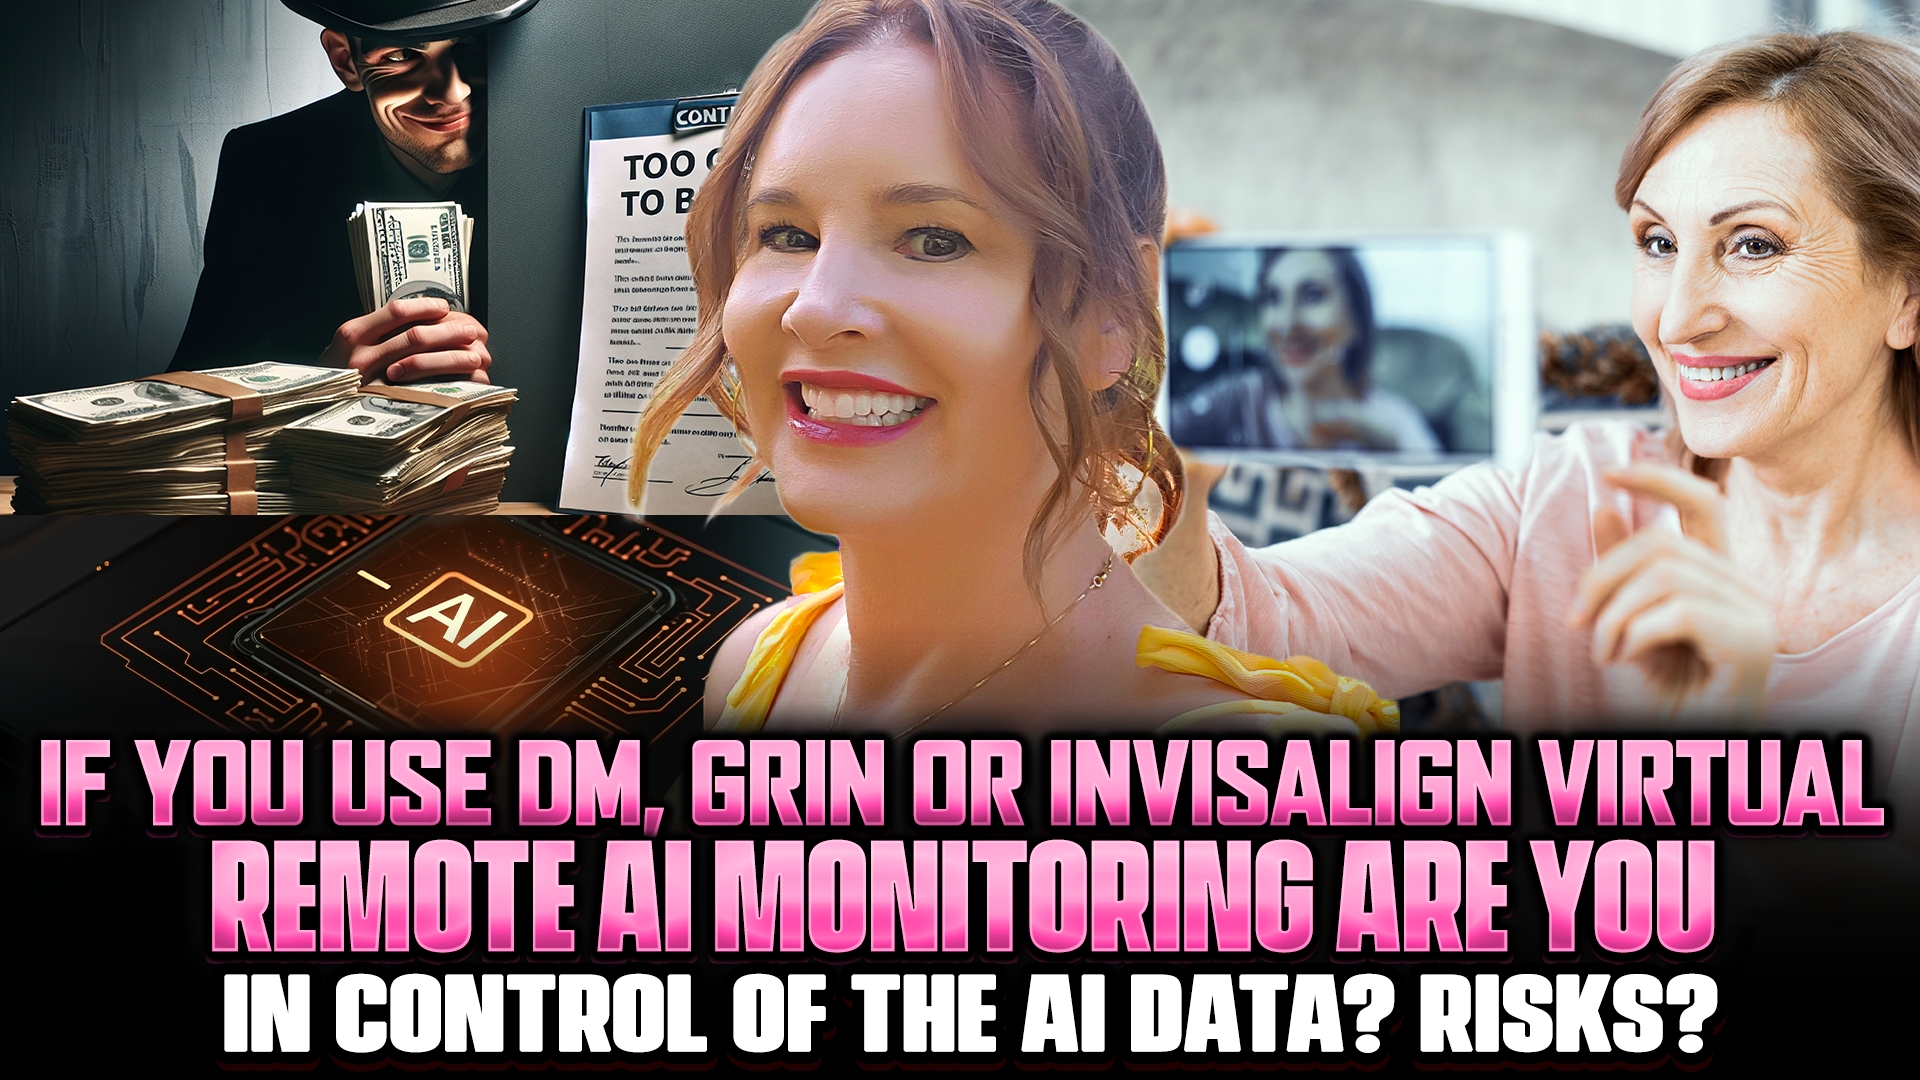 In the fast-paced world of modern orthodontics, tools like Invisalign Virtual, Grin, and Dental Monitoring (DM) have become the gold standard for efficiency (0:09). They promise patients fewer office visits and practitioners a more streamlined workflow (2:18). But as Dr. Amanda from Straight Smile Solutions explores in her latest video, there is a looming question every dentist and patient should be asking: What exactly is happening to that data? (0:21)Your Data as the “Fuel” for AIWhen a patient uploads photos or scans to these third-party platforms, they aren’t just helping their doctor track their progress (3:36). They are feeding massive AI models (1:53).Align Technology: Uses anonymized data for internal research and training to predict tooth movement patterns (2:51).Dental Monitoring (DM): Boasts the industry’s largest database, using millions of scans to identify over 130 oral observations, from aligner tracking to gingivitis (3:21).Dr. Amanda raises a provocative point: by providing this data, are orthodontists “feeding their own demise?” (1:53) As these models become more predictive, the need for an in-person specialist to oversee every step of treatment could potentially diminish (4:42).The Privacy and Legal RealityWhile the treating orthodontist is typically the “controller” of the data, the AI companies act as “processors” (5:24). Once personal identifiers like names and dates of birth are removed, the information is no longer considered Protected Health Information (PHI) under HIPAA—it simply becomes data for AI training (5:38).Key takeaways for your practice:Anonymization is Permanent: Once data is integrated into a training model, it is often impossible to delete (5:55).Know the Law: States like California and Nevada offer specific opt-out rights regarding the sale or processing of personal data (6:00).Specific Consent: It is becoming increasingly vital to have an AI-specific consent form that explicitly outlines how data will be used by third parties (6:21).The “Opt-Out” DilemmaWhat happens if a tech-savvy patient refuses to let their data be used for AI training? (6:43) If the “remote” part of the monitoring is removed, the patient must return to monthly in-person visits (6:47). This raises a new operational question: Should practices charge more for patients who opt out of remote monitoring? (6:52)As technology continues to evolve, the balance between convenience and data privacy will remain a central challenge for the dental community (2:08).
The New Era of Orthodontics: How AI and 4D Modeling Are Redefining the Digital Smile
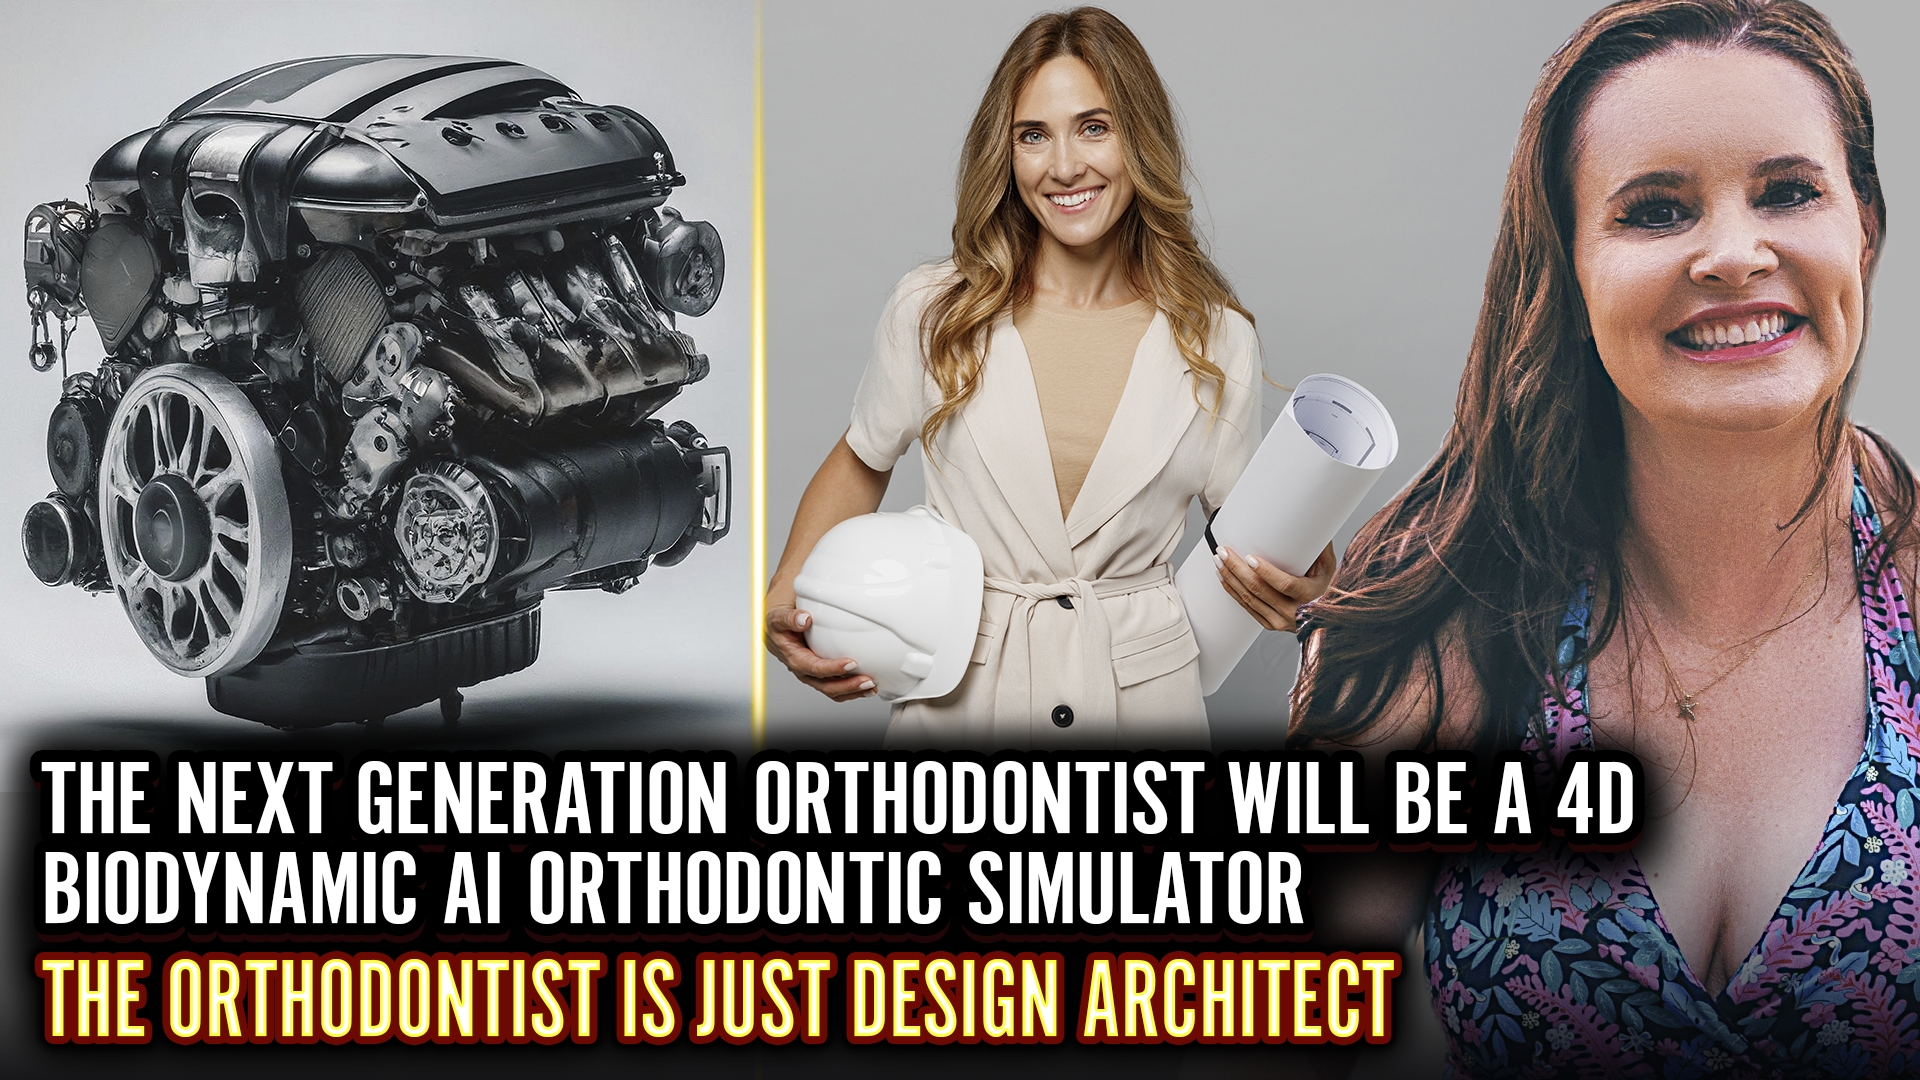 The New Era of Orthodontics: How AI and 4D Modeling Are Redefining the Digital SmileThe traditional world of “analog” orthodontics is rapidly transforming. In a recent presentation by StraightSmile Solutions, the focus shifted from manual adjustments to a future where dentists and orthodontists act as Design Architects. At the heart of this shift is the 4D Biodynamic Predictive Model, a tool that uses artificial intelligence to move beyond static 3D scans and into the realm of dynamic, time-based treatment.Beyond 3D: The Power of the Fourth DimensionWhile 3D modeling allows us to see the teeth and jaw in three-dimensional space, the fourth dimension is time.Predictive Simulations: AI-driven 4D models simulate how teeth will respond to forces over the entire course of treatment.Accounting for Variables: These advanced models are beginning to program “real-world” variables that analog methods often overlook, such as bone density, genetics, and patient habits like tongue thrusting or mouth breathing.Biological Response: Unlike static plastic models, biodynamic modeling aims to predict the actual biological response of the bone and tissue, making the final result much more predictable.The Clinician as a “Design Architect”The role of the orthodontist is evolving from someone who performs manual labor to a digital architect who designs the ideal outcome.Strategic Planning: With AI handling the heavy lifting of data analysis and tooth movement prediction, clinicians can focus on the overarching architectural design of the smile.Empowering General Dentists: These tools are especially transformative for general and pediatric dentists. Professional consulting services, such as those offered by StraightSmile Solutions, help these practitioners integrate complex orthodontics into their daily workflow with confidence.Reduced Guesswork: By using 4D simulations, the “trial and error” of traditional methods is replaced by measurable, data-driven accuracy.Why This Matters for PatientsThis isn’t just a win for doctors; patients are the ultimate beneficiaries of this technological leap.Faster Results: Precise planning and optimized movement paths can reduce total treatment time by several months.Fewer In-Office Visits: AI-powered remote monitoring means patients can often track their progress from home, reducing the need for frequent chairside adjustments.Visual Transparency: Patients can see a 4D preview of their future smile before they even start, which builds trust and sets realistic expectations.The Future is ProactiveWe are moving away from reactive orthodontics—where we fix problems as they arise—and toward a proactive, intentional model. The 4D Biodynamic Predictive Model represents a paradigm shift that makes treatment more efficient, more predictable, and ultimately more human by allowing doctors to focus on the person behind the smile.