
StraightSmile Solutions®
What You Need to Know About Kobayashi Hooks and Ligature Steel Ties
What You Need to Know About Kobayashi Hooks and Ligature Steel Ties
Have you ever wondered about the main differences between Kobayashi Hooks and Ligature Steel Ties? These two techniques can offer various pros and cons, and keeping this in mind as part of your orthodontics treatment planning can help. Fortunately, we’ve summarized some of the key things you should know about using Kobayashi Hooks and Ligature Steel Ties in orthodontics to help.
The Differences Between Kobayashi Hooks and Ligature Steel Ties
If you’ve been wondering about the main differences between Kobayashi Hooks and Ligature Steel Ties, there are several key things to keep in mind.
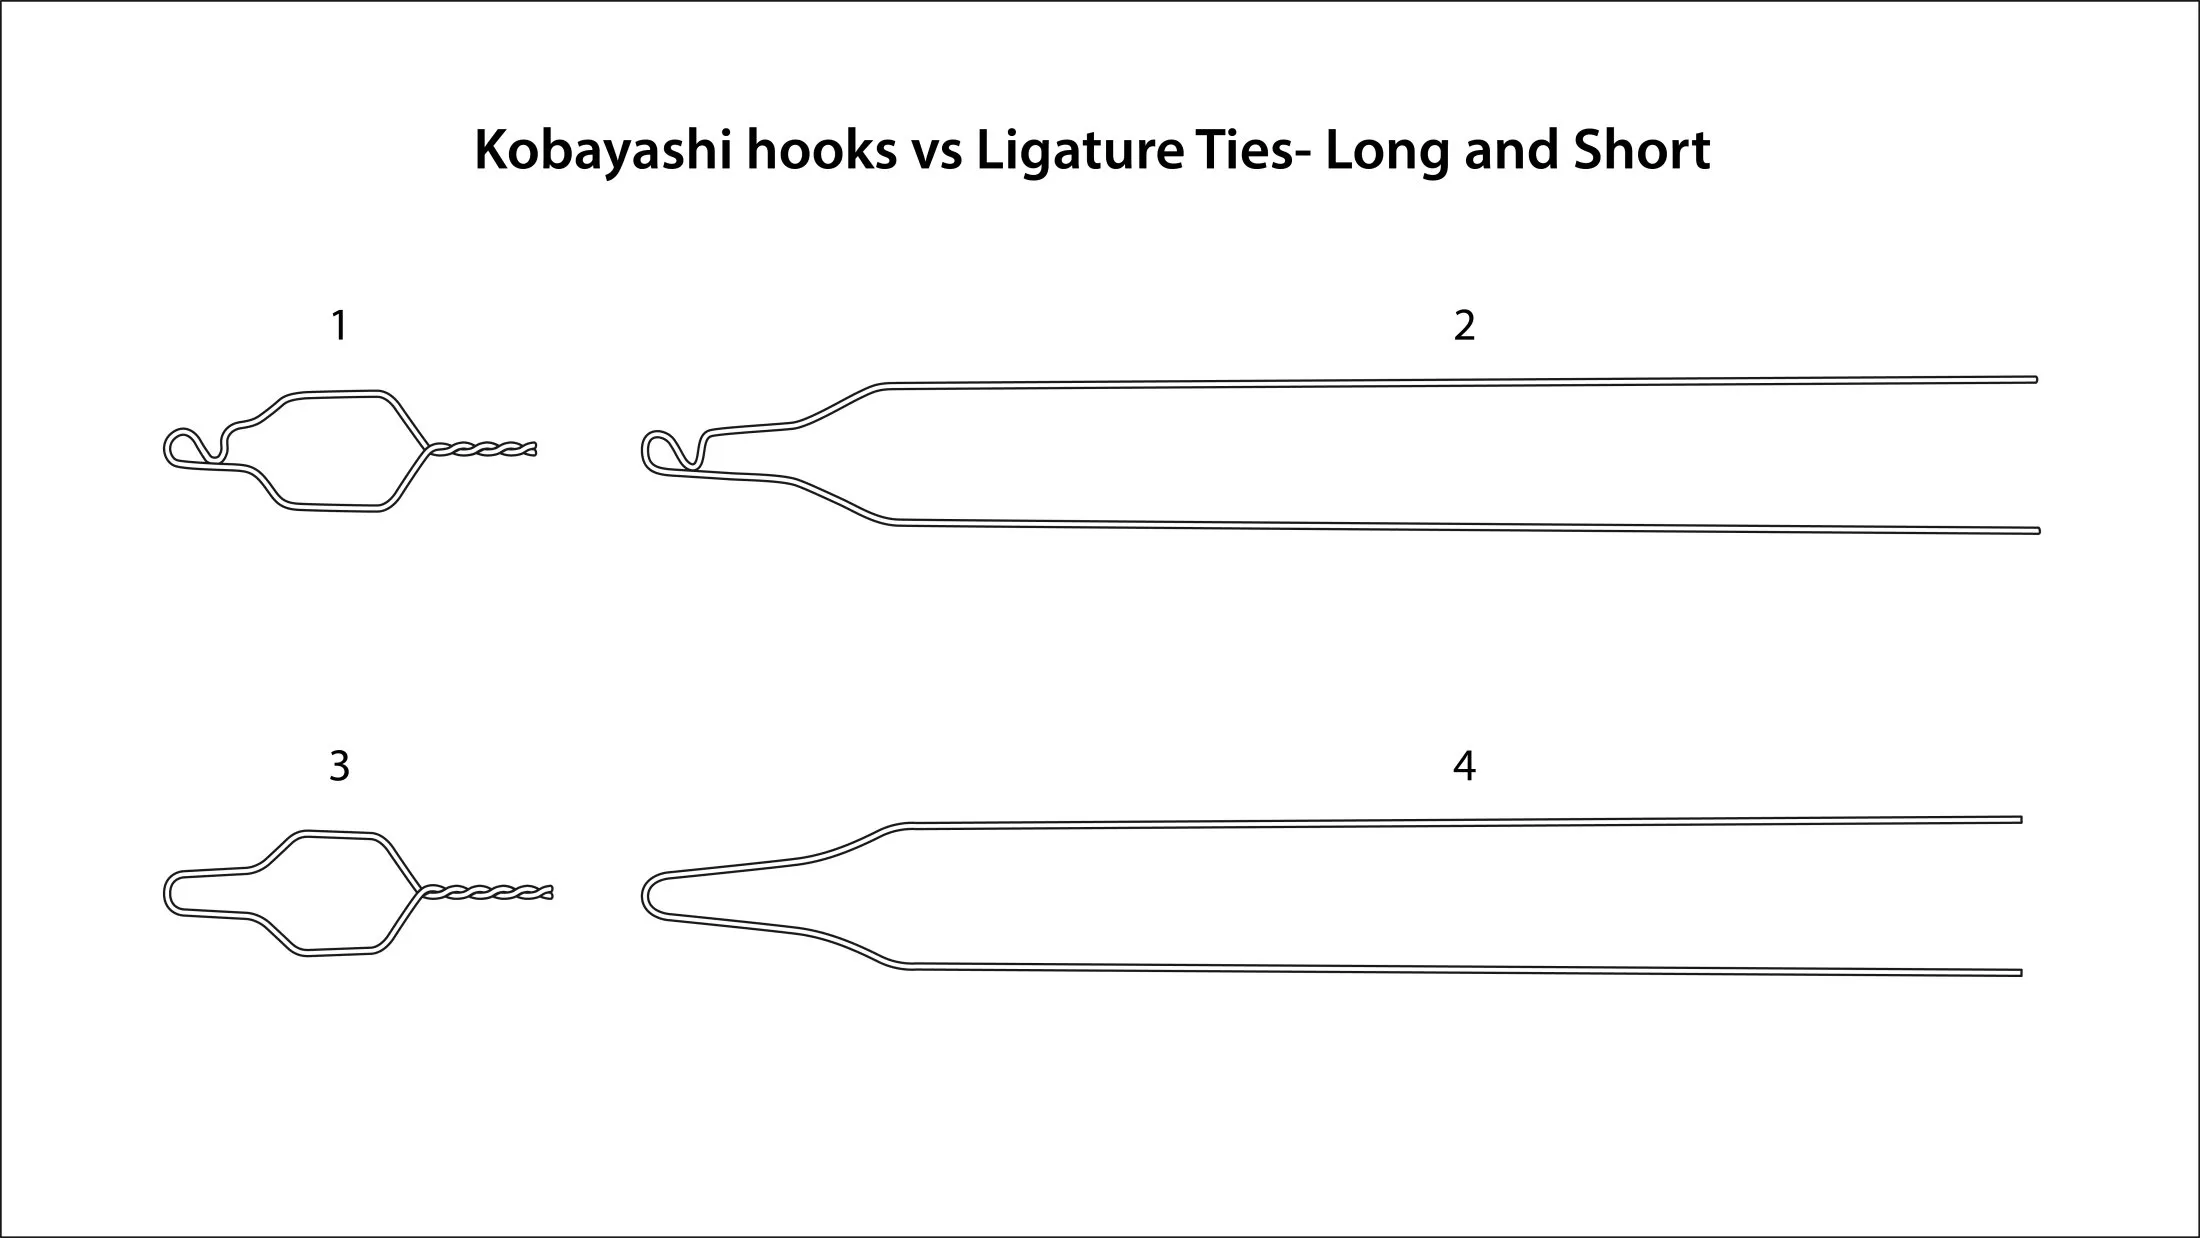
Kobayashi Hooks are predominantly used as an add-on hook, which can potentially bother the patient, but they do make working with elastics easier. Hooks may be needed on almost any tooth, depending on the patient’s requirements, which is where the Kobayashi Hooks come in. They are very similar to Ligature Steel Ties, but their function is to hook an elastic on.
By contrast, a Ligature Tie is used for many different applications, such as under tie, lace back, or long tie cases. Moreover, these can be used in scenarios when an o-ring doesn’t fully engage, preventing you from proceeding with the treatment plan.
It’s worth noting that both options can come in different gages, depending on your choice of distributor. Ligature ties may be more effective on the lighter side for short options; meanwhile, a mid to heavy gage may be more effective for long Ligature Ties.
Find Out More with our Straightwire Classes
If you’d like to find out more about Kobayashi Hooks and Ligature Steel Ties in orthodontics cases, make sure to check out our classes or view more of our Straightwire videos on our YouTube channel.
The Three Ages in Orthodontics You Should Know
The 3 Ages in Orthodontics
When it comes to your orthodontics patients, knowing how to treat a patient can be incredibly difficult, and one of the major things you’ll need to consider as part of this is your patient’s age. It’s not enough to just know their chronological age, though (i.e., how many years they’ve been alive); instead, you’ll also want to make sure you know your patient’s level of dental and skeletal maturity and how this influences the most effective treatment plan.
The Three Ages in Orthodontics You Should Know
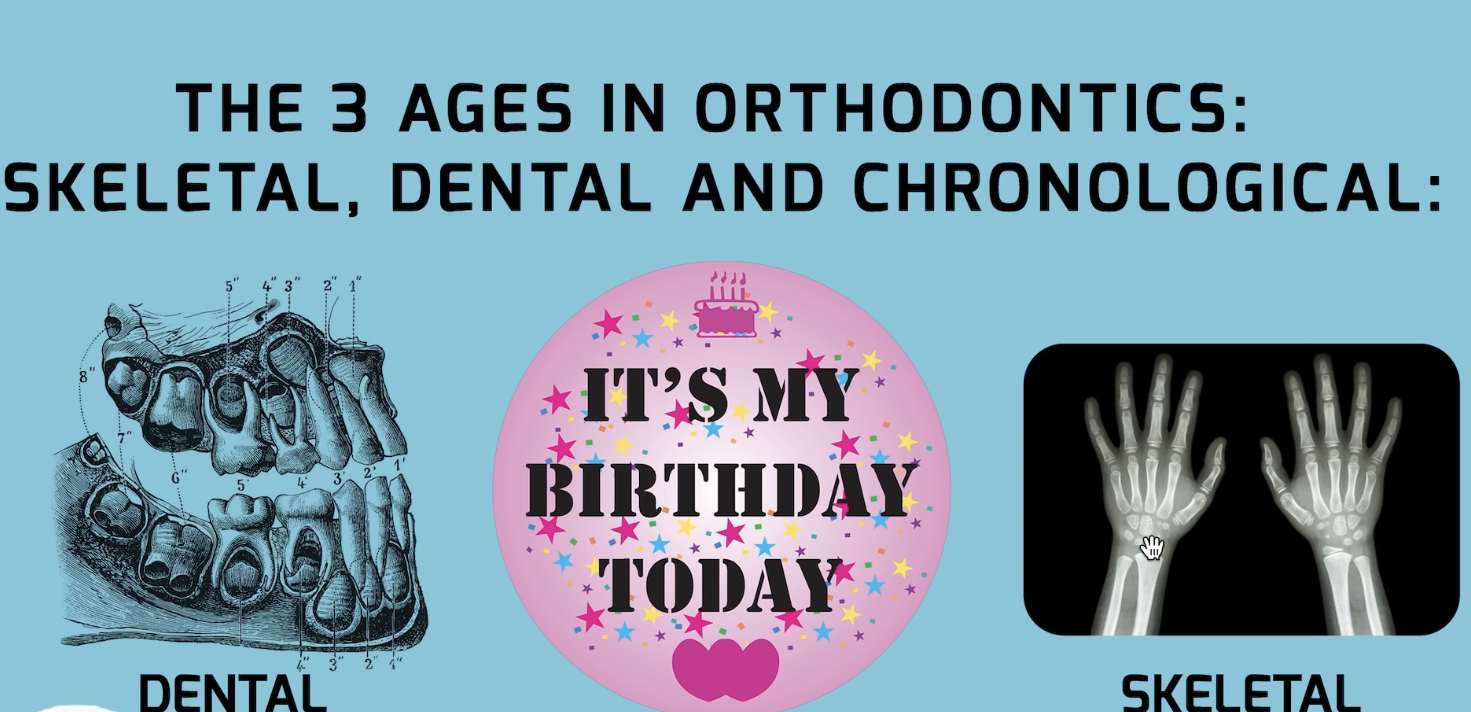
A young patient – especially those in Phase 1 – will have three different ages you should consider. These are as follows:
1. Chronological age: While it’s not the “be all and end all” of dental treatments, a patient’s chronological age can significantly impact their treatment plan. The chronological age is your patient’s normal age in years – in other words, how long since they were born.
2. Dental age: A patient’s dental age can strongly influence your approach to ortho treatments. Indeed, if a patient has more of their teeth in than you might expect for their chronological age, this could influence your approach to treating them.
3. Skeletal age: Similarly to dental age, a patient may potentially be more or less developed skeletally than you might expect at their age. Taking a hand-wrist x-ray is one of the simplest ways to determine this.
These three ages can directly influence how you treat your patient before ortho starts, especially when you want to expand the jaw and the like. Considering all of these factors together can help you take the necessary steps as required to treat your patients successfully.
How These Influence Your Cases
Many people assume that a patient’s chronological age is one of the most influential factors in treatment plan choices. However, understanding a Phase 1 patient’s dental and skeletal age can help you make the most effective choices for your own patients. So, when treating mixed dentition Phase 1 patients, make sure you’ve considered all aspects of their age before ortho starts to inform your decision.
How to Manage an Invisalign Case with Existing Implants
Ideally, Invisalign patients do not have existing implants before they receive aligners. However, there are cases in which patients want Invisalign after they have an implant. These Invisalign cases might not always be possible, and patients with implants should straighten their teeth first before receiving an implant in most cases.
But you might still be able to help your patients achieve the goal of a straight smile after they have received an implant if their case is right. In this article, we will discuss how to proceed with an Invisalign case if you have come across a case in which your patient already has implants.
How to Manage an Invisalign Case with Existing Implants
As always, each case is different, requires a level of examination, and has a different level of complexity. Implants are a fundamental complication with Invisalign because they are teeth that are unable to move. When we straighten teeth or reduce crowding, we need to be able to move teeth in order to straighten them. This is done by expanding arches, using anterior bite turbos, or proclining teeth—all of which cannot be done in most cases where a patient has an implant.
Distalization could be an option depending on the placement of the implant because sequential distalization is the movement of the teeth one by one in order to make space. However, if there are posterior implants, this is no longer an option because the teeth won’t be able to have extra room to move.
In these cases, they are considered limited due to the immovable teeth. You could potentially proceed with Invisalign in cases where there are small gaps between the front teeth and a posterior implant, for example. Other options that might be preferable include restorative services, such as veneers or other cosmetic dentistry.
Class 3 Serial Cephalometric Xrays
Class 3 Serial Cephalometric Xrays
Have you ever wondered what serial cephalometric xrays are and how they work? In many cases, this is something that people fail to embrace fully in their own cases – but this shouldn’t have to be the case. Luckily, we’ve outlined some of the key things that cephalometric xrays can offer as follows for Class 3 patients.
What are Serial Cephalometric Xrays?
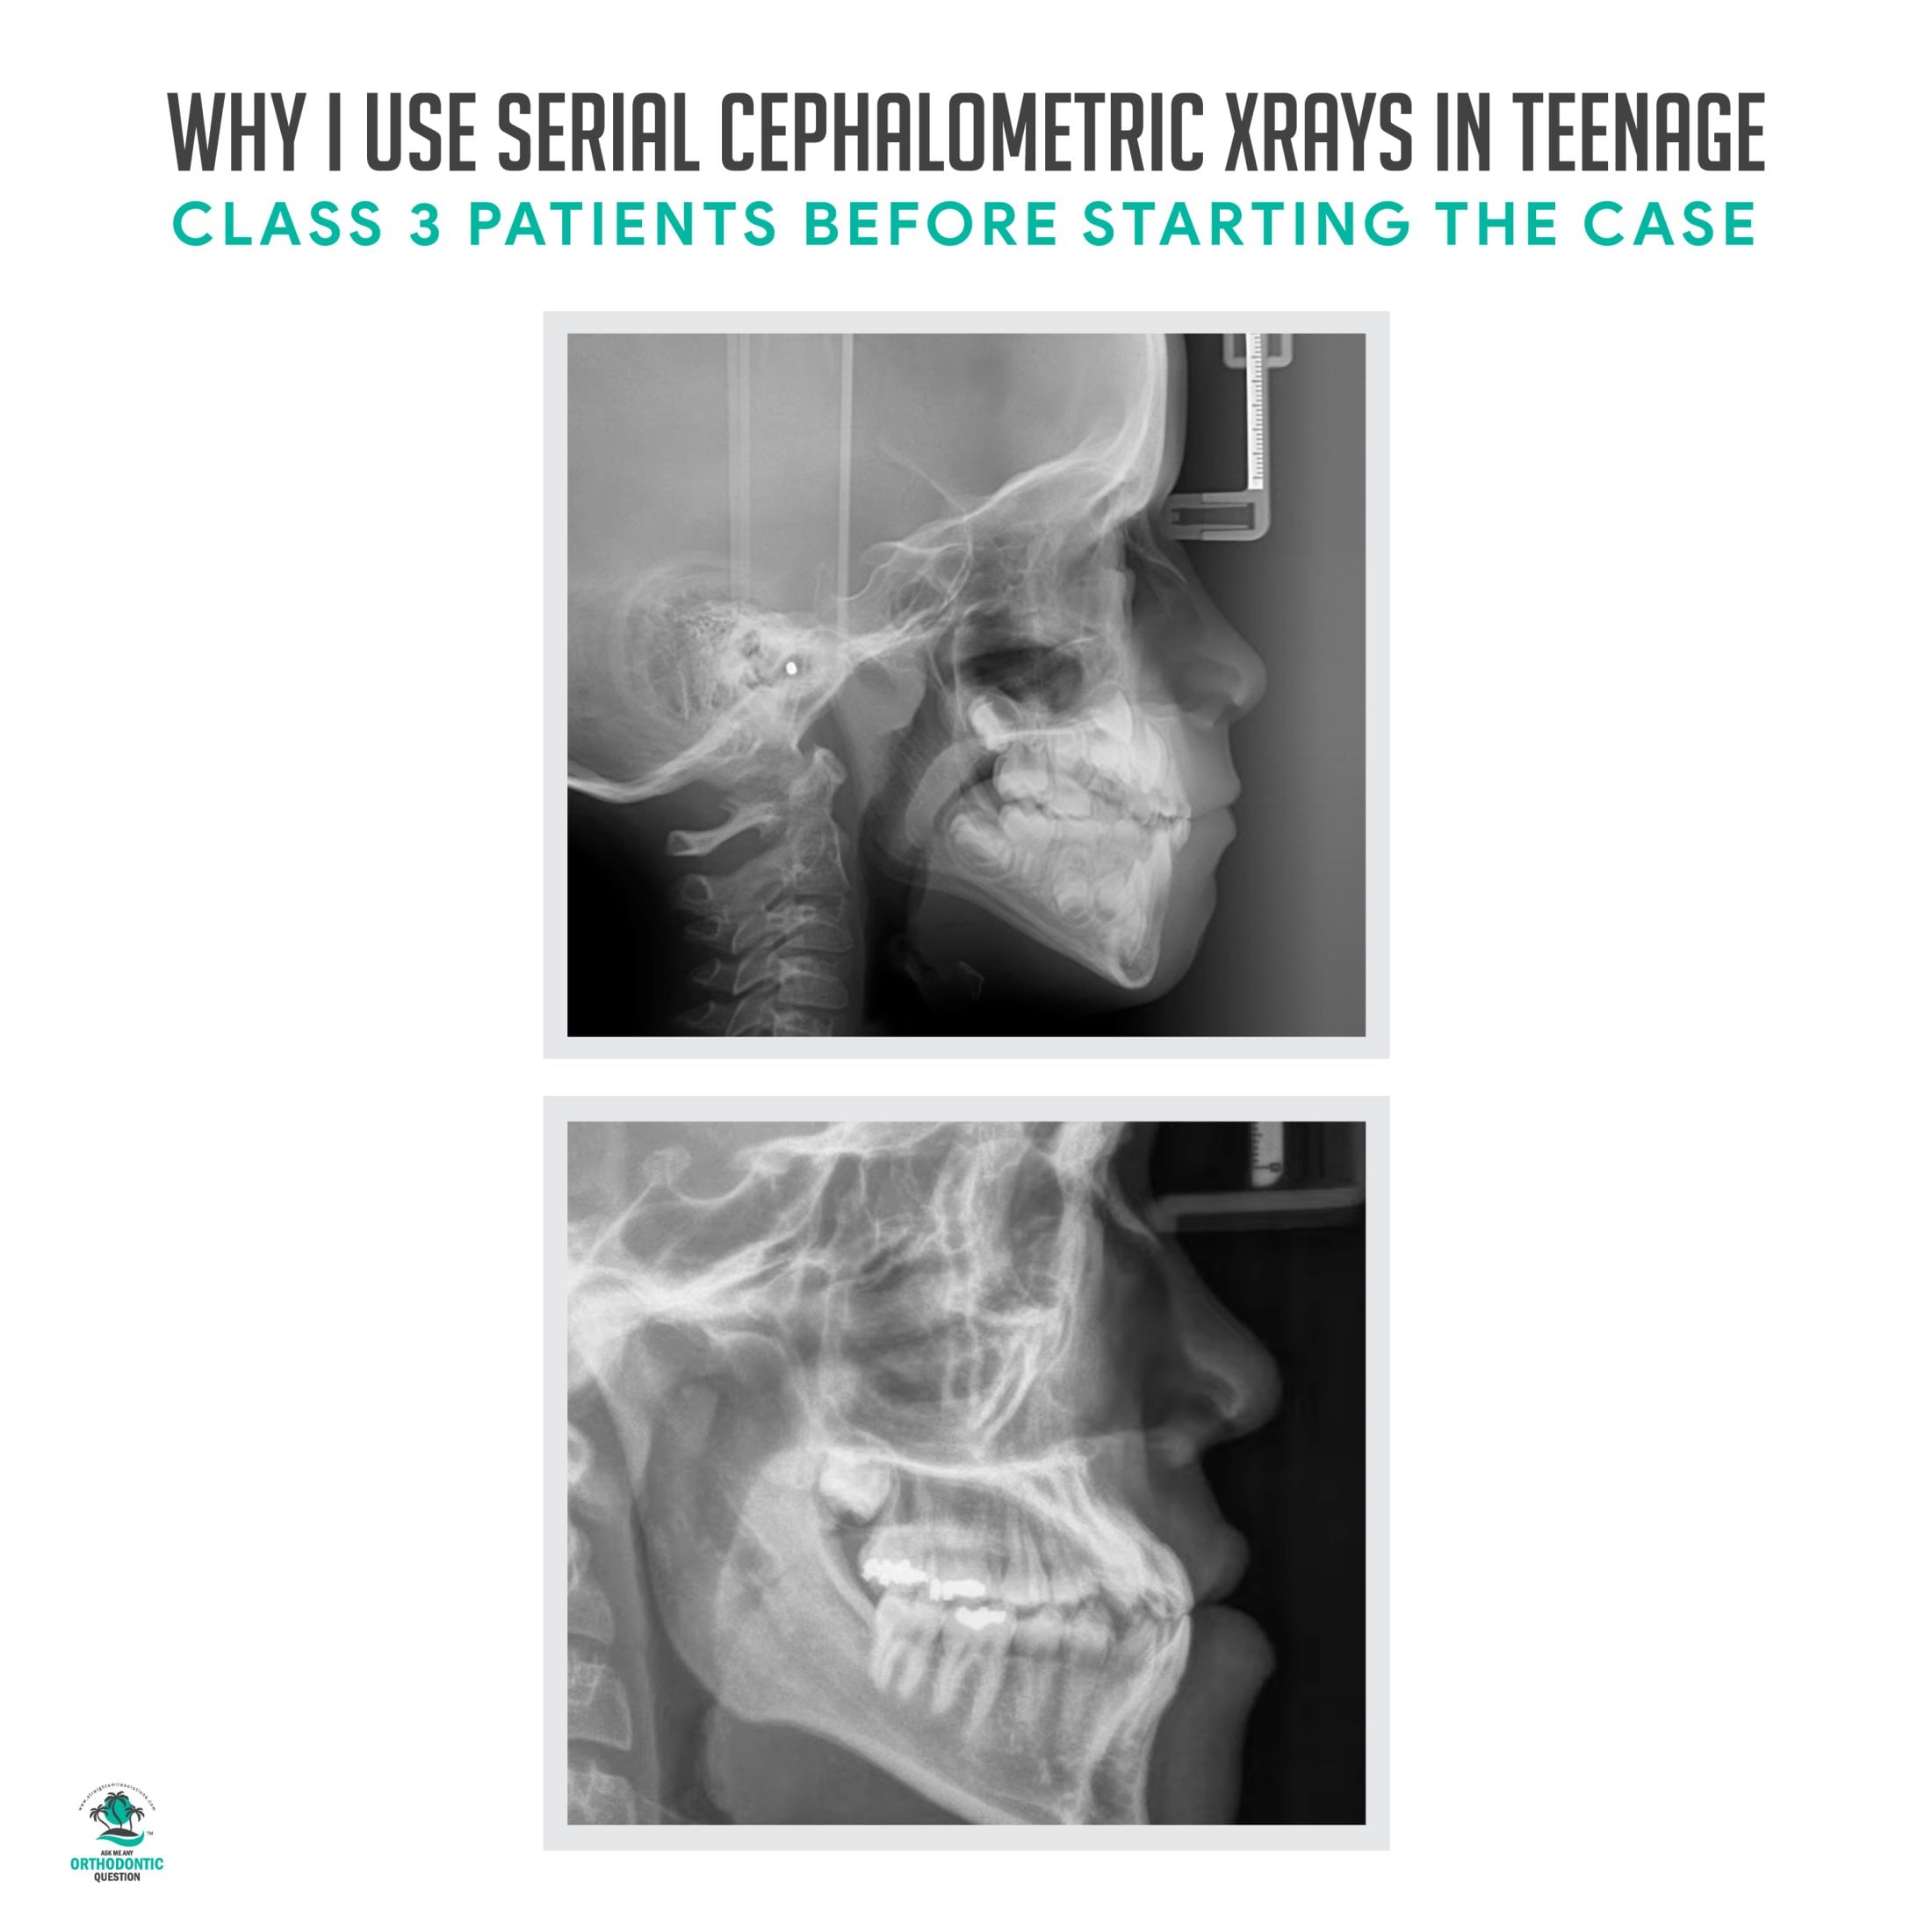
First, we need to consider what serial cephalometric xrays are. Simply put, these are when you take more than one cephalometric xray at a time; this could be a month later, a year later, or any other short time interval as necessary. Generally speaking, the xrays will be following up on previous scans.
When tackling any Class 3 orthodontics case, one of the key questions we here at Straight Smile Solutions recommend considering is: will it get any worse? Well, this may be hard to say, but a serial cephalometric xray allows you to check that the patient’s jaw is no longer growing.
Get Professional Support from Our Experts at Straight Smile Solutions
If you see stability and continuity in the numbers, you can generally feel a little more comfortable overall. However, every case is unique; make sure to contact our experts here at Straight Smile Solutions for further guidance. After all, nothing’s worse than having a patient outgrow a treatment plan – and this can cost your business significantly, too!
Lower Incisor Extraction vs IPR
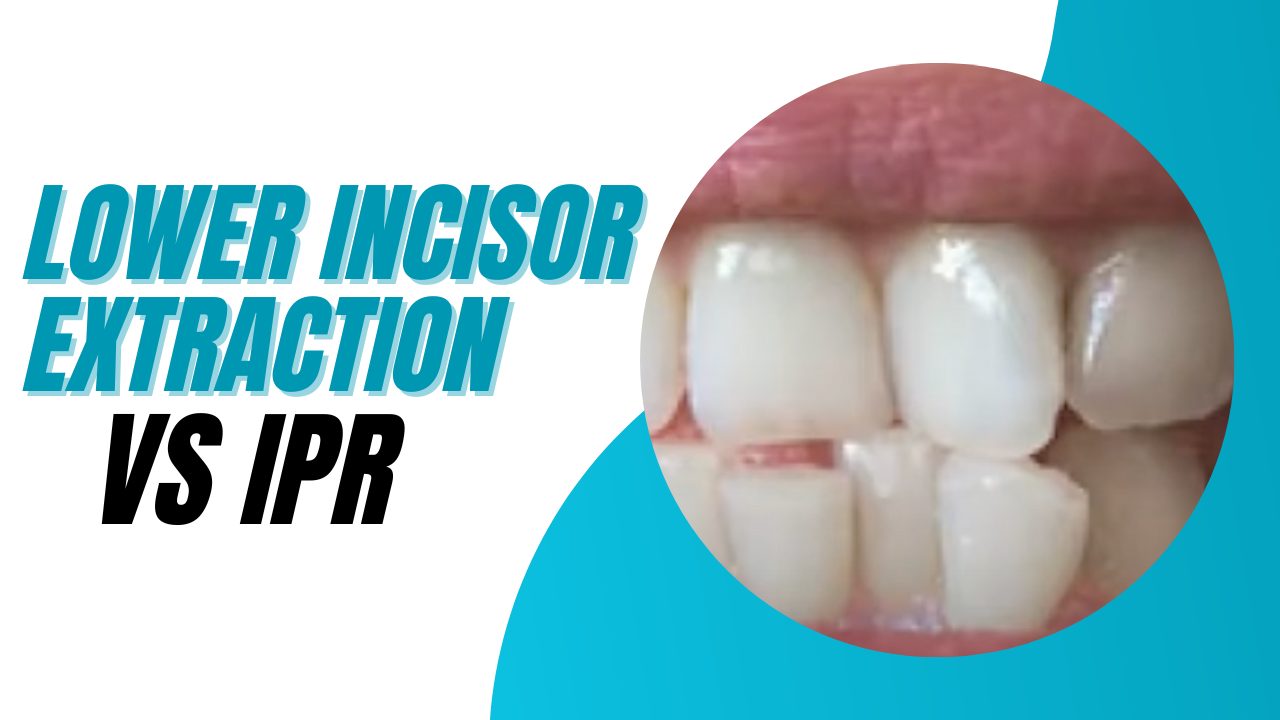
Incisor Extraction vs IPR
Have you ever wondered about the different techniques you should be using for crowding cases? There are several options you could consider for crowding cases that may help you find the optimal solutions for your patients’ orthodontics needs. After all, there’s no single approach to crowding cases, and while some scenarios may need a procline treatment plan, others may need lower incisor extraction or even IPR.
How to Choose the Right Crowding Treatment Plan for Orthodontics Patients
Choosing the right crowding treatment plan is difficult. And, with three options to choose between (lower incisor extraction, IPR, and proclination), the right approach may be hard to find.
If you’re going for an extraction, it’s worth checking whether there are any teeth that are more obviously displaced, which may be the best candidates for removal.
IPR, meanwhile, may be a good option for around 0.5mm reductions in space between all of the teeth. This allows around 5mm more space in the mouth in total, although you will end up losing some of the patient’s enamel while doing so.
Finally, proclination may work best in cases where a fuller side profile may be better suited. The simple method of working out whether proclination could help is to take a side profile of the patient’s face, then draw a line from the tip of the nose to the chin. If the lips sit well behind the line without touching it at all, proclination may be a good option.
Get Professional Support for your Cases
If you find yourself facing a difficult ortho case and don’t know where to turn, coming up with an effective treatment plan alone can seem tough. Fortunately, our experts here at Straight Smile Solutions can help you work out the most effective crowding technique to use for your orthodontics patients. Doing so should help you get great results with fewer refinements that’ll thrill your patients, as often as possible.
Introducing Invisalign Smile Architect
Introducing Invisalign Smile Architect
When it comes to Invisalign, knowing about all of the amazing features on offer can be hugely valuable – but this is something that many people miss out on. With this thought in mind, today, we’re taking a quick look at one of the exciting new features of the Invisalign Clincheck platform: Invisalign Smile Architect.
What is Invisalign Smile Architect?
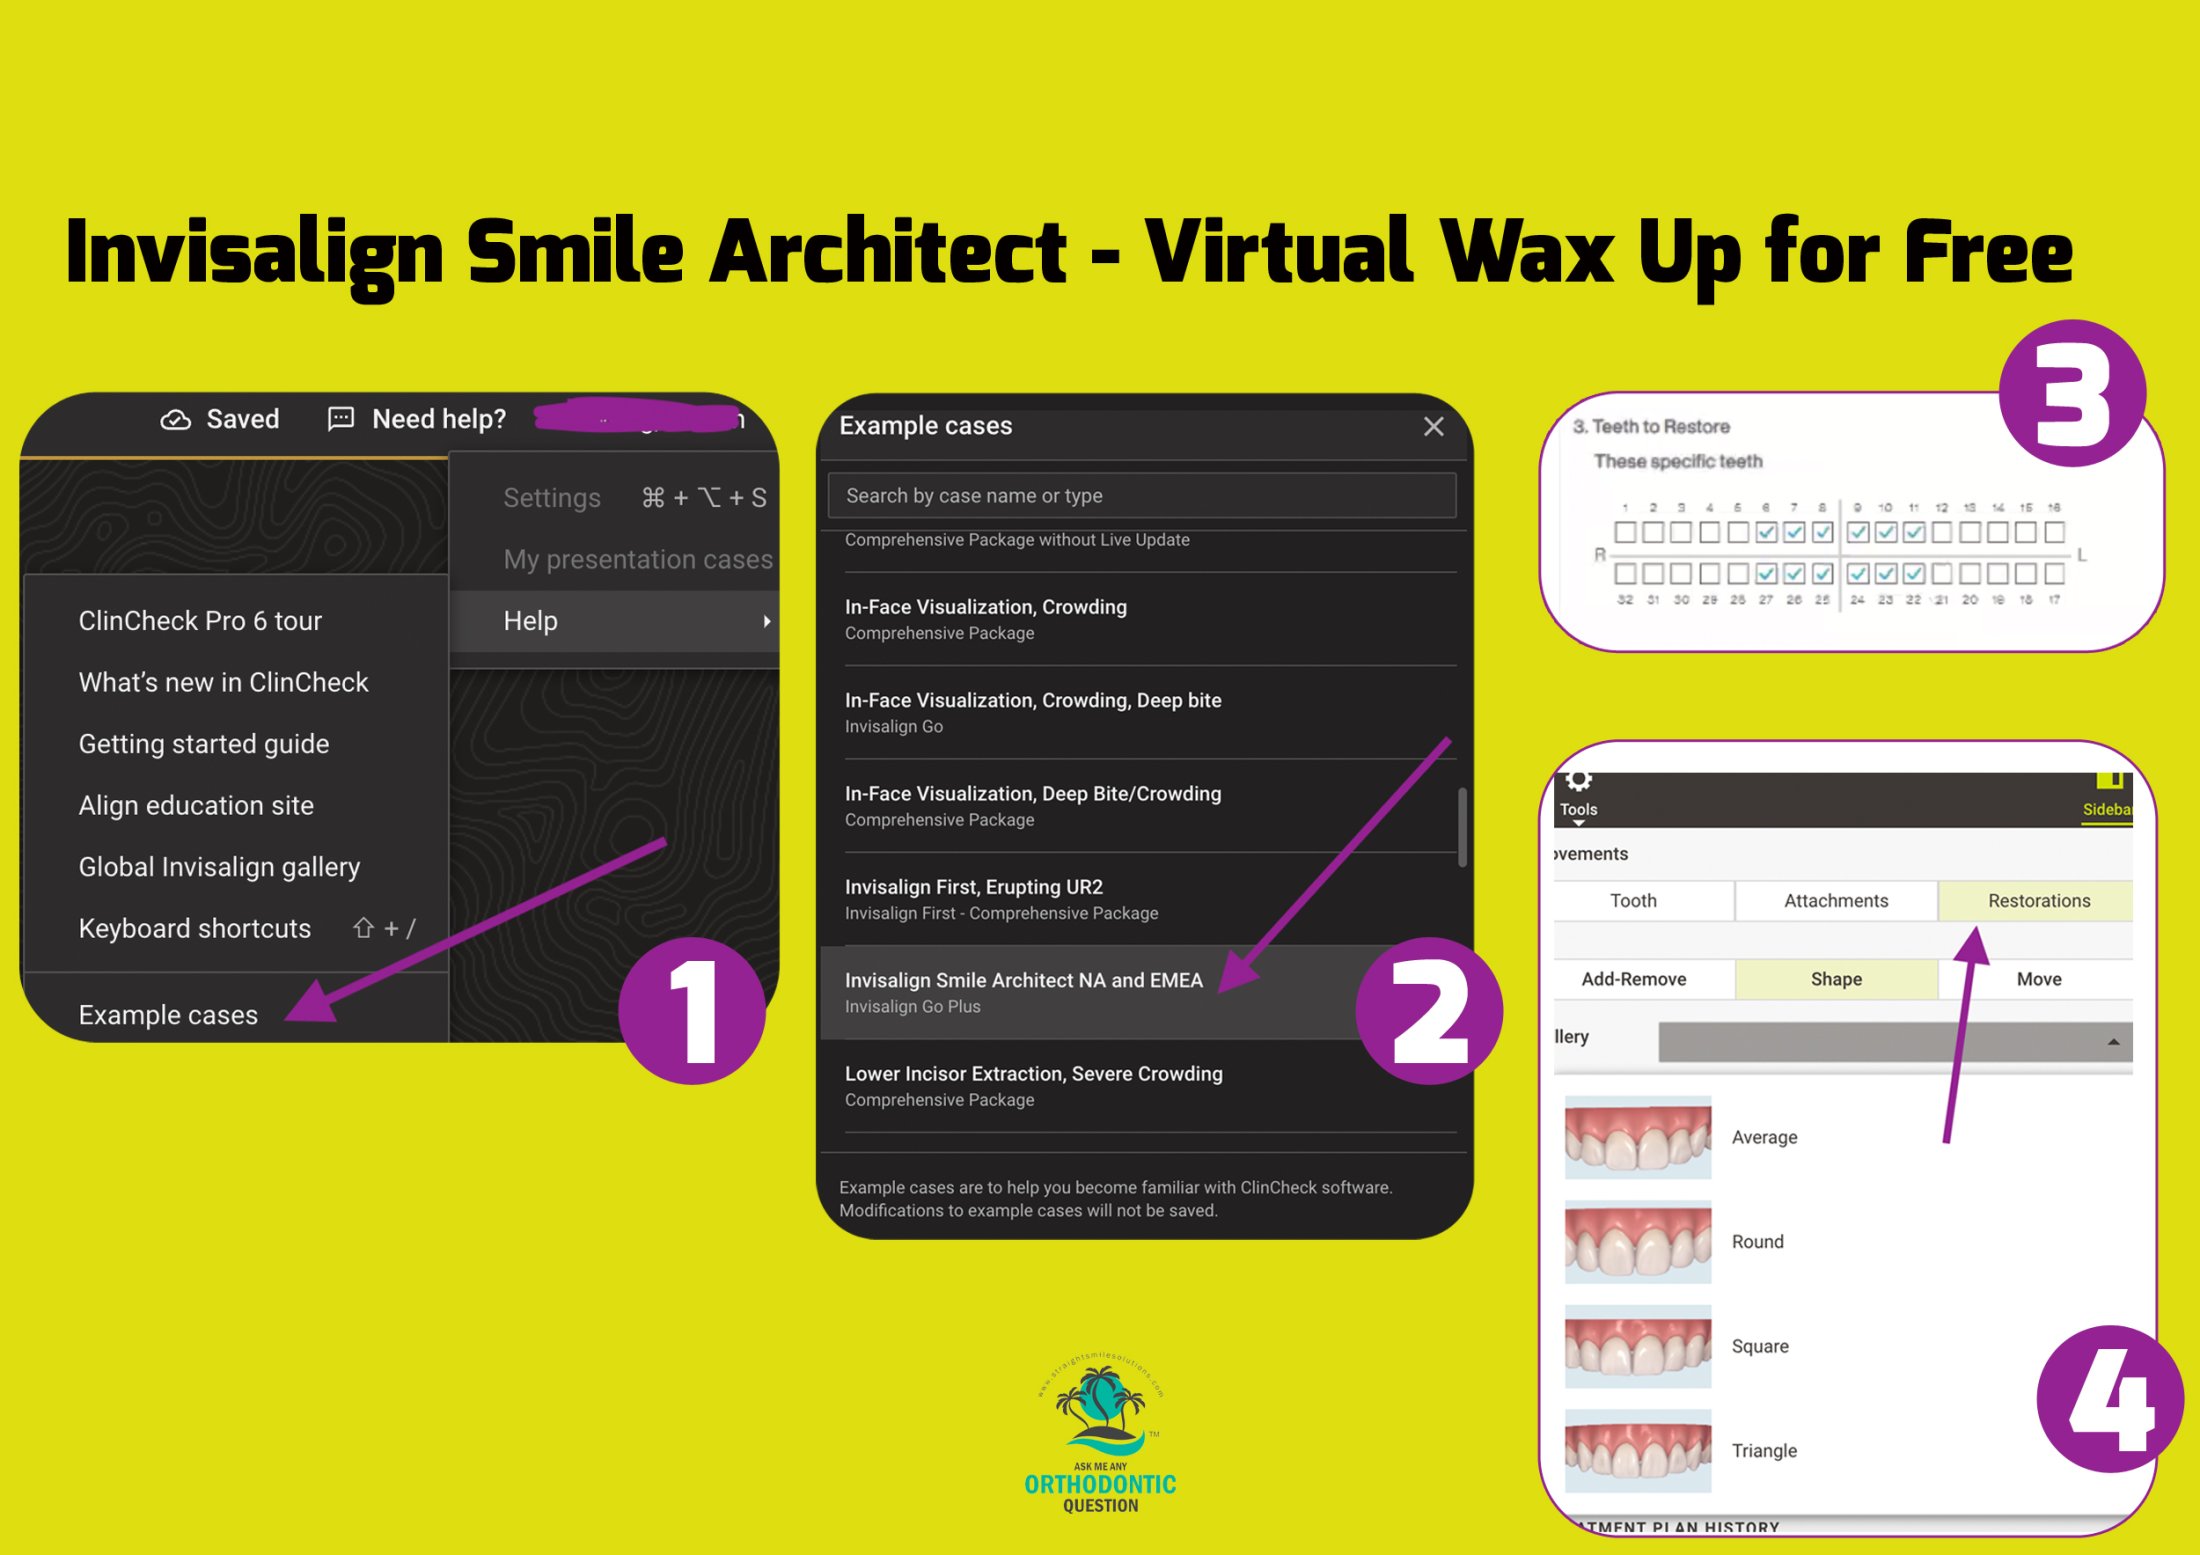
What is Invisalign Smile Architect? Smile Architect is an exciting new feature that allows general practitioners and orthodontists to see a virtual example of how cases might look. To open the Smile Architect, head into Invisalign ClinCheck 6.0, then load up the Help section. Open “Example Cases” then select “Invisalign Smile Architect NA and EMEA” to bring up the full tool.
Smile Architect allows you to play around with a virtual example of your restoration cases. As such, the tool offers an incredibly valuable resource, especially for educating clients and patients too.
Final Thoughts
In many cases, Invisalign’s new Smile Architect platform looks like it’s going to offer a brilliant resource for GPs and potentially for orthodontists. Indeed, this handy resource is making it easier than ever for general practitioners in interdisciplinary work to optimize their approach, giving a simple way to improve results overall.
What You Should Know About the Invisalign DSP
Have you been looking for support with your own Invisalign cases? It’s not uncommon to find yourself feeling a little overwhelmed by the options when it comes to Invisalign consulting, knowing who can assist is often hugely helpful. To this end, considering the key features of the Invisalign assist feature, the DSP might be useful to help in developing an easy orthodontics treatment plan.
What is the Invisalign DSP?
Invisalign rolled out a new subscription program for orthodontics experts last year, the Invisalign DSP, designed to assist orthos in creating the most effective treatment plan for a patient. However, it’s not always clear what the program offers.
Simply put, the Invisalign DSP plan is open for one year, and enrollments are available from the start of each month. Units are purchased in advance, with each being an aligner or retainer. Interestingly, the program is also available for non-Invisalign patients to be listed on the system, meaning any braces patient can be funneled into the system.
Generally speaking, it appears that Invisalign’s DSP assist program is competing with white label workflow. Depending on the amount you use, the cost can be around $23 per unit with high-volume orthodontics. Overall, the delivery and turnaround times are also incredibly quick and convenient.
Perhaps the biggest drawback is that you don’t get advantage points with the Invisalign DSP assist program; however, the versatility and saved money on delivery fees (which are free for DSP users) will often make this a far more affordable platform overall. However, with 1200 units as the minimum, it’s generally best suited to orthodontists providing numerous services rather than just the odd case.
Find Out More and Develop the Optimal Treatment Plan for your Dental Coaching
If you’d like to find out more about easy orthodontics and making the most of your treatment plans, make sure you get in touch with our friendly experts here at Straight Smile Solutions to learn more. Our dental coaching support is available on either a subscription service or as a one-off solution, depending on what you need.
Class bites and Cr-Co Shifts
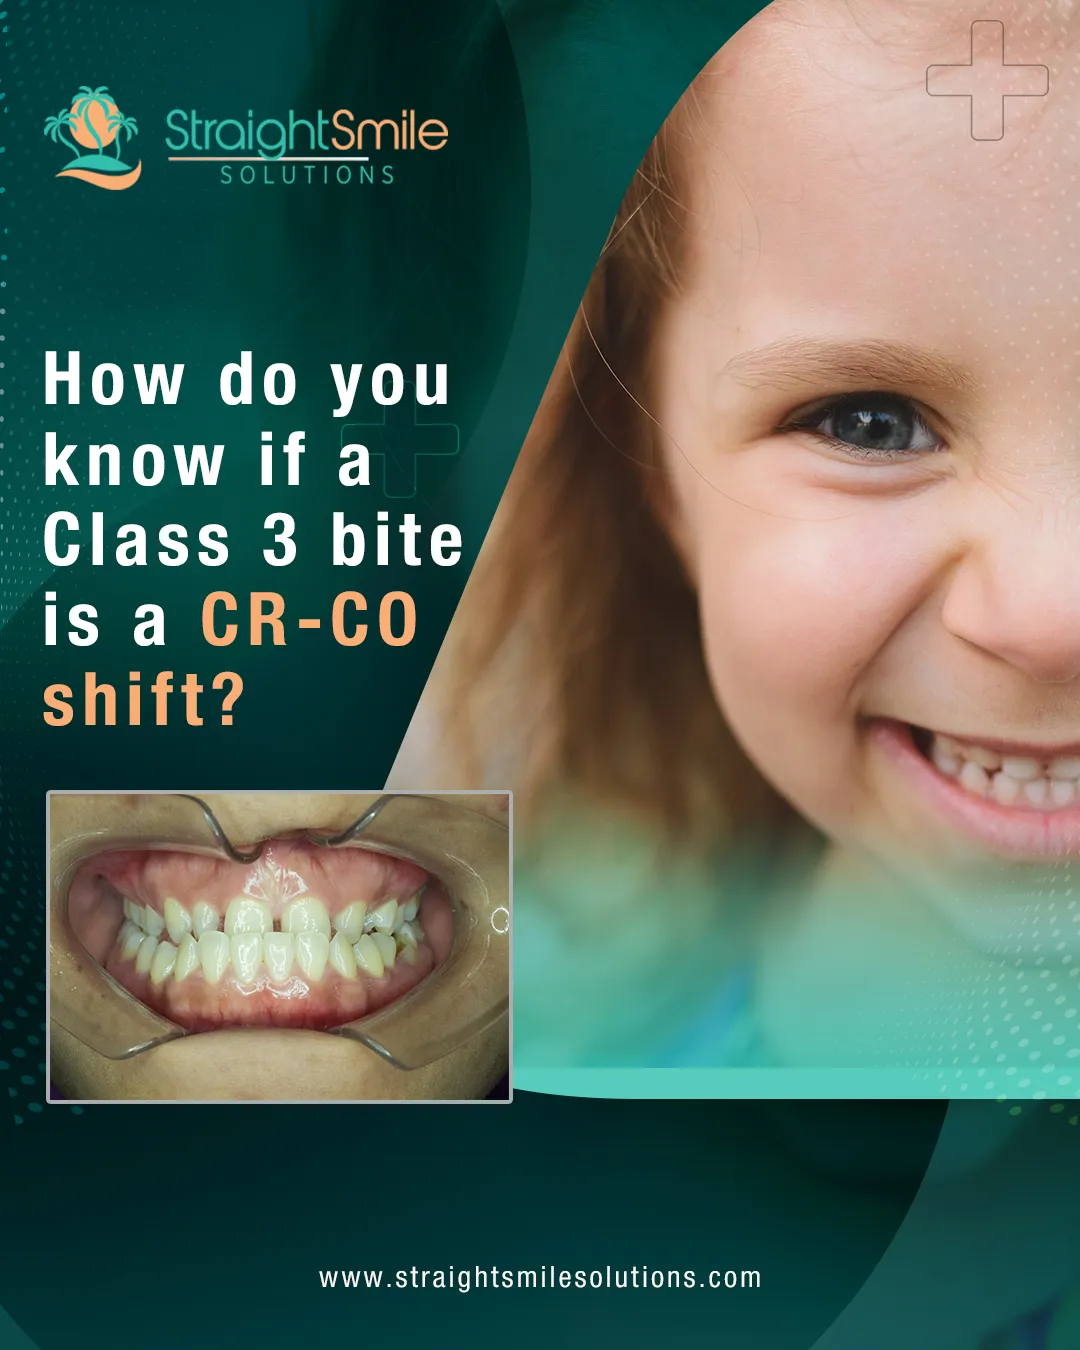
Have you ever wondered if there is a way to tell from static images if there is a CRCO shift? Well, in some situations, you might presume that there may be a CRCO shift involved in patients that are Class 3. These presumptions come from red flags that are able to clue you into the occurrence of a shift.
In this article, we will discuss the signs and red flags that there is a Class 3 CRCO functional shift in a mixed dentition case.
Signs There is a Class 3 CRCO Functional Shift in Mixed Dentition
Discovering what the red flags are for certain conditions can be a great timesaver when reviewing your cases. A red flag goes off, especially if the case involves children with mixed dentition and there are two different things in place. These two things are a unilateral crossbite and a misaligned lower midline which can be seen from a static image.
So, why are these cases red flags for CRCO shifts? First off, a full or functional unilateral crossbite is very rare. These crossbites can be great indicators for CRCO shifts, and they are typically associated with a CRCO shift.
Secondly, the lower midline being off can also be an indicator. You can tell that this lower midline is off by visualizing the face of the patient from a static image. If it appears like an adjustment to the jaw might correct the midline, then it’s possible that a CRCO shift is present.
In addition to these red flags, you can also try to see if the front teeth are retroclined with an x-ray or a CBCT slice. These teeth being retroclined can also be a red flag for a CRCO shift, but they are harder to tell just from a static image.
What Causes Invisalign or Aligner Cases to go OFF TRACK?

3 Key Causes of Revisions and Refinement You Need to Know
Have you ever found yourself struggling with more cases of revisions and refinement than you might normally expect? There are countless different causes for a patient to need further support, of course; however, knowing – and avoiding – the three most common is vital to improve the results of your cases the first time around.
3 Key Causes of Revisions and Refinement You Need to Know
Ever wondered why you’re getting so many revisions and refinement cases? The following three scenarios are among the most common causes.
#1 Treatment Plan Quality
One of the most common reasons patients experience revisions and refinement is simply that the treatment plan isn’t quite a high enough quality. You should always make sure you refine each case based on the patient’s needs and requirements.
#2 Compliance Loop Failures
Did you know that another frequent cause of revisions is compliance loop failures? Many orthos fail to keep a close eye on patients and their progress; as such, make sure your clients know exactly what they should be doing and when, and try to give them as many checks as possible to ensure any problems are noticed and amended before they need a full revision.
#3 IPR
As a third common cause, it’s also worth keeping in mind that IPR can be one of the biggest struggles with aligners. IPR, or interproximal reduction, can be incredibly frustrating in many cases, but it’s a necessity if there’s too much space between the teeth.
Final Thoughts
When it comes to your orthodontics cases, revisions and refinement can eat into your business’s margins and client satisfaction significantly. As such, the importance of preventing revisions and refinement when ortho starts by avoiding common mistakes is crucial. Luckily, keeping today’s three cases in mind could help significantly.
FREE IPR Webinar 1 CEU 11/28/23

https://www.straightsmilesolutions.com/
Interproximal reduction (IPR) is a technique widely used in orthodontic treatment to create space between the teeth, allowing for proper alignment of the teeth. This technique involves removing a small amount of enamel from the sides of the teeth, which can help reduce crowding and improve the smile’s overall appearance. An IPR webinar will provide valuable insights into this technique and its role in orthodontic treatment.
An IPR can be an effective way to address minor crowding issues in the teeth, particularly in cases where the patient’s teeth are slightly overlapping.
One of the benefits of IPR is that it is a minimally invasive procedure that can be completed quickly and easily. The key to successful IPR is to use the right tools and techniques to remove the enamel evenly and safely. Using specialized dental burs and polishing disks can help achieve a smooth and uniform result while minimizing the risk of damage to the tooth structure.
Proper case selection and treatment planning are important when using IPR. While IPR can be an effective way to address minor crowding issues, it is not suitable for all patients. Factors such as the amount of crowding, the shape of the teeth, and the overall health of the teeth and gums must be considered when deciding whether to use IPR in a particular case.
Dr. Amanda from Straight Smile Solutions has announced a free webinar with CE units sponsored by Garrison Dental, covering IPR techniques and their importance. The webinar will be held in five and a half months, and interested individuals can sign up through Dr. Amanda’s website. The webinar will last an hour and will include a live demo, but attendees will not receive a kit in the mail. Dr. Amanda will discuss the importance of doing IPR on crooked teeth at step one, and attendees will learn how to put their patients on virtual check-ins after attachments and IPR.