Case selection is a crucial when it comes to orthodontics, and in sequential distalization patients, this can have a very significant impact on your success rates with an Invisalign treatment plan (or any brand of clear aligner). In line with this thought, today, we’re looking at some key things you should know about treatment planning and case selection for sequential distalization patients in Invisalign.
The Benefits of Sequential Distalization
There are many benefits of following a sequential distalization treatment plan. Of course, the main benefit is that you won’t have to cut teeth or pull premolars or lower incisors, and there are no risks of pushing teeth through the bone anteriorly or transversally; instead, you are using the hidden space that is already there due to third molar removal.
Case Selection is Critical
While sequential distalization is crucial, this type of treatment plan won’t work for every patient. Critically, case selection is integral. For one thing, after the third molar extraction, try to leave at least, one, two, or three months before starting a sequential distalization treatment plan with Invisalign, which can allow the bone to fill in a little.
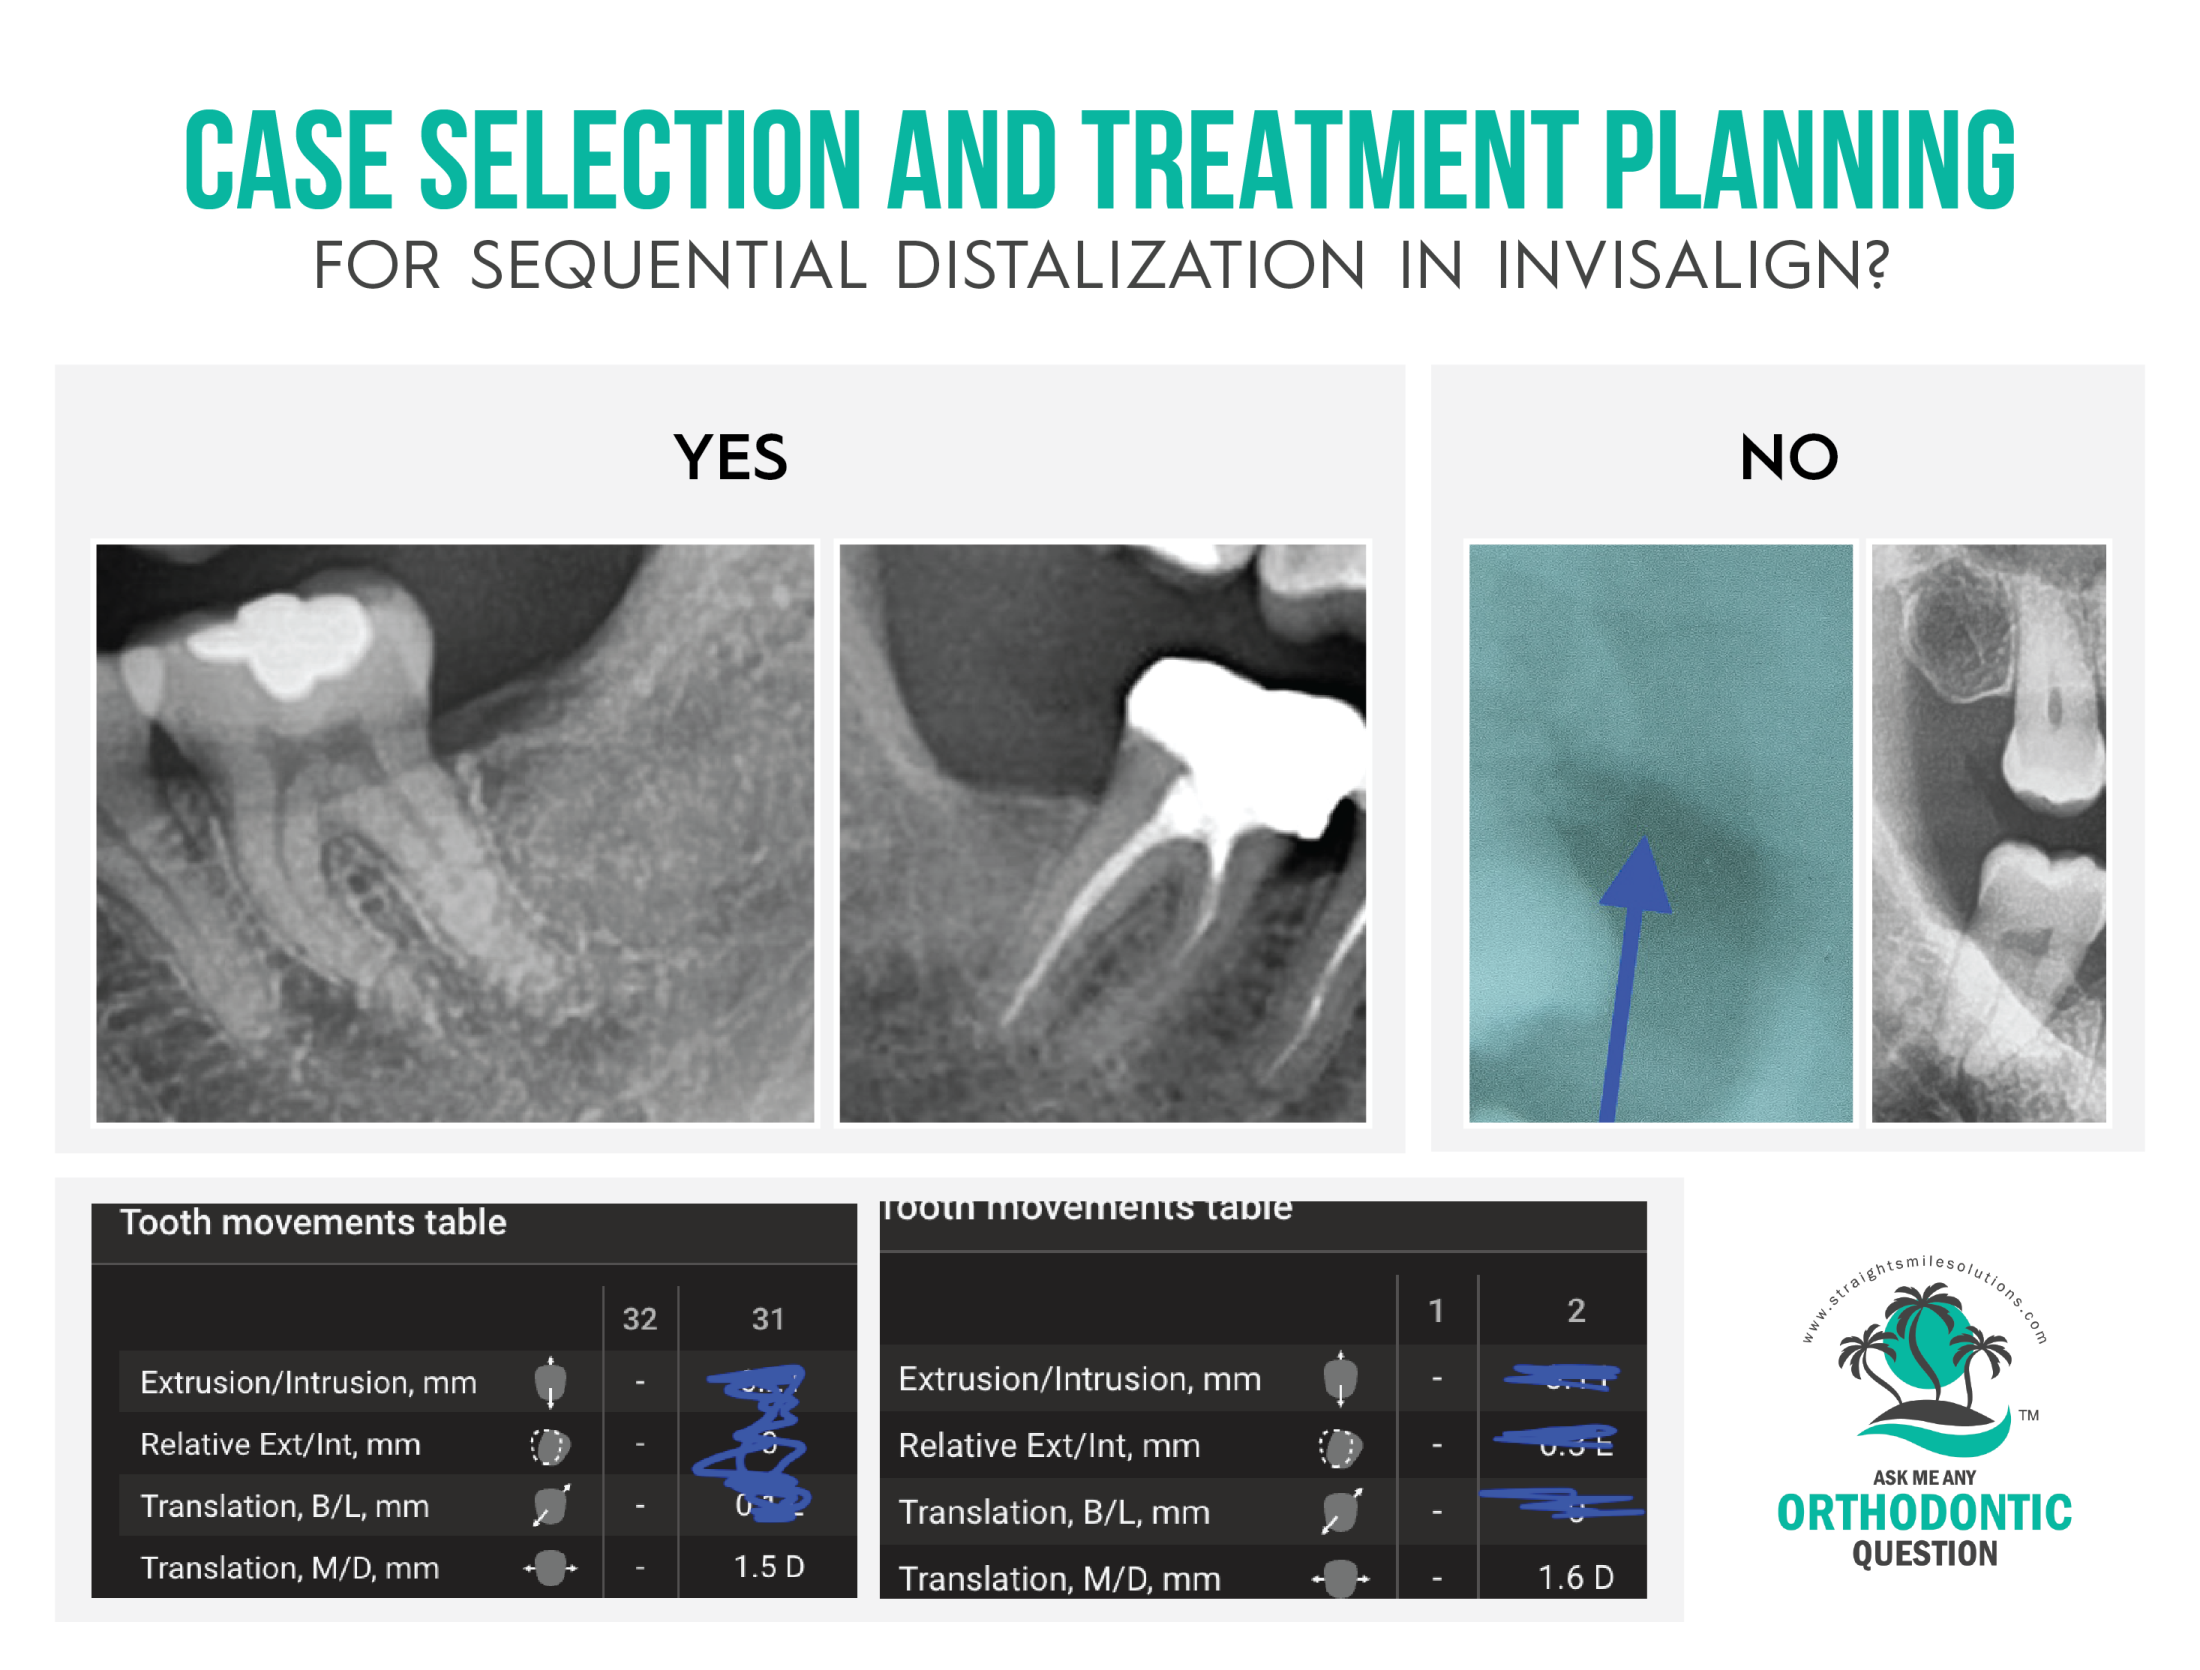
Before starting any sequential distalization treatment, check the patient clinically and look at the pano x-ray to ensure there is a retro molar space. Try to stick within limits, too; around 2mm on the lower is the limit we use, although up to 6mm can potentially work on uppers in some cases.
Always be careful with the speed in sequential distalization cases in Invisalign. Remember, these cases will usually be long-haul, and going too fast can result in a perio pocket.
Fortunately, when determining whether you can do sequential distalization, platforms such as Invisalign (and some other clear aligner brands, like ClearCorrect) offer Tooth Movements Tables, which can help you understand spacing better.