 The Ultimate Challenge: Phase 3 FinishingFinishing is notoriously the hardest part of orthodontics. In traditional braces, clinicians bent wires to manually adjust stubborn contacts; however, clear aligners present a different challenge.A very common issue is seeing solid contact on the second molars and the anterior teeth, while the premolars and first molars remain completely out of contact. To resolve these unbalanced contacts and POBs, you must look at your overall debond workflow and isolate where the case is getting stuck.Clinical Secrets for Resolving Unbalanced Contacts1. Single-Arch RefinementsIf one arch is completely straight, properly positioned, and aligned, do not order a full refinement for both arches.The Strategy: Run a refinement on the problematic arch alone while leaving the finished arch completely free of plastic.The Benefit: Eliminating plastic from the tracking arch allows natural forces to take over, preventing patient burnout and encouraging faster settling.2. The “Sloppy” Bonded Retainer TechniqueWhen you need to keep the front teeth perfectly straight but want the back teeth to come together, an in-office temporary retainer is highly effective.The Strategy: Take a piece of braided wire and use a quick floss-holding technique to bond it directly to the anterior teeth right in the office.The Benefit: It acts as an immediate stabilizer for the aesthetic zone without costing hundreds of lab dollars, giving the back teeth the freedom to naturally settle via gravity.3. Mini Deprogrammer AlignersFor minor alignment corrections paired with a need for severe posterior settling, a short-segment clear tray can bridge the gap.The Strategy: Create a short aligner that extends only from canine to canine (3-to-3). Use multiple attachments on these anterior teeth to ensure the mini-tray anchors firmly and cannot be swallowed or choked on.The Benefit: This temporary splint improves Centric Relation to Centric Occlusion (CRCO) shifts. It keeps the front teeth locked in position while leaving the entire posterior section open to erupt and close the bite.4. Guided “Free Settling”There are specific scenarios—such as transitioning a patient from Phase 1 to Phase 2 treatment—where the best approach is to simply do nothing.The Strategy: Remove all attachments and plastic entirely from the dentition.The Benefit: Allowing the teeth to “free roam” without plastic interference allows the natural occlusion to lock itself into place organically.Key Clinical TakeawayNever lock a patient’s teeth into a standard full-coverage clear retainer if their posterior teeth are not touching. Full plastic coverage traps the open bite permanently. By using segmented tools like single-arch tracking, short deprogrammers, or bonded wires, you can easily guide a stubborn alignment case across the finish line.
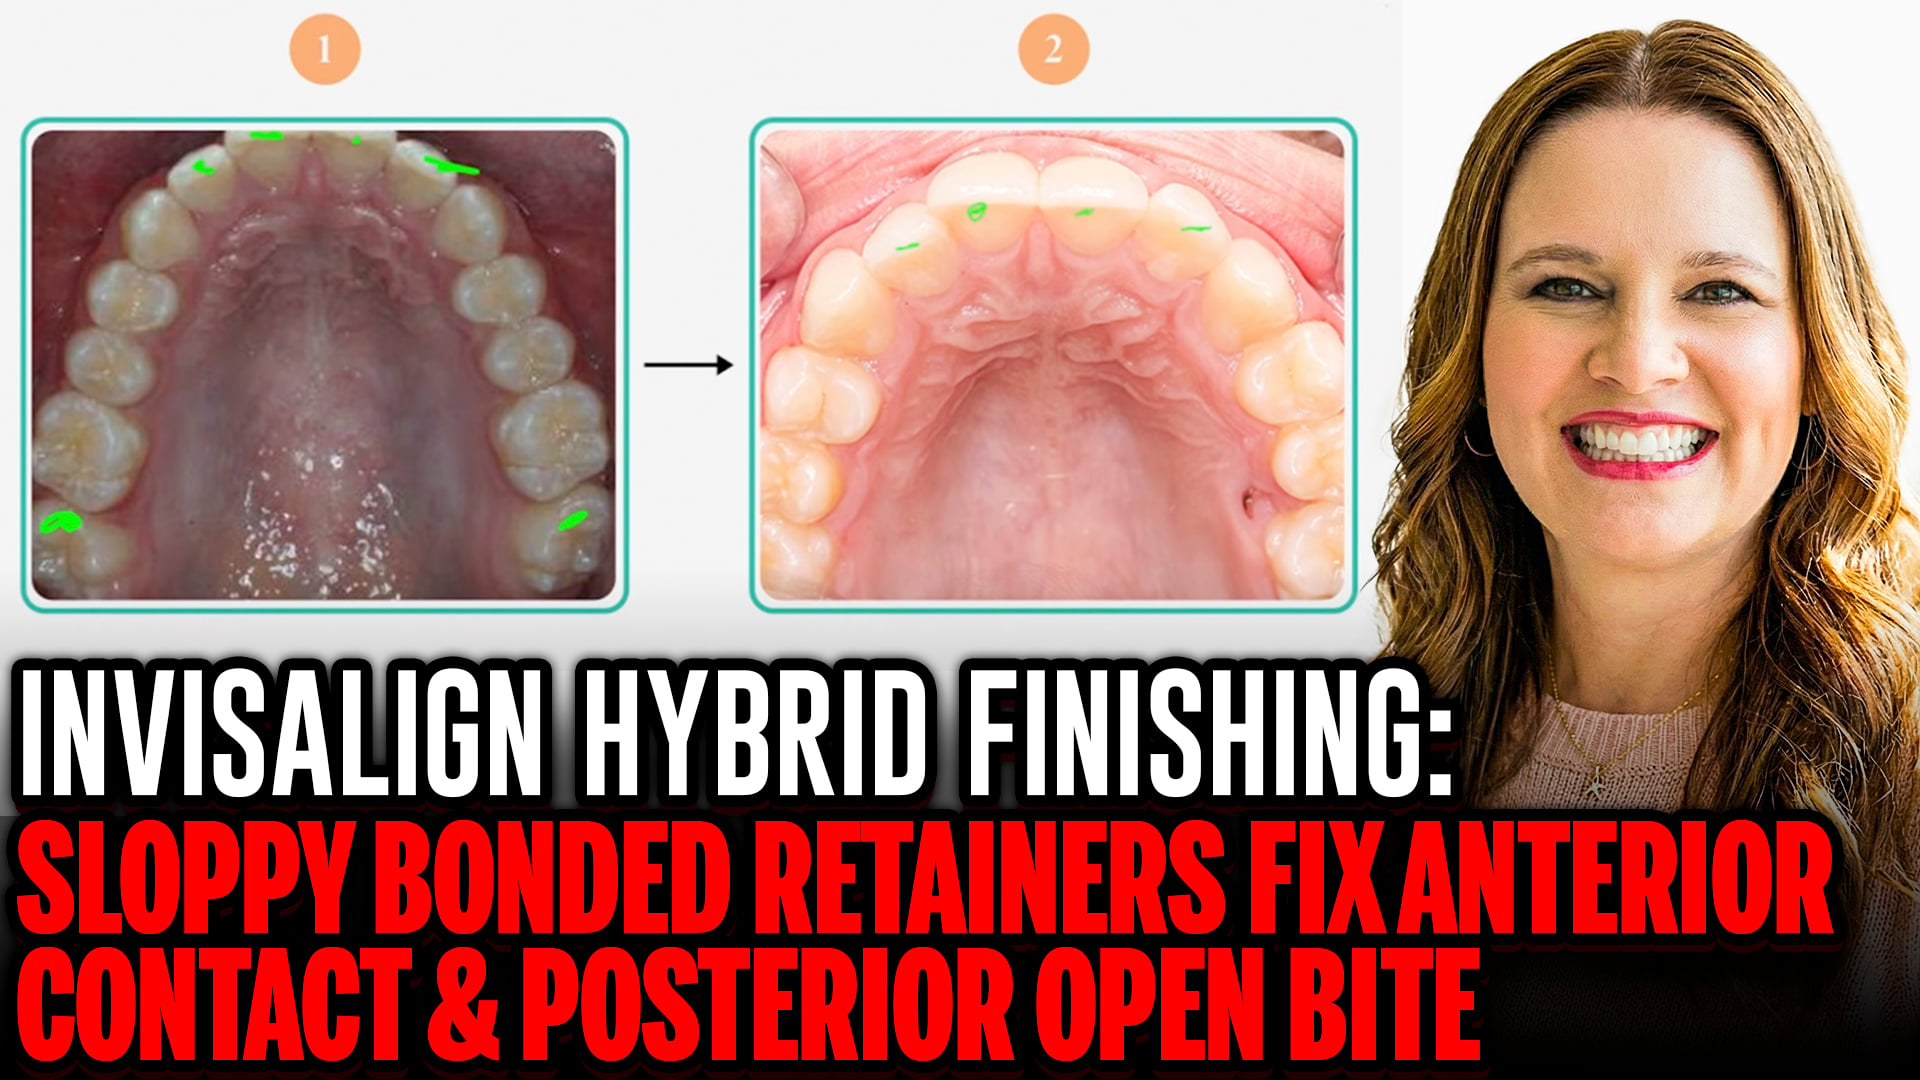